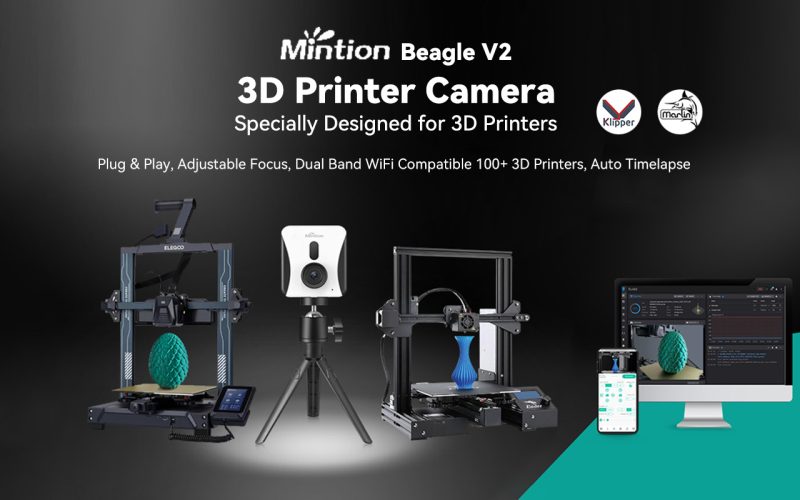
We have recently received feedback from some Klipper printer users that they are unable to connect when using Beagle cameras (V1&V2). Therefore, we take Elegoo Neptune 4 Plus as an example to explain in detail the beagle camera (V1&V2) connection steps for the reference of Klipper printer users (Elegoo Neptune 4 series, Sovol SV07 & SV08 series/SVT300/SVT500, Flsun V400, Creality Sonic Pad, Artillery Sidewinder X4 series, Kingroon KP3S Pro V2/KLP1, etc.).
1. The Way to Connect Beagle Camera (V1&V2) with Klipper Printer
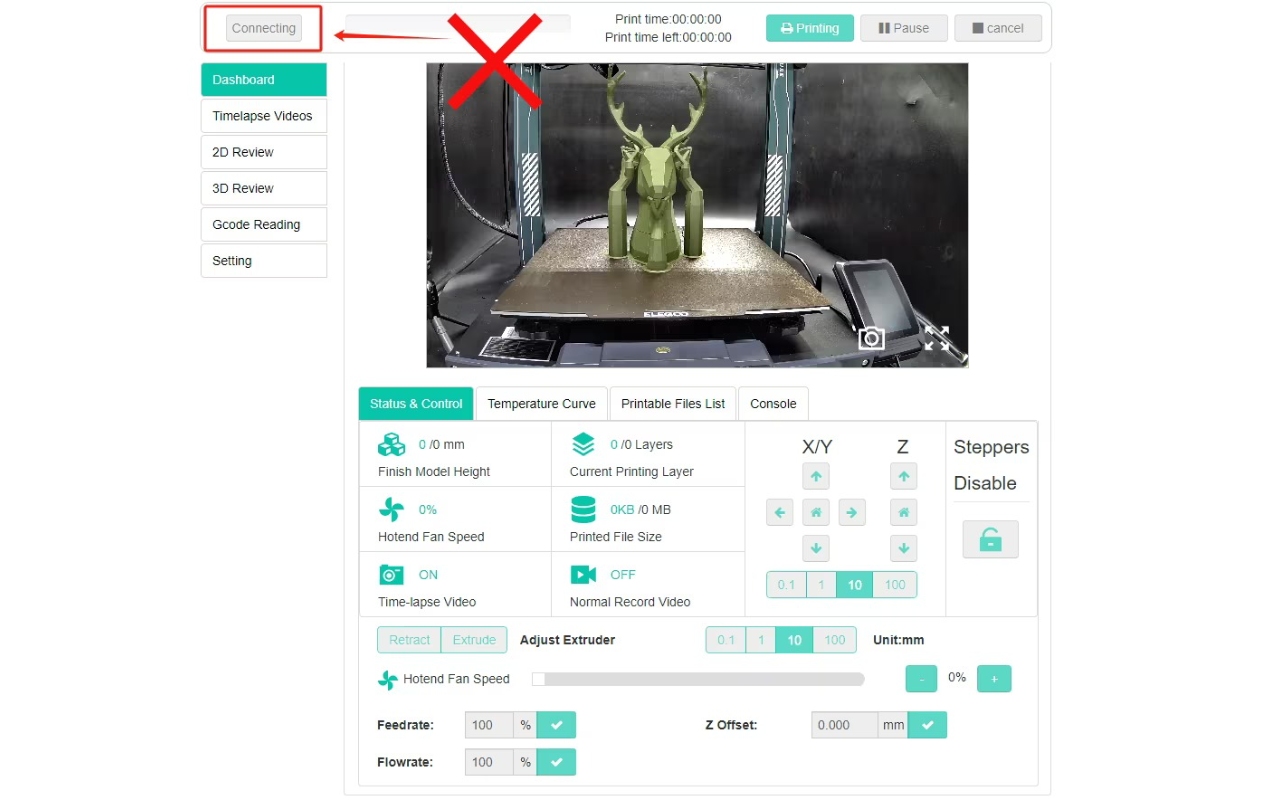
There are currently two ways for the Beagle camera to connect to the Klipper printer: the first method is to connect wirelessly through our APP: Beagleprint, and the second is to add the Beagle camera to Fluidd/Mainsail for use. The following is an example of incorrectly using the camera to connect:
- When connected to a Klipper printer, the camera only needs to be plugged in with the power cord. Please do not use a USB cable to connect the camera and Klipper printer.
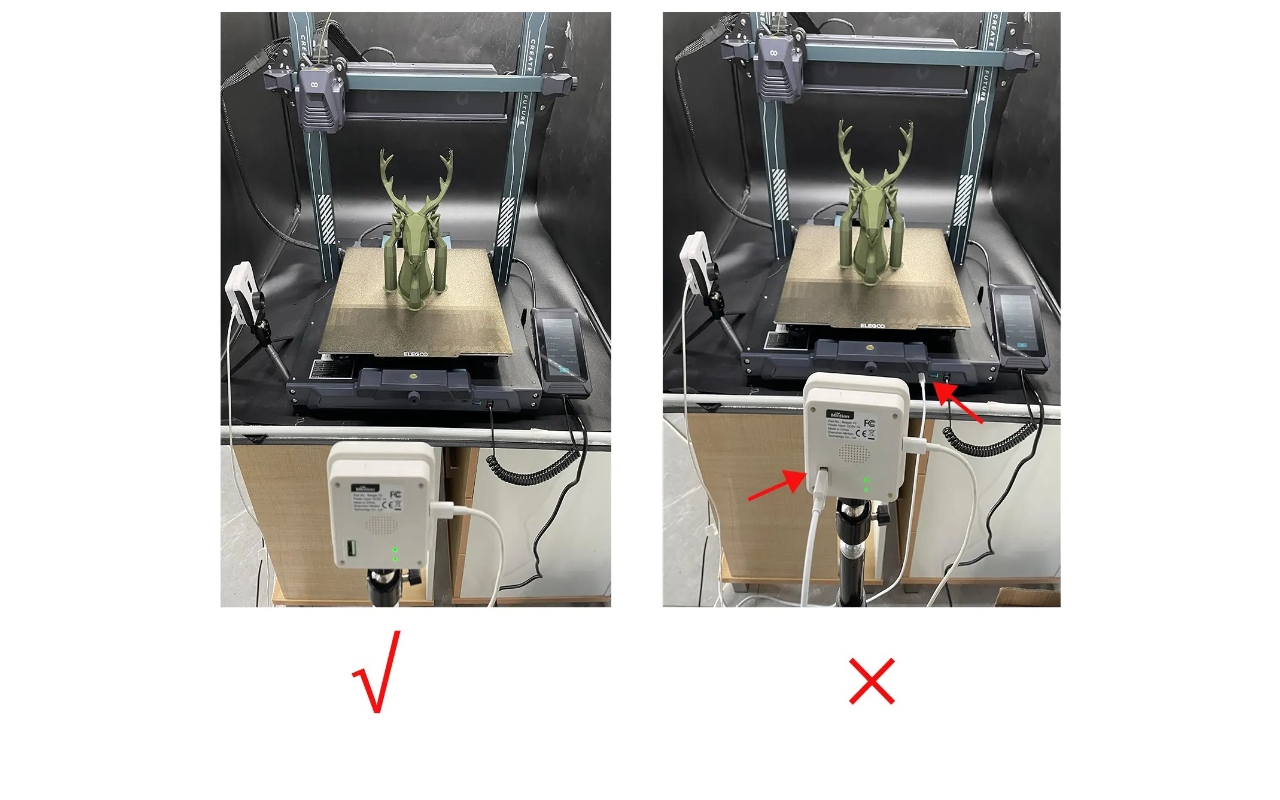
- Please do not connect to the browser management page that comes with the camera.
2. Use the APP: Beagleprint to connect the beagle camera and Klipper Printer (take Elegoo Neptune 4 Plus as an example)
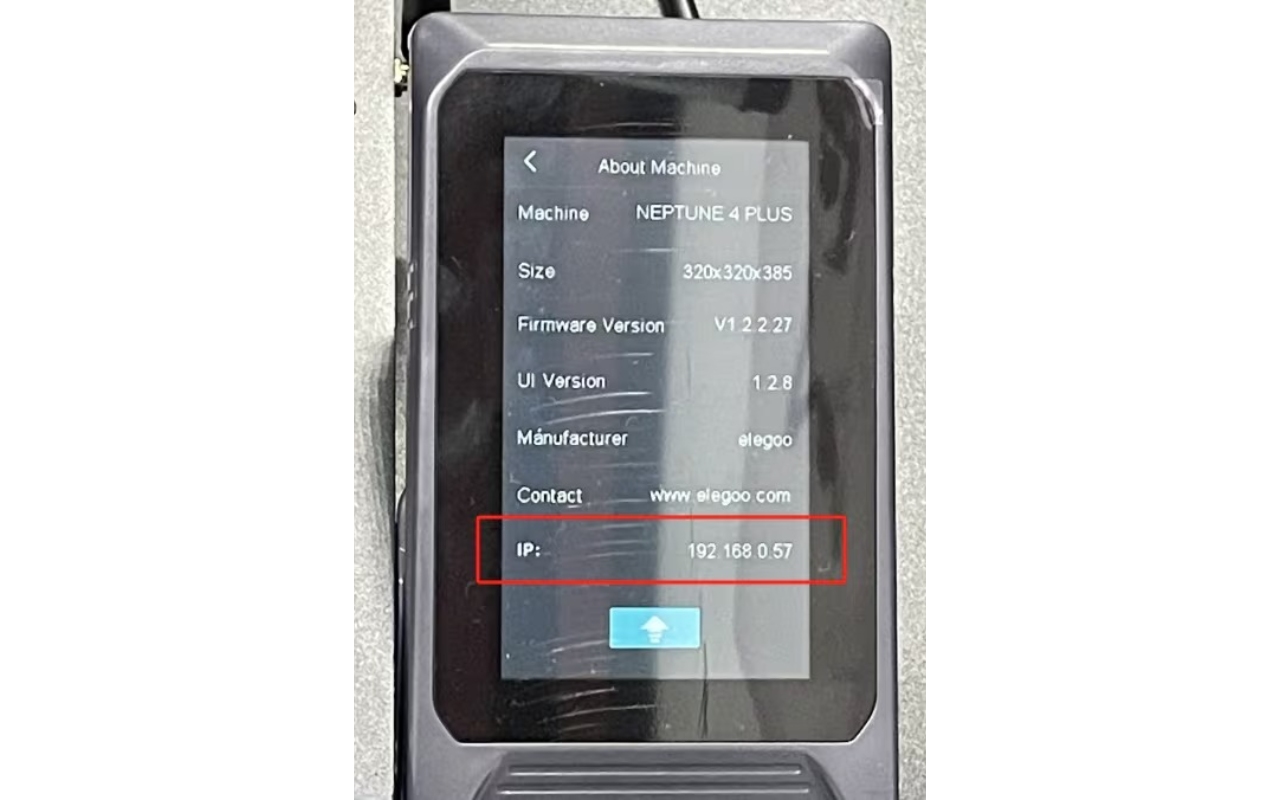
- Power on the printer, and then find the printer IP address information on the printer control screen.
- Power on the camera and set the printer model in the APP. Enter the printer model and IP address information, then click “Save”.
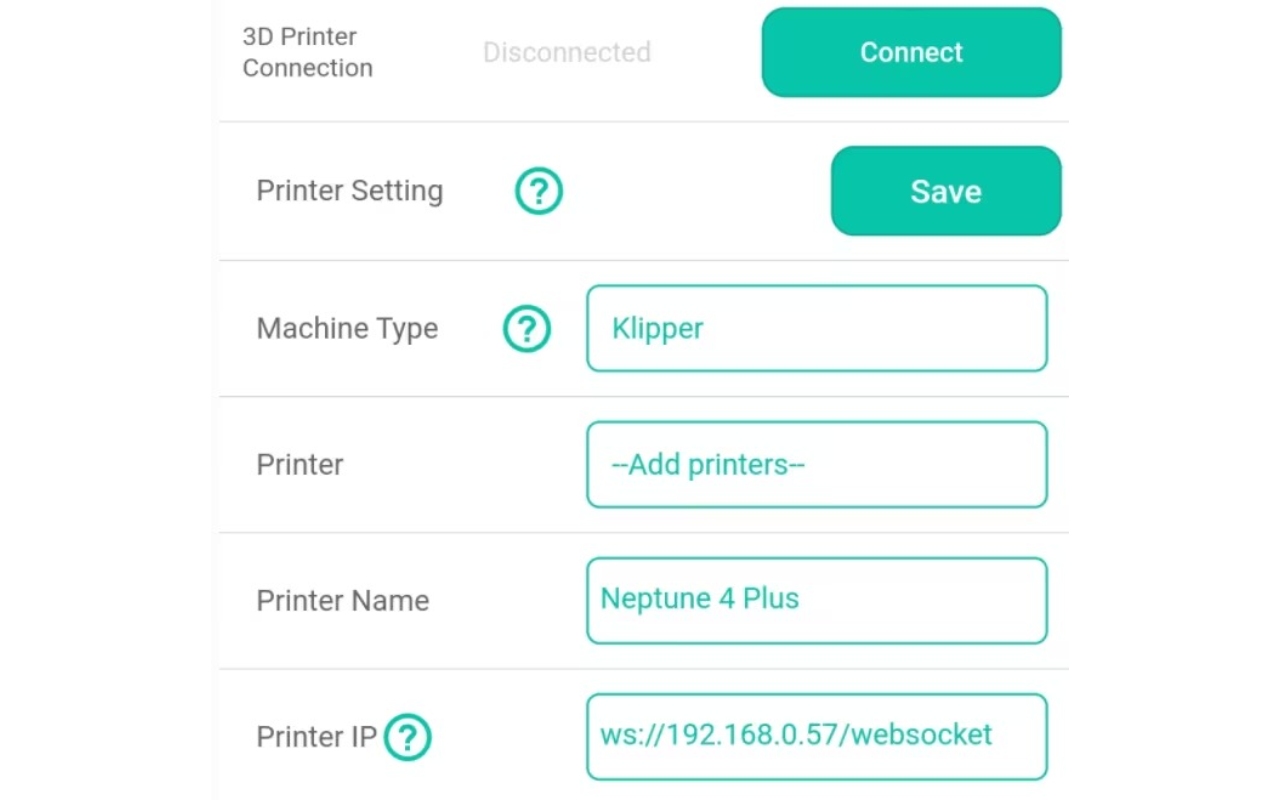
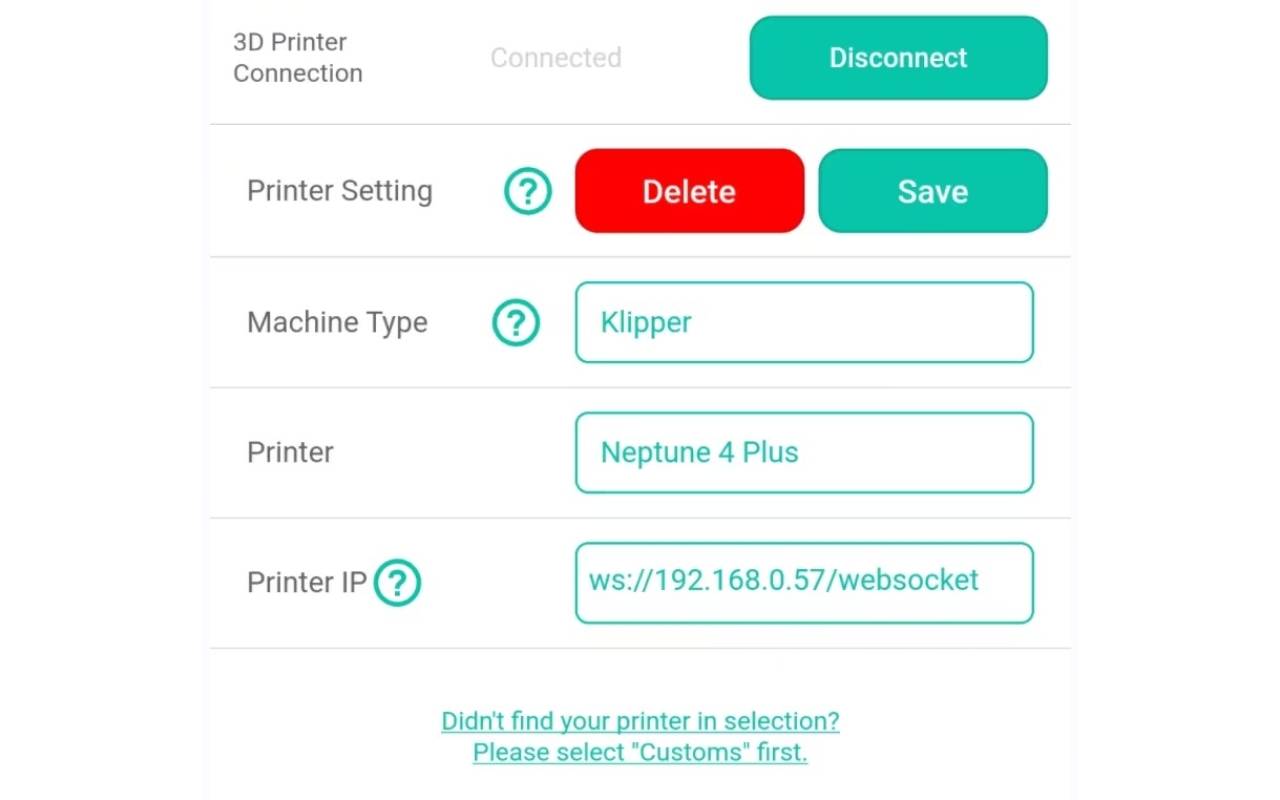
- After saving the printer settings, click “Connect”.
Note:
- The camera needs to be in the same LAN as the Klipper printer.
- If the camera cannot connect to the printer after following the above steps, please restart the camera and APP and click “connect” again.
- The printer IP address information entered in the APP needs to be consistent with what is displayed on the printer control screen. Do not add other characters.
- For Klipper printers using the Creality Sonic pad or Raspberry Pi etc. (multi-serial management devices), you need to find the printer’s specific IP address information on the printer’s Web page.
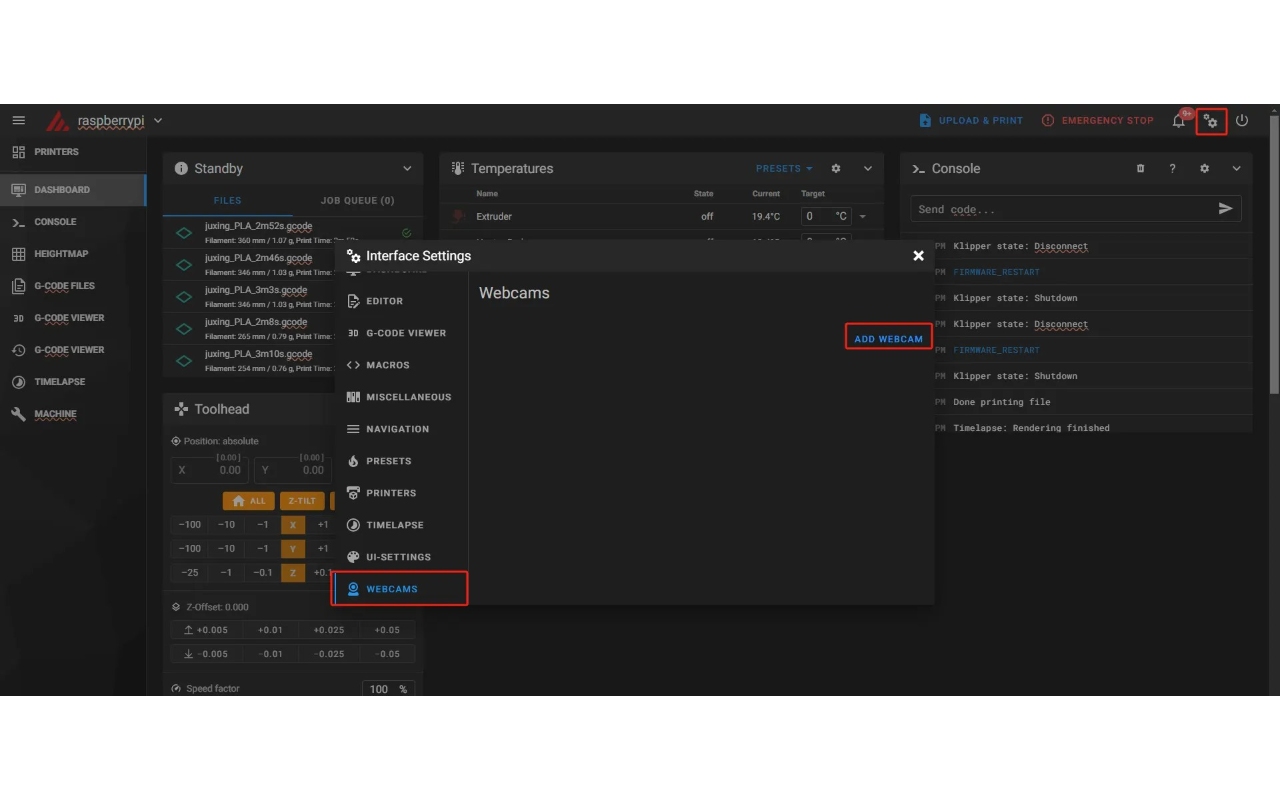
3. Add the Beagle Camera(V1&V2) to Mainsail/Fluidd
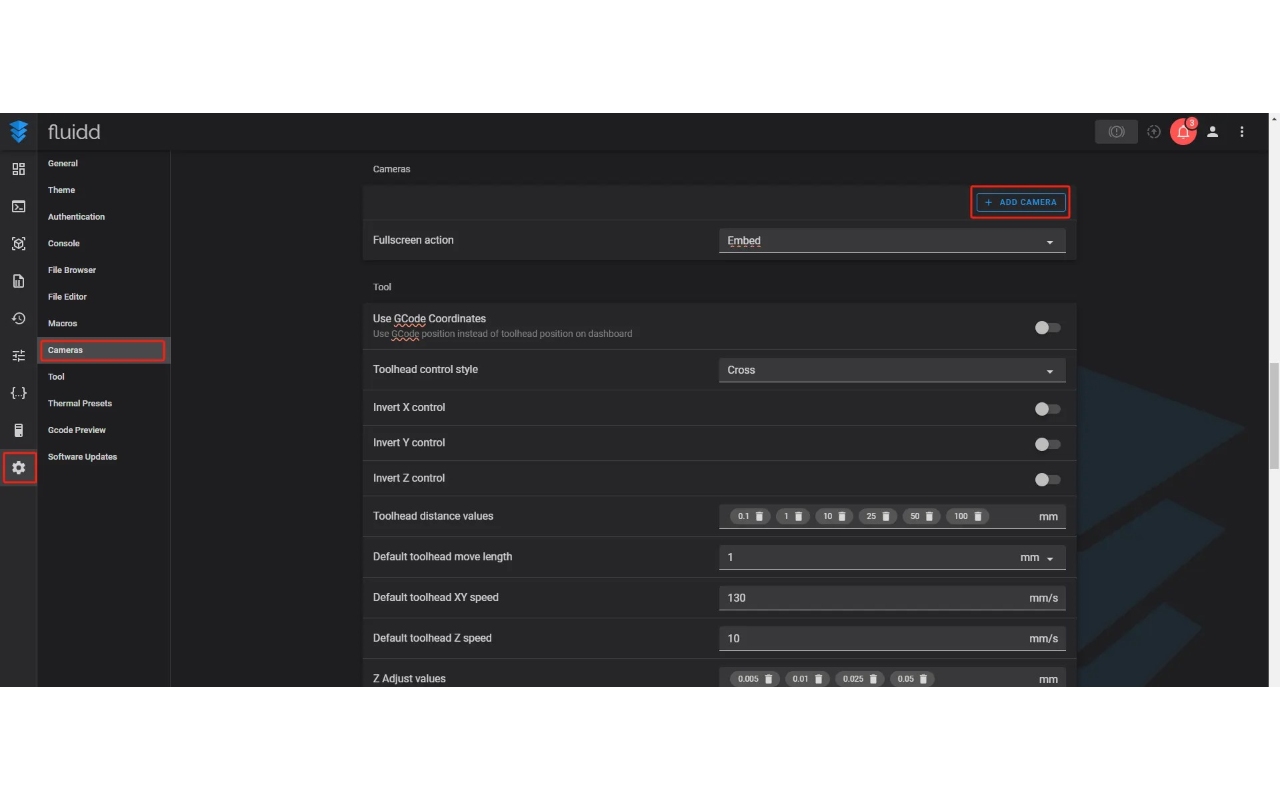
3.1. Fluidd
- Please find the Webcams category in Settings and click “Add Webcam”.
3.1.1. After entering the camera IP address, click “Save” to add the beagle camera(V1&V2).
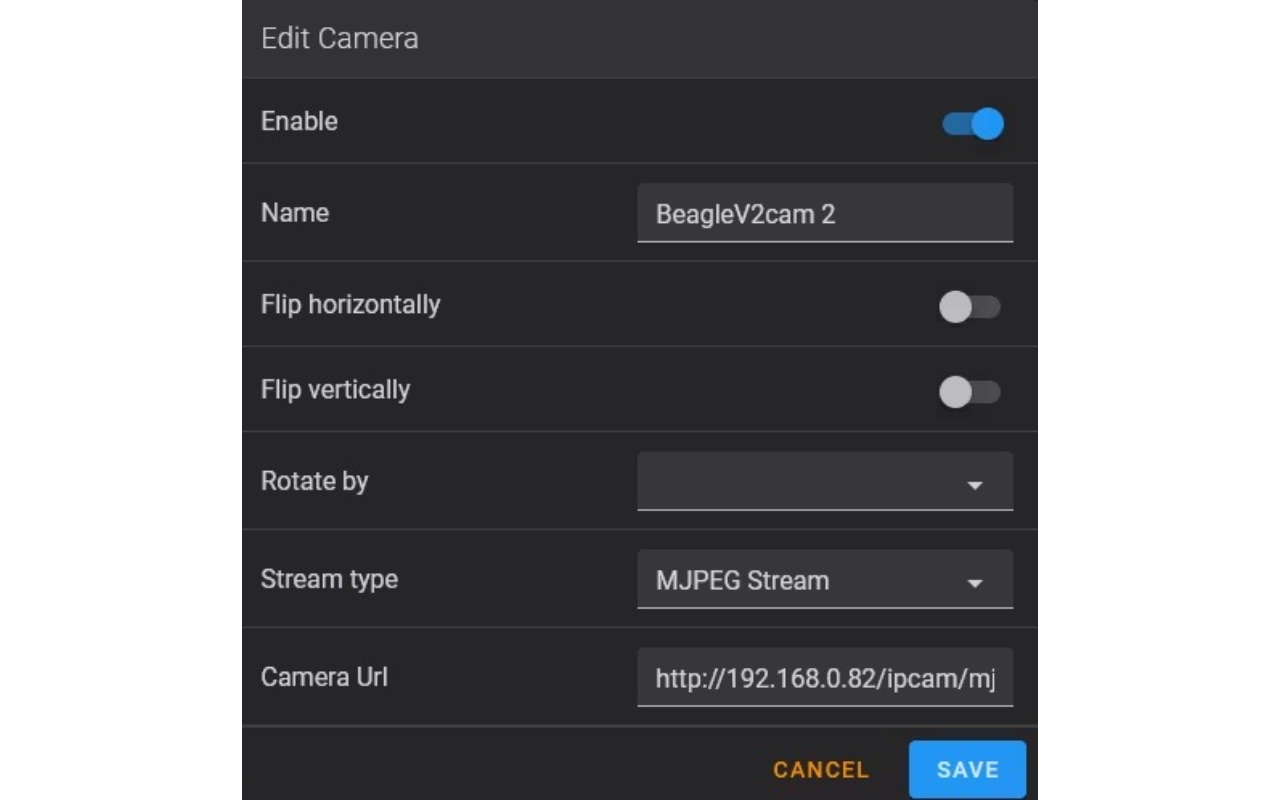
Name: Custom camera name (such as “BeagleCamera”)
Stream type: MJPEG Stream (this type requires the video to be an MJPG stream)
Camera Url: http://192.168.0.82/ipcam/mjpeg.cgi
*Please note that you need to replace “192.168.0.82” with your own Beagle camera IP address.
3.2. Mainsail
3.2.1. Find the webcams category in Settings and click “Add Webcam”.
3.2.2. After entering the camera IP address, click “Save” to add the beagle camera(V1&V2).
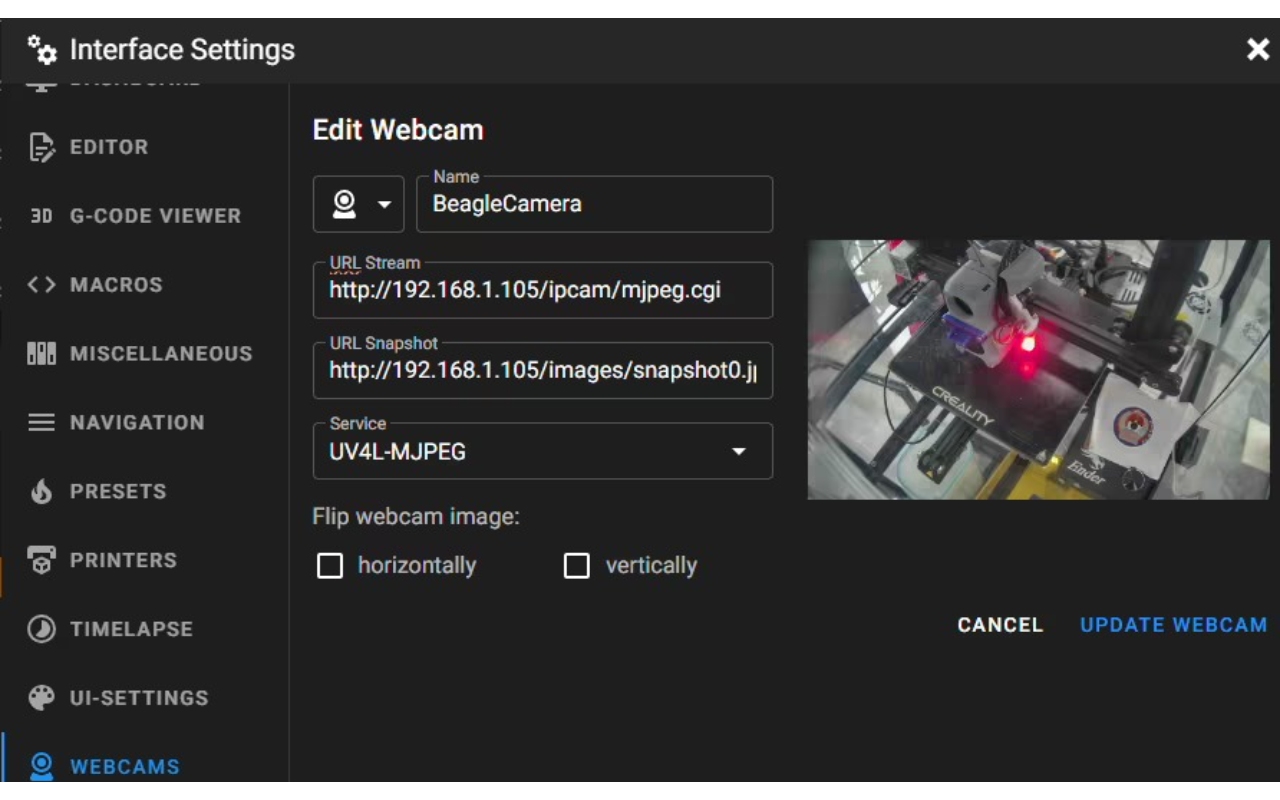
Name: Custom camera name (such as “BeagleCamera”)
Stream type: UV4L MJPEG (this type requires the video to be an MJPG stream)
Camera Url Stream: http://192.168.2.92/ipcam/mjpeg.cgi
Camera Url Snapshot: http://192.168.2.92/images/snapshot0.jpg
*Please note that you need to replace “192.168.2.92” with your own Beagle camera IP address.


