This is a quick start guide for novices using LaserGRBL since the real-life situation of each user and the design of each laser engraving machine may vary. No worries, there is always a general rule to follow.
1、Engraving grayscale image:
The original image is as follows:

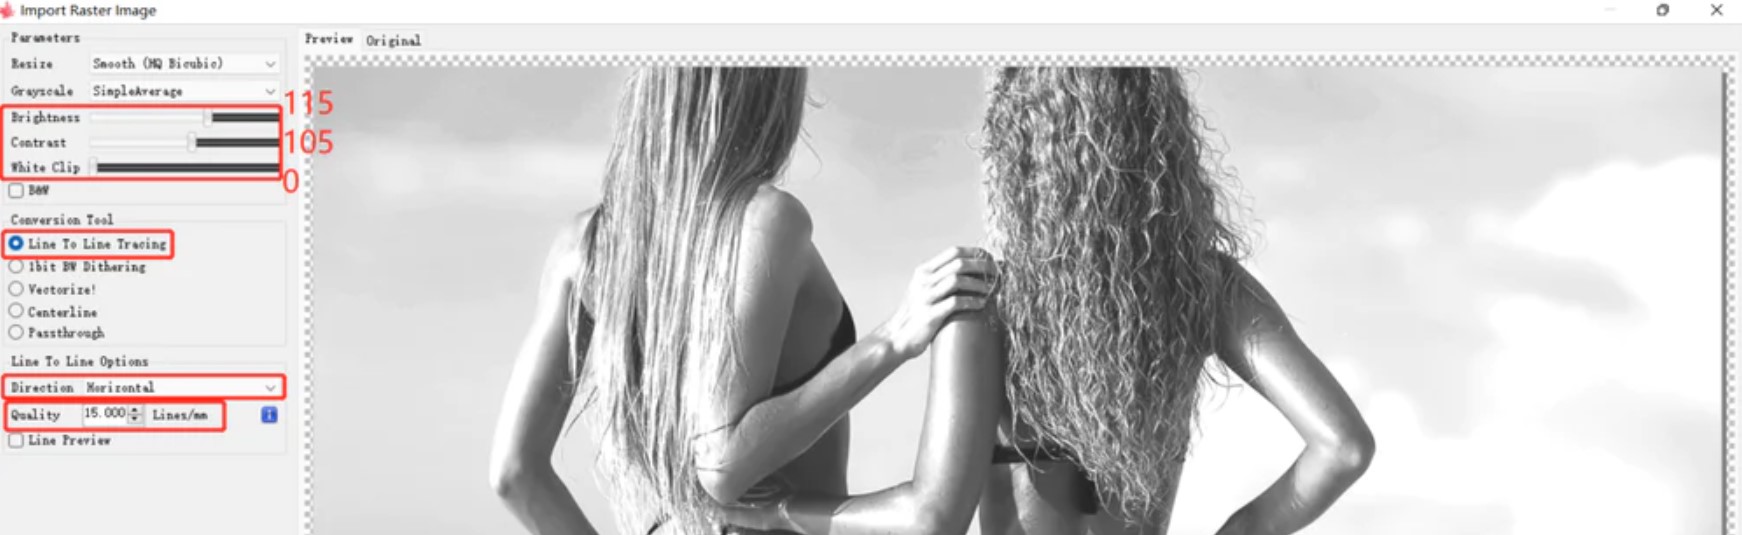
When selecting an image, the first page to set parameters appears like this:
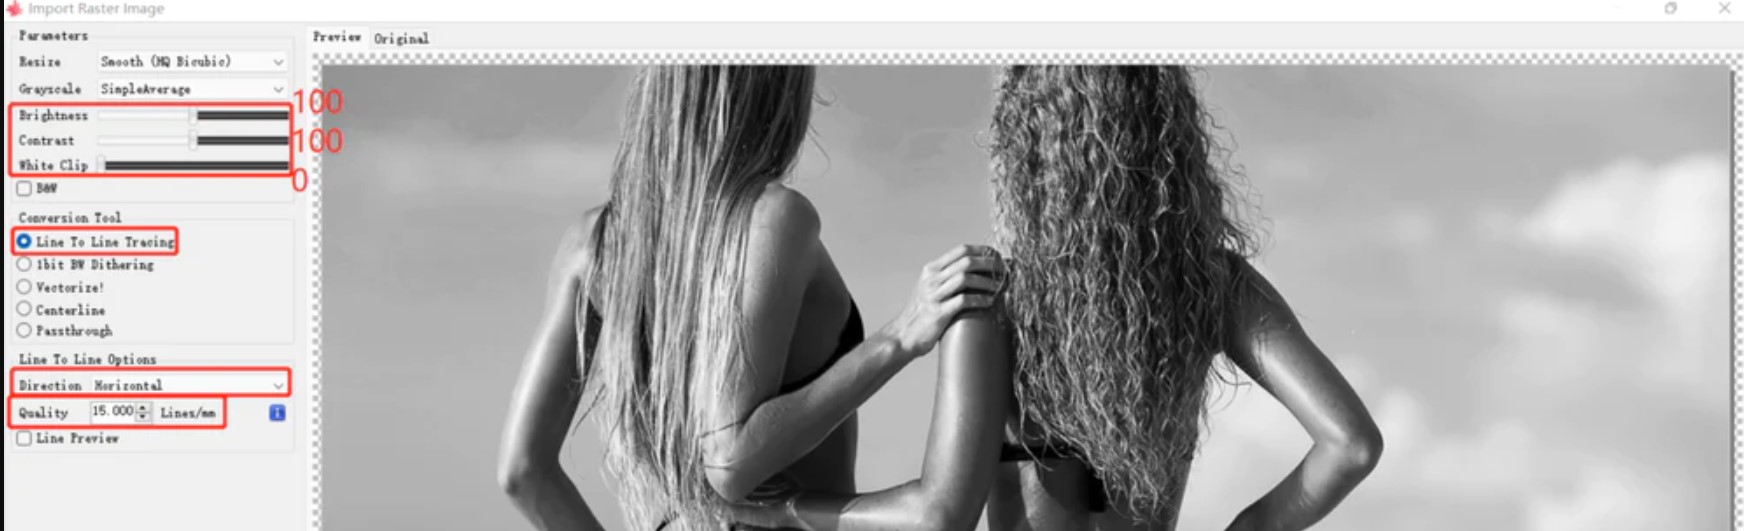
Generally, when engraving grayscale images for a laser engraving machine, the red-framed parameters are the most basic.
Brightness: Brighten or darken the whole picture.
Contrast: To differ between the brightest brights, the whitest whites, and the blackest blacks. The lower the contrast, the more visible the details in an image; and vice versa.
White Clip: Whitener the white area.
These parameters can basically determine the overall engraving effect. It is inevitable to adjust them when we engrave a grayscale image. The rest can stay untouched.
Let’s have a look at the effect after fine-tuning these three parameters
After adjusting the brightness and contrast, the laser engraving will go between black and white. Keep in mind that only the black part will be engraved. If the picture is too dark, the image will tend to be deep black, resulting in a blurry look. Instead of being applied in grayscale, the he white clip is frequently used in black and white images.
Line-to-line tracing: Applied when engraving pictures
Direction: Horizontal by default to obtain the highest precision, and the idealist grayscale imaging effect.
Quality: 15 or 10. In my test, 15 is the best for a grayscale image
Next up is the second setting page.

Generally speaking, the first parameter “speed” and the 3rd parameter, the S-MAX of the laser (that is the laser power) are relative. The faster the engraving speed, the higher the S-MAX, otherwise the engraving will leave no trace. The lower the engraving speed, the lower the S-MAX.
The second parameter: the engraving grayscale image is unified in M4 mode( also called M4 dynamic power). When performing engraving work, the laser head must be continuously accelerated and decelerated to corresponde to the direction change.
Conclusion: To achieve better grayscale image engraving, it is necessary to fine-tune the brightness and contrast; while the rest of the parameters remain the same ( as shown in the given parameter table). After fine-tuning, lower the S-MAX of the laser if the image still looks dark.
2、Engraving black and white illustration:
The original image is as follows:

When we select an image, the first page to set parameters appears to be:

Since there is no excessive grayscale in black and white images, the parameters of the first page are set like this with no fine-tuning required.
Of course, there is always an exception, that is, even the white area is engraved by the laser when engraving a black and white image. That is because the software recognizes the white area of the image as black. When this happens, you need to adjust a parameter: the white clip in order to whitener the white areas. And in my case, I will also limit the white to the max. In other cases, the default value is 0.
Next up is the second parameter setting page

The parameters of this page can also be set according to the laser engraving parameter table without the least adjustments.
3、Cutting
The original image is as follows:
The first parameter of the setting page is shown below:

The parameter of the first red-framed part is usually set like this.
While the second( the Vectorize ) is dedicated to cutting. Opt for this if cutting is necessitated.
Then move to the second parameter setting page:

Choose M3 mode ( also called constant laser power mode). We choose M3 mode as long as we start a cutting project: just keep the laser power in the programmed state, whether the machine is moving, accelerating, or stopping. This allows for better control of the laser state and will result in a more consistent cut for tougher materials.
Moreover, the speed also should be slower, and the S-MAX (laser power) should be higher so as to facilitate cutting.
4. useful tips (keep updating)
-
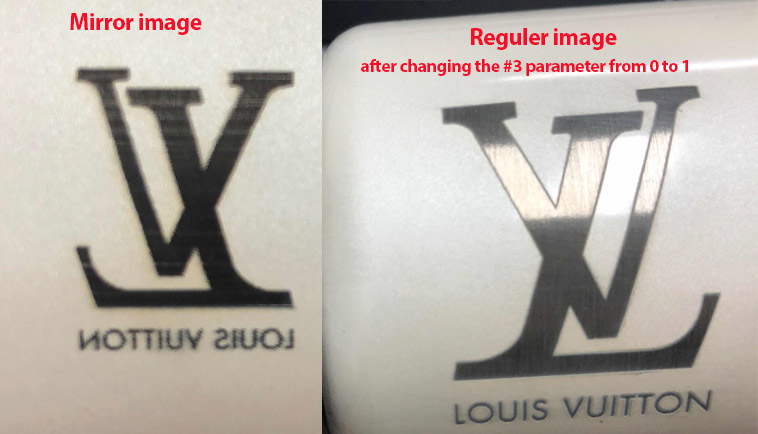
Mirror image
Trying a laser engraver for the first time, and have sorted out a few minor teething problems but still having trouble with the laser engraving in the mirror image, despite the controller showing the image the right way around?
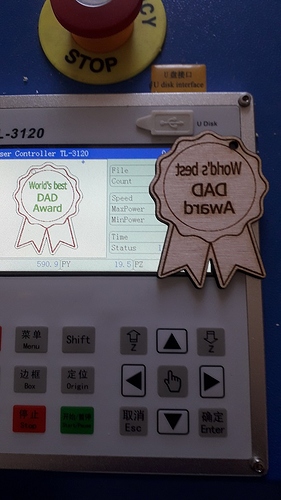
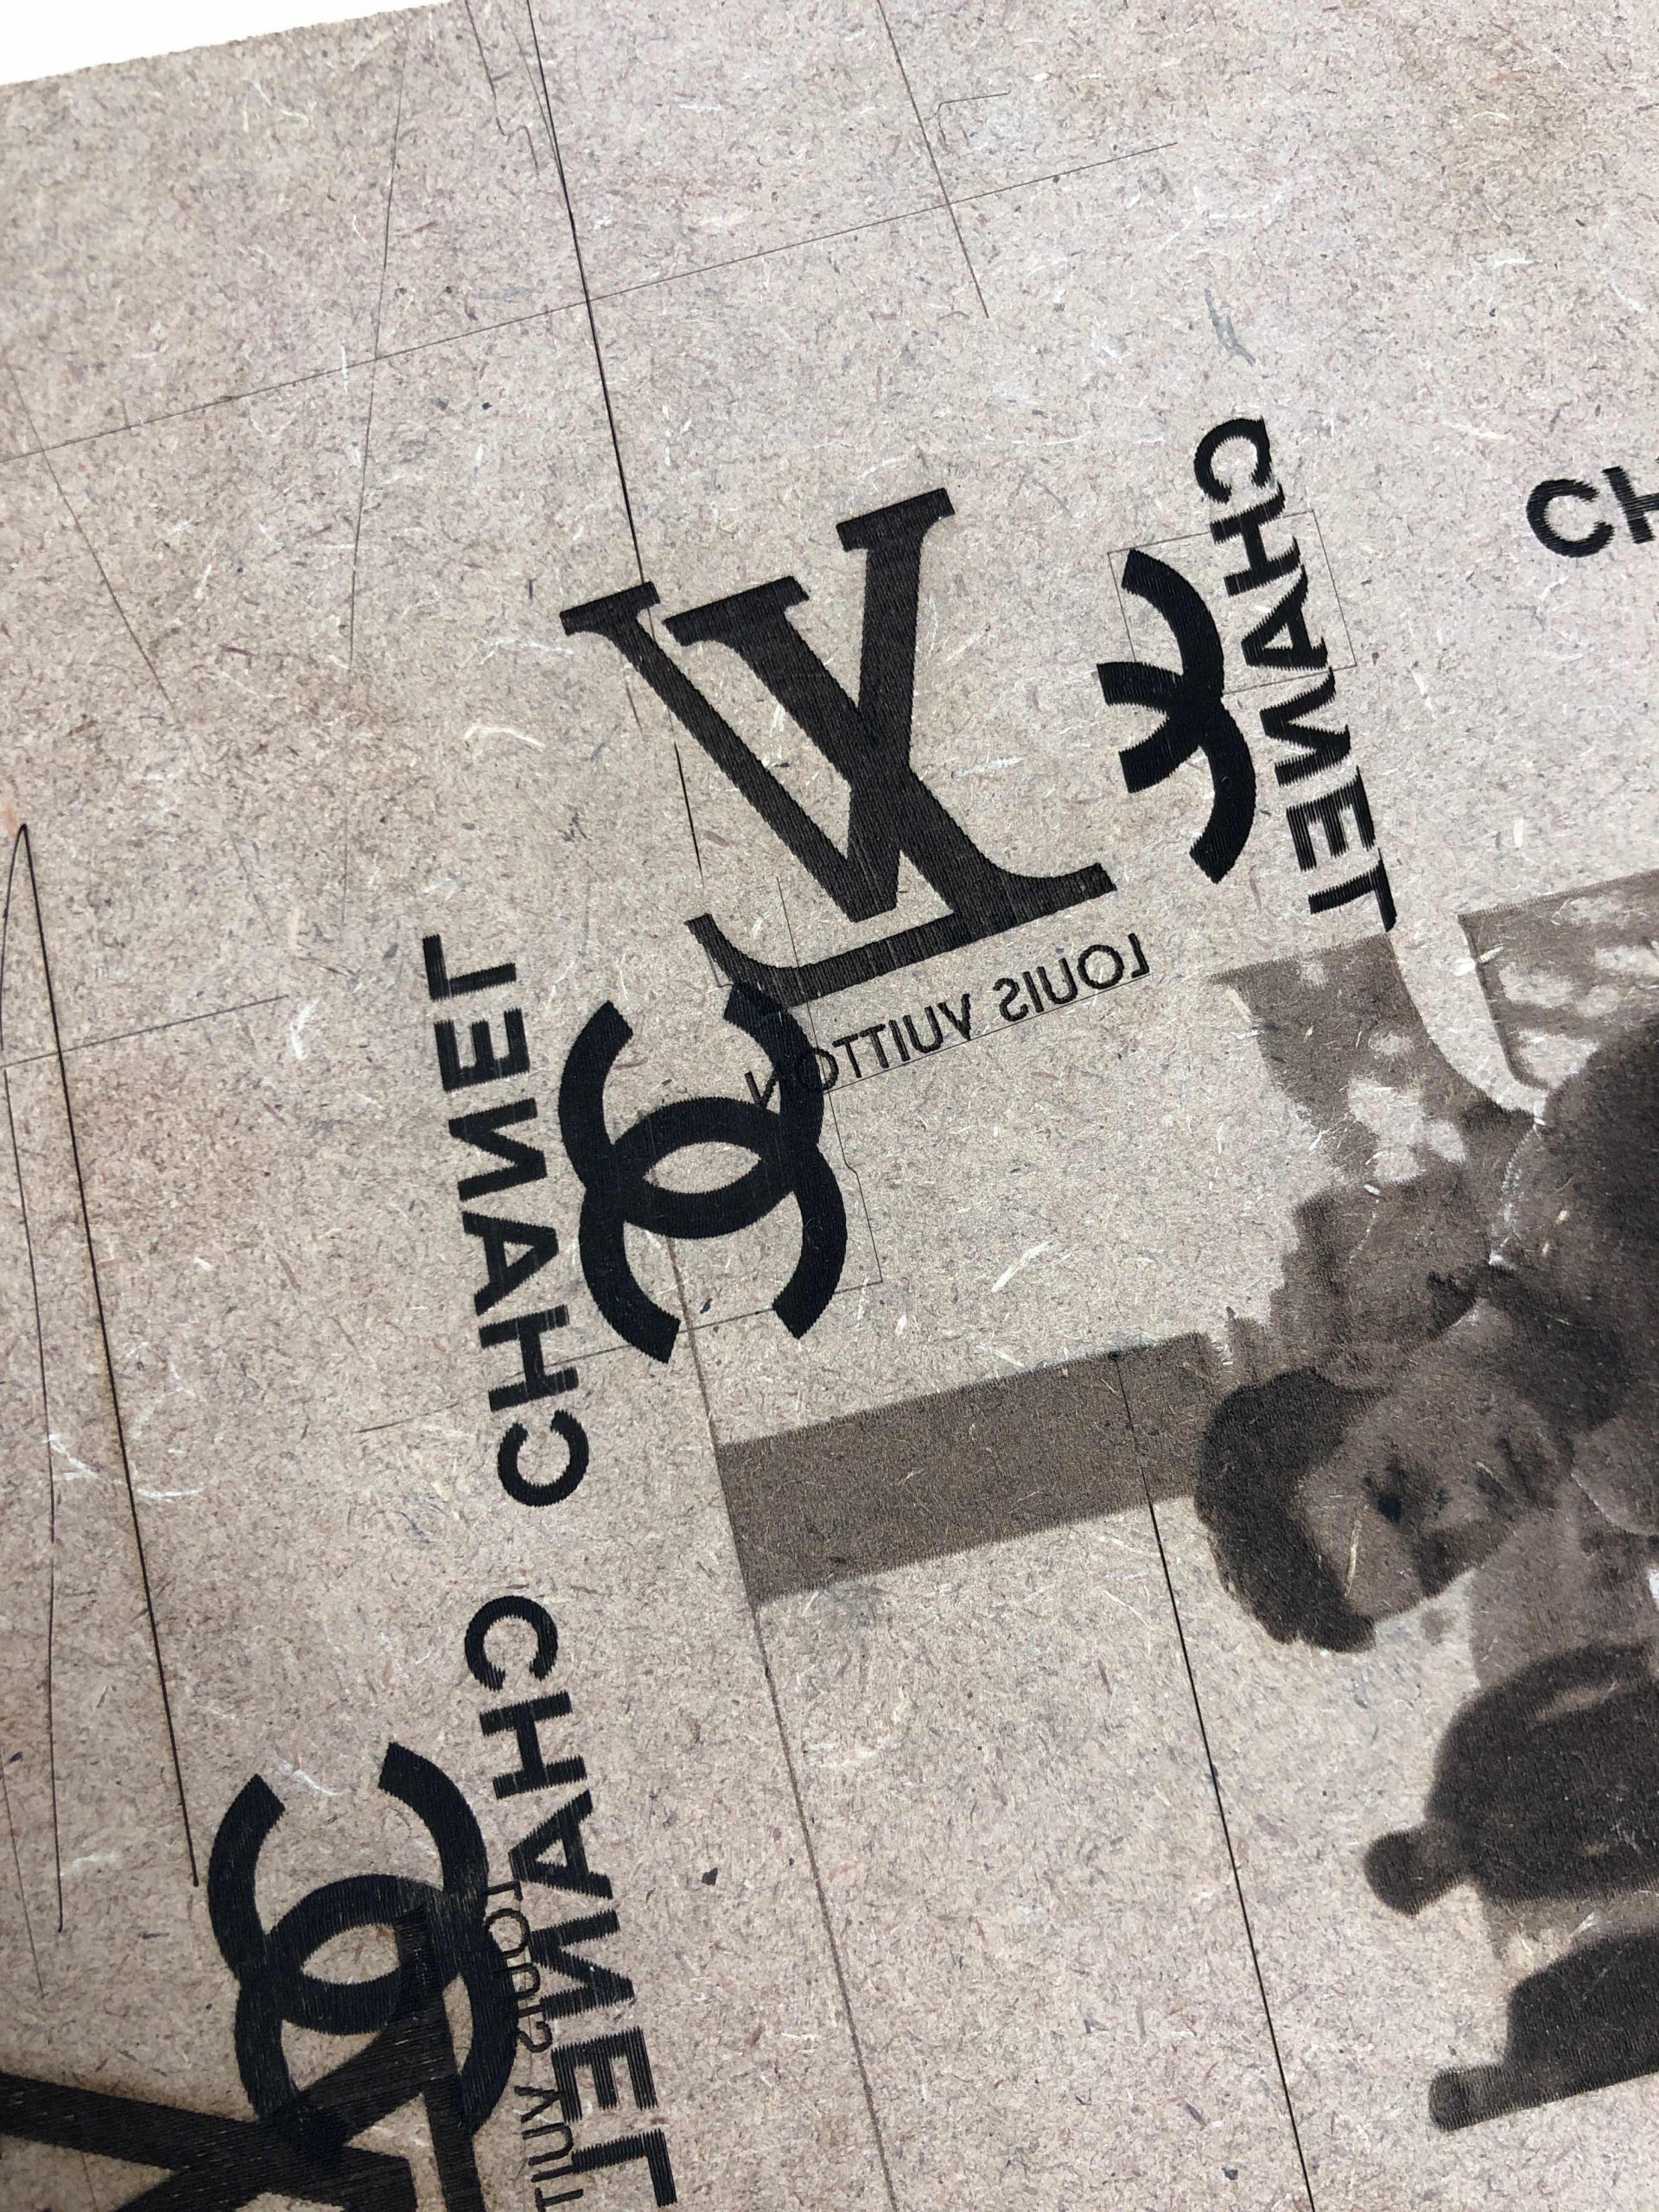
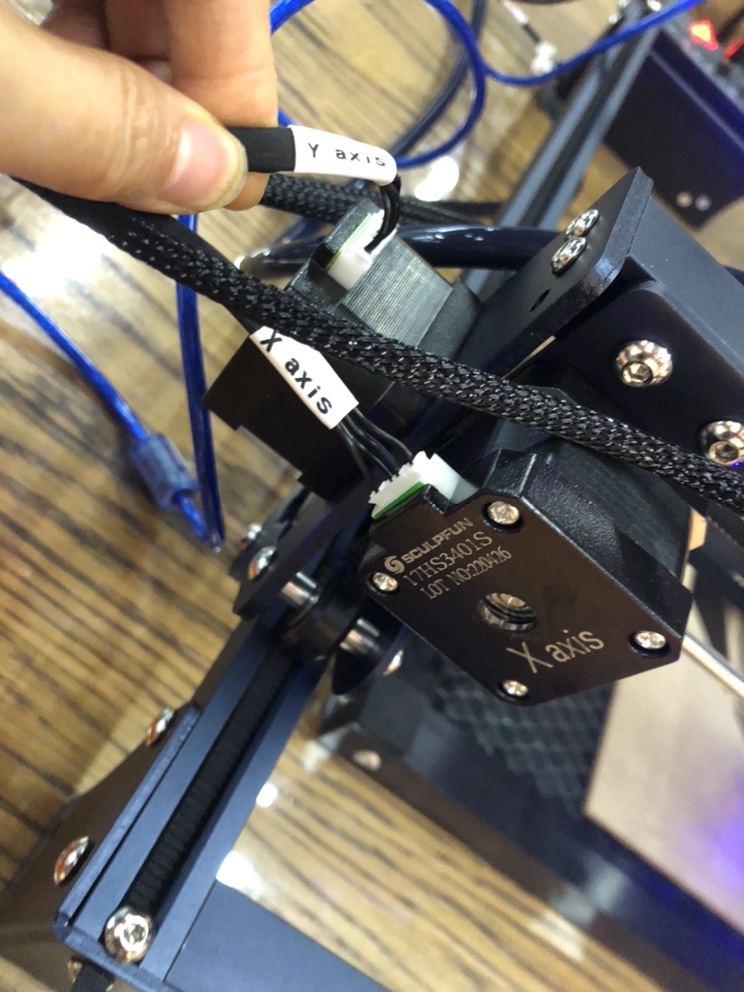
Here are the tips :
A: Check if the serial cable is plugged in properly. By saying this I mean, the X-axis tagged cable must be plugged into the interface of the X-axis, and likewise for the Y-axis. ( The mistake I made using Sculpfun S30 Pro shown in the photo posted above where all the images and letters turned out to be mirror images. )
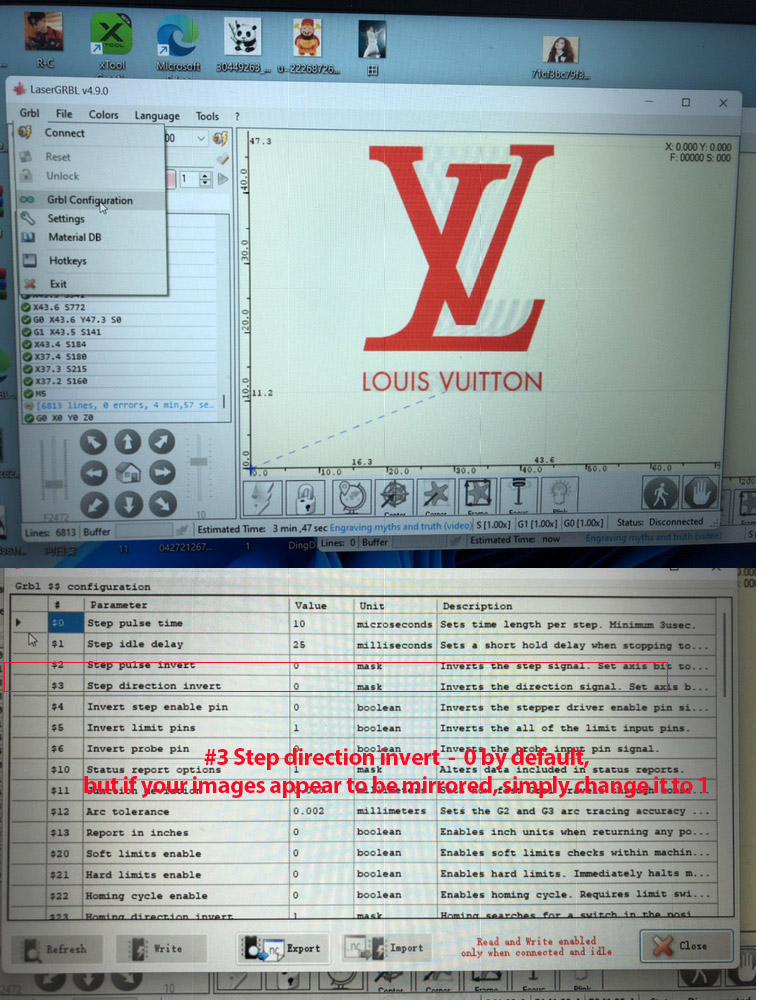
B. Please go to the Grbl configuration and find #3 step direction inert, change to parameter from 0 to 1. (updated on 2023/1/26)