Your 3D printer’s heated bed wastes more than half of the total energy it consumes. Here’s how you can reduce power consumption with a simple mod.
The average power consumed by a 3D printer varies from 120 to 300 watts per hour, primarily depending on the size of the heated bed. The remaining components, such as the mainboard, display, stepper motors, and fans, usually draw less than 50 watts per hour. The inherent power efficiency of these components leaves no scope for improvement, unfortunately.
However, modifying the heated bed for efficiency has the potential to yield significant reduction in power consumption. Here’s how you can reduce your 3D printer’s carbon footprint with a simple, inexpensive bed modification.
Why Is Your 3D Printer Terrible at Power Efficiency?
While 3D printing is undoubtedly sophisticated at the commercial level, consumer 3D printers are relatively simpler designs cobbled together with off-the-shelf components. Most of these components involve electronics and stepper motors that are inherently optimized for low power consumption. Nothing wrong in that department.
Unfortunately, the 3D printer beds are a different matter altogether. To save costs and reduce production complexity, nearly all consumer 3D printers lack bed thermal insulation. That’s a bad idea because an uninsulated bed will radiate heat from the top as well as the bottom surfaces. In other words, nearly half of the radiated heat is wasted from the bottom of a heated bed.
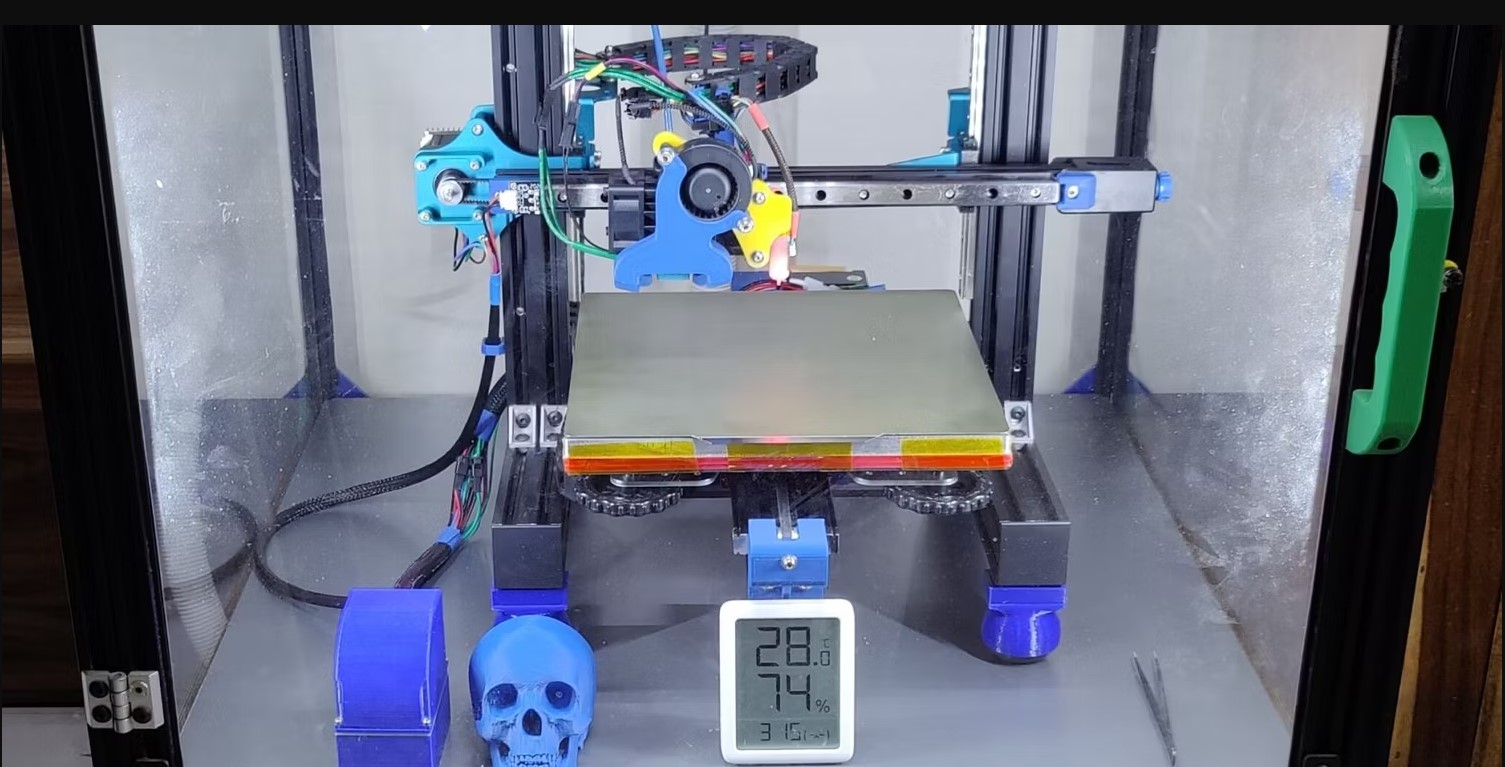
The greater the amount of wasted heat, the longer the bed heater must operate at the maximum power level to maintain the preset bed temperature. The heated bed of a typical 3D printer, such as the Creality Ender-3, consumes more than 250 watts of power at full tilt, so you’d ideally want to insulate the bed to prevent the heater from kicking in often. Here’s how to go about doing that the proper way.
Tools and Materials Required
Thermally insulating a 3D printer bed involves partially disassembling the printer to extract the bed. That’s not a huge concern because nearly all consumer 3D printers ship in knocked-down kits replete with user manuals and the tools required to put everything together. The same tools can be reused for this purpose.

Getting the insulation material choice right is our primary concern. The heated beds in most consumer 3D printers are good up to 250°F. That’s well below the ignition temperature of most materials, which makes most common insulation materials safe enough for our purpose.
However, such high temperatures still introduce the problems of warping, melting, and off-gassing. Plastics such as acrylics and foam insulation materials will begin to deform at the sort of bed temperatures recommended for ABS printing. In fact, some foam materials might even emit potentially harmful gases.
The best materials, therefore, are cork (rubberized cork works as well) and silicone. Cork sheets are cheap and easily available, while also being capable of withstanding temperatures well beyond what most consumer 3D printer beds can reach.
Silicone sheets are the best choice simply due to their significantly higher thermal threshold. Choose the option that fits your budget. What isn’t optional, however, are these tools:
1.Ruler for measurement
2.Appropriate cutting surface
3.Utility knife, or any other type of blade
4.High-temperature RTV silicone sealant
5.Hole punch tool, or chisel
6.Hammer
7.Latex or nitrile rubber gloves (non-powdered)
Step 1: Remove the Build Platform
The exact steps vary according to the make and model of your 3D printer, but the process is roughly the same for Ender-3 or other variants of the Prusa i3 “bed-flinger” design. The first step invariably involves removing the build platform otherwise known as the printer bed.

Your 3D printer’s assembly manual will have detailed instructions, but it generally involves these steps:
- Powering the printer off.
- Removing the power plug from the wall socket.
- Detaching the bed heater and bed thermistor wires.
- Unscrewing the bed adjustment knobs.
- And finally lifting the bed off the 3D printer chassis.
Keep the bed aside for now, and move onto the next step.
Step 2: Cut the Insulating Material to Size
Lay your thermal insulation sheet down on the cutting surface and place the bed on top. Use a box cutter or an X-Acto knife to cut the sheet to the exact dimensions of the bed. A dull blade will make the task painfully slow and tedious, so be sure to use a fresh, sharp blade.

A thicker insulating layer retains heat better, but high-density materials such as silicone add a considerable amount of weight. It isn’t advisable to go overboard with insulation thickness for printers such as Prusa i3 and Creality Ender-3 that employ moving beds.
It’s absolutely important that the thickness of the insulating sheet shouldn’t exceed the length of the bed springs when they are compressed. For example, if your 20mm long bed springs are compressed to 10mm upon tuning, it’s wiser to limit the insulation thickness to 6mm or less.
Step 3: Cut Out Holes for Bed Screws
Place the bed on the insulation sheet and mark out the holes meant for the bed screws. You can either use a hole punch tool to cut a circular hole of appropriate diameter, or use a chisel and hammer to cut out clean squares.

Speaking of appropriate hole size, they should be large enough to accommodate the bed springs without touching or snagging on them.
You can also resort to a box cutter or X-Acto knife in a pinch, if you don’t have access to the aforementioned tools. However, the cuts won’t be as clean or precise.
Step 4: Does Your Bed Have a Flat Underside?
The heated beds on virtually all 3D printers employ PCB heaters. Such beds tend to have flat undersides. If that’s the case with your 3D printer, you may skip this step.

However, those who have built their own DIY 3D printers, such as Voron (learn more in our Voron beginner’s guide) or Rat Rig, have to contend with uneven bottom surfaces on their DIY beds, on account of additional components such as thermal fuses, bed thermistors, and cabling.
Using multiple thinner insulation sheets with cutouts to accommodate these protruding components does the trick, followed by a final layer of insulation to cover up any gaps.
Step 5: Prepare the Bed Surface
Before we can stick the insulating sheet to the underside of the bed, the mating surfaces must be thoroughly cleaned of oils and impurities for reliable adhesion. Warm distilled/filtered water and a drop of dish soap works for cleaning the bed, but isopropyl alcohol is a better choice.

We recommend wearing non-powdered latex or nitrile rubber gloves, because your bare fingers and palms can leave oil and grime on the cleaned surfaces. If you used water to clean the bed, be sure to wait at least 15 to 20 minutes for it to dry out before moving onto the next step.
The insulating material must be cleaned as well. Avoid water if you’ve opted for a porous material, such as cork or foam, that can absorb or otherwise retain water. These are best cleaned using a brush to remove dust and contaminants. However, water-resistant materials such as silicone can be cleaned with a tissue moistened with distilled/filtered water.
Once the bed surface is clean, you may optionally apply masking tape to prevent the silicone adhesive from migrating inside the perimeter.
Step 6: Sticking It All Together

Apply a thin but consistent layer of high temperature RTV silicone sealant to the underside of the bed. You can either choose to apply the adhesive everywhere or just to the perimeter. The latter is perfectly fine because even if an air gap were to form in the center, that would only improve thermal insulation.
Carefully align the thermal insulating sheet and stick it onto the bed. Silicone adhesive begins to cure immediately after being exposed to air, but most formulations allow adjustment for 10-15 minutes. If you are using multiple insulation sheets, repeat the process for all sheets.

Place some weight on the bed, while resting it on a flat surface where it can lie undisturbed. Most silicone adhesives take anywhere between 24 and 48 hours to cure. However, reaching full adhesive strength may take up to a week depending on the adhesive formulation. Please refer to the manufacturer’s instructions for clarity. Ideally, avoid removing the weight or otherwise disturbing the bed for at least two days.

Step 7: Reinstall the Bed
With your bed adequately insulated, you can now reassemble the bed screws and springs, and reinstall the bed onto the printer. Assembly is the reverse of the disassembly process you followed earlier.

Enjoy the Power Savings
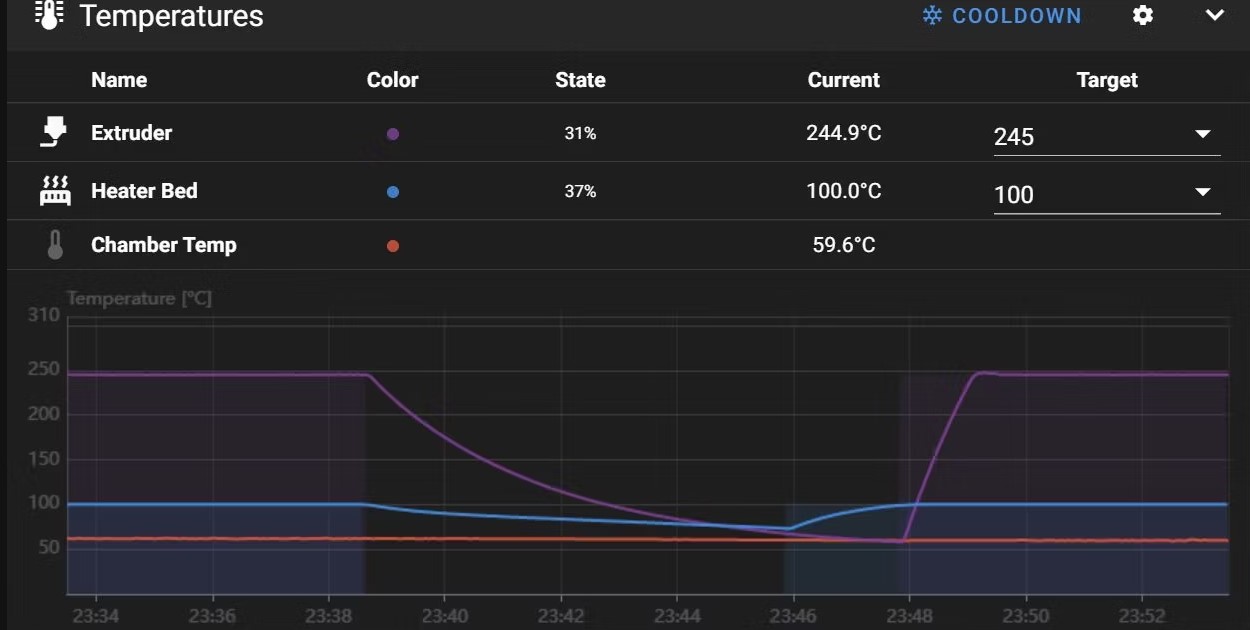
A well-insulated 3D printer bed not only heats up faster, but it also significantly reduces power consumption. This is all the more apparent on longer prints, where heat loss tends to compound to a greater degree over time.
Source: Makeuseof


