How to add the Original Limit switch to SCULPFUN S6&S9 series laser machine
Preparation
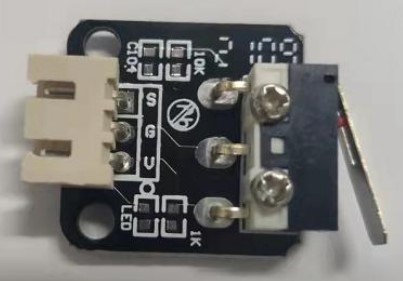
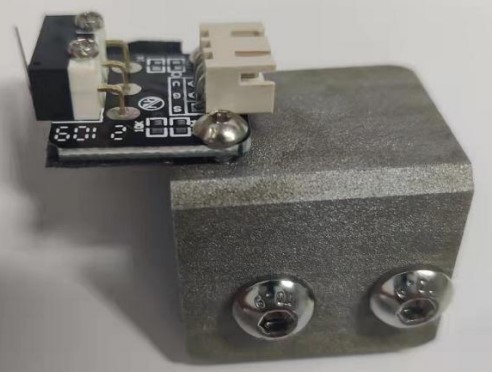
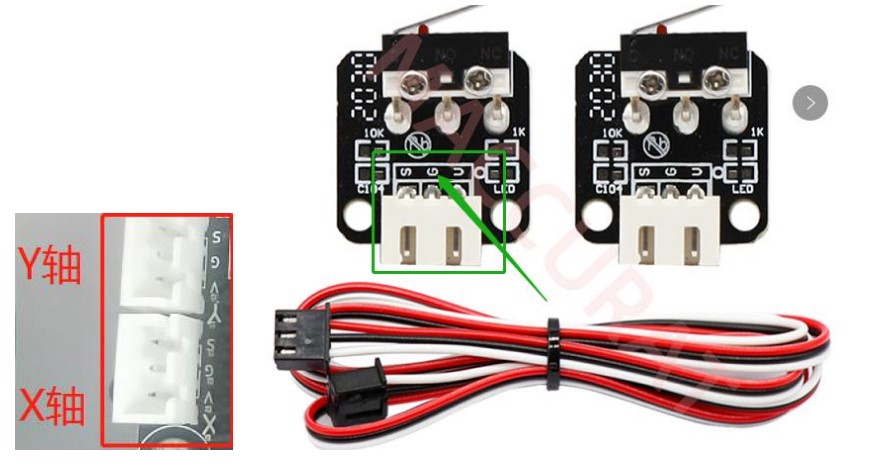
1.5V Limit switch 2pcs
2.3PIN XH2.54 Terminal connection line,1 meter,2pcs
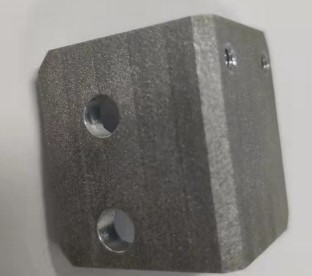
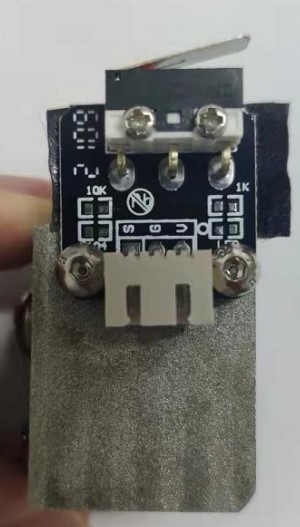
3.DIY limit switch mounting parts 2pcs

Hardware installation
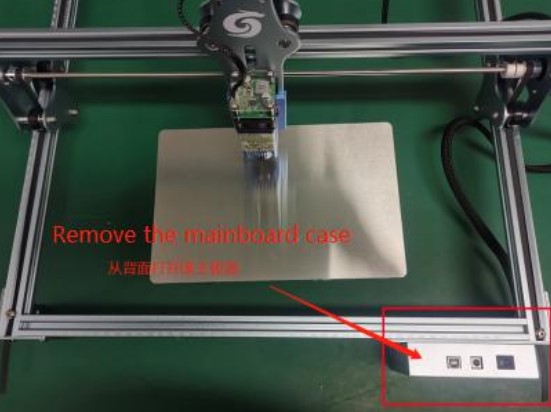
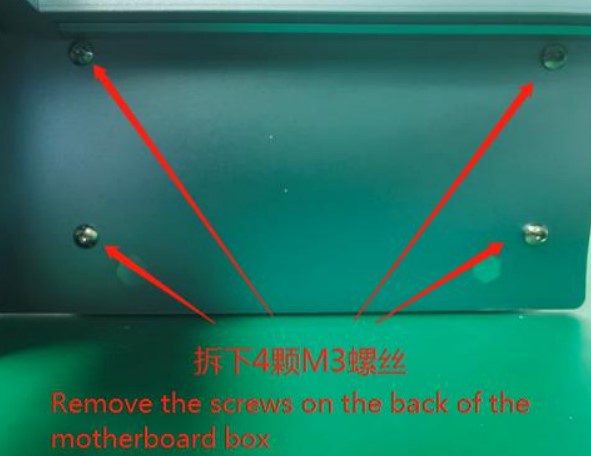
1. Locate the motherboard box in the lower right corner of the engraving machine, remove the 4 M3 screws at the back of the box, and open the motherboard box
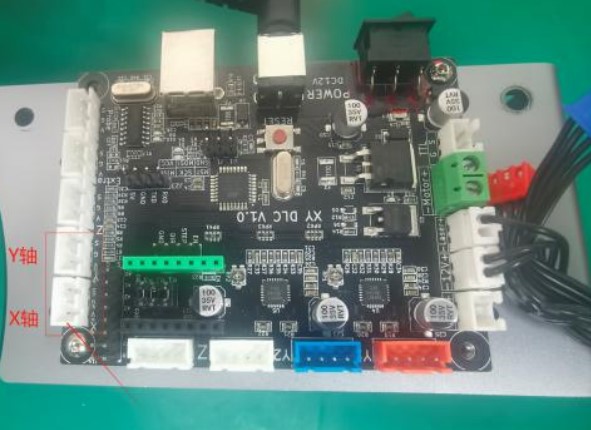
2. Find the terminals “X VGS” and “Y VGS” at the bottom corner of the circuit board, and connect them to the limit switches of the X-axis and Y-axis respectively;)
3. Compare the terminal “VGS” on the motherboard with the terminal “VGS” on the limit switch, each pin has to correspond one by one; )
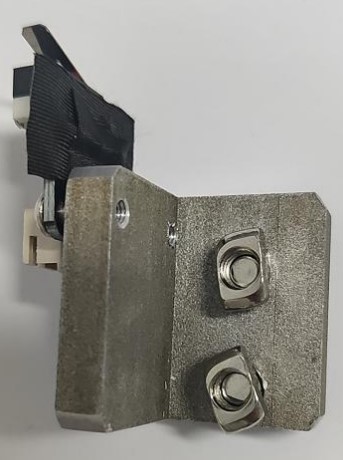
4. Install the limit switch on the lower-left corner of the engraving machine, horizontal – X-axis, vertical – Y-axis; according to your needs, adjust the X and Y axis limit switches to adapt to the position of the machine.
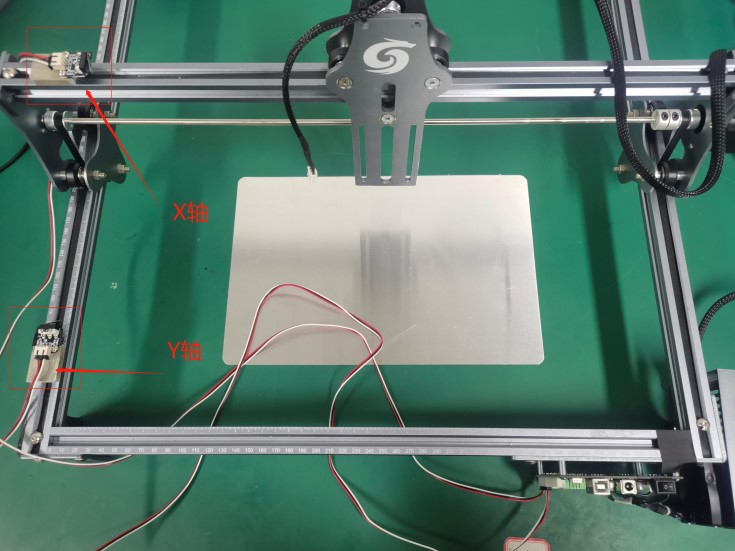
Note: pins of the limit switch must be insulated, instead of directly contacting the metal during installation, or it might lead to a short circuit.
Software settings
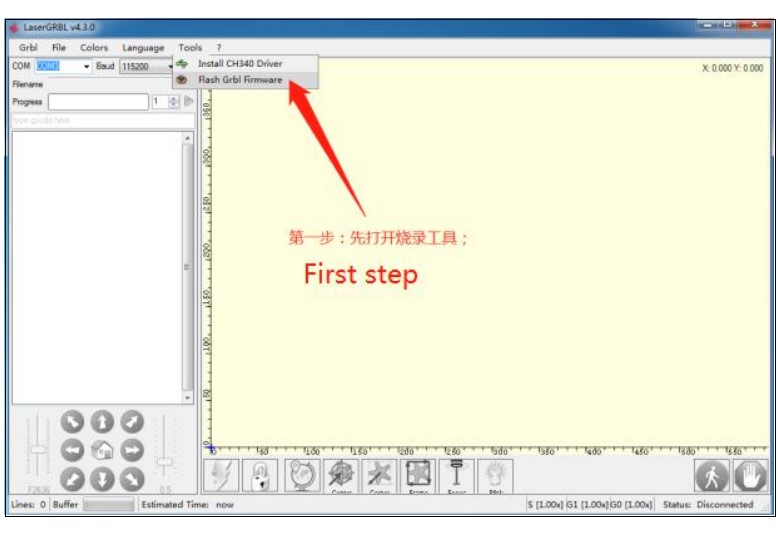
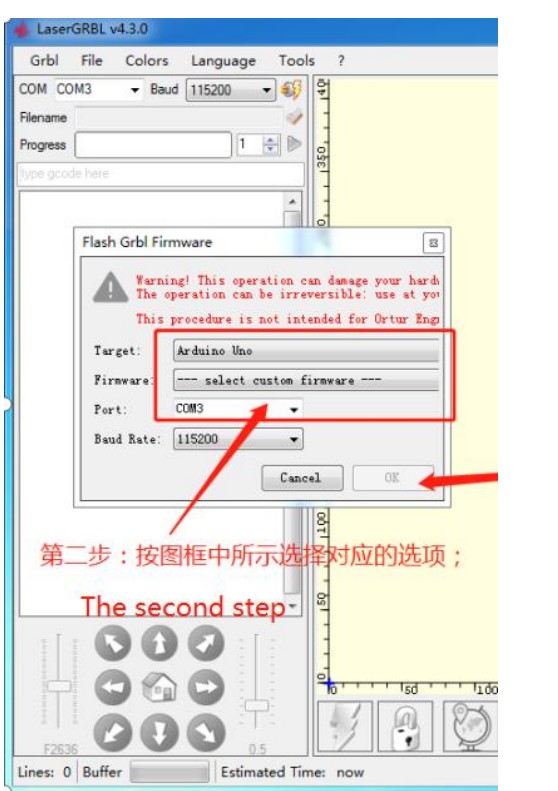
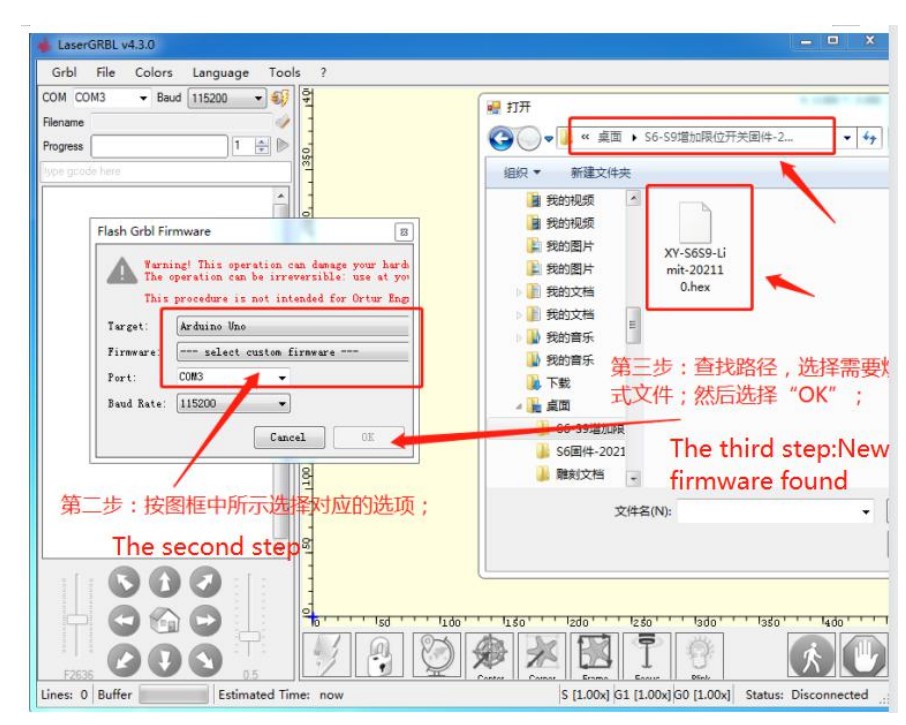
1. Update the firmware
Download and install the software “LaserGRBL”, plug in the USB data cable, enter the main interface, and follow the steps to install the new firmware on the motherboard
2. Software operation
LsaerGRBL
A. After opening the main interface, connect to the engraving machine, then click the icon button to perform the “return to origin” operation; wait until the machine stops, click, and wait for the button to turn into color to complete the “origin” setting.

LightBurn
B. To use this software to engrave, you also need to complete “LsaerGRBL software” installation first; Open the LightBurn software, and the motherboard will automatically perform a zero return operation after power on. Enter “G92 X0 Y0” in the “console” dialog box, and press “Enter” to complete the origin setting;)
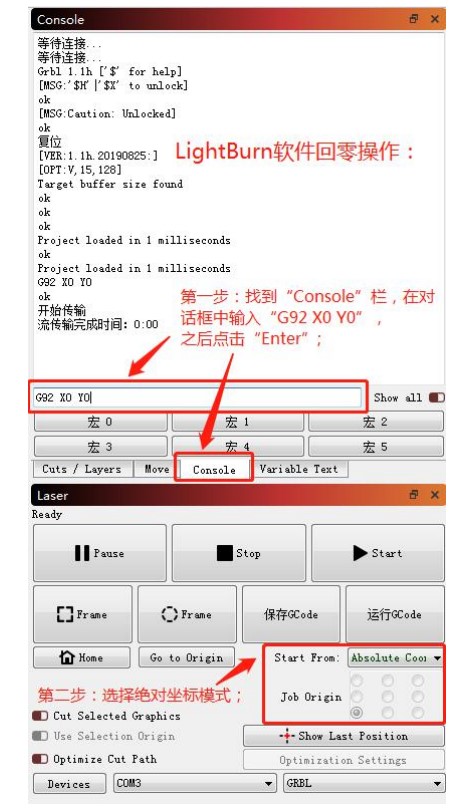
1. (type the “G92 X0 Y0” on Console,then Enter.)
2. (Choose Absolute coordinates.)
(Note: If you accidentally select the wrong position of origion, you need to re-execute the process of returning to the origin and reset the origin;)


