Install
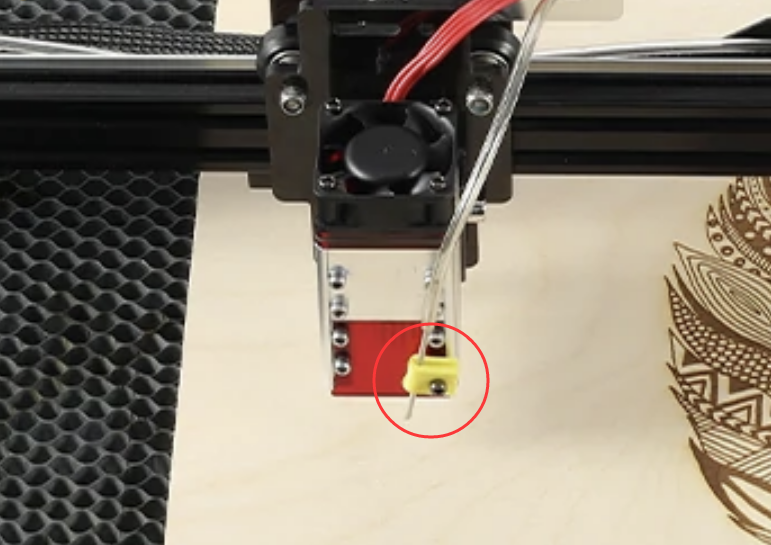
Install the module height adjuster on the z-axis, adjust the module height and focus by finetuning the M5 Allen key to slide the module up and down.
Please do not leave the equipment alone when it is working!
Please wear protective glasses before the operation!
Please do not touch the laser outlet with bare hands. It may burn your hands!
Please avoid a strong impact on the machine!
Children under 14 years of age are prohibited from using this product!
Children over 14 years of age need adult supervision when using this product!
Avoid accidental touch by pets!
Adjust Focus
The A40640 is an adjustable focus module. The image above is a guide for the idealist adjustment settings. You can adjust the focus position with a flat-blade screwdriver. Proper focus selection is critical to cutting. You may need to try repeatedly. In addition, an air assist will enhance the cutting and engraving results, namely with cleaner edges and improved cutting thickness and cutting efficiency.
When the focus is adjusted to about 33mm from the light outlet with a flat-blade screwdriver, you can get a focus of 0.04mm capable of engraving stainless steel or black alumina, etc.
When focusing to 55mm position (Rotate the lens to the bottom), you can cut materials up to 20mm (requires accurate focus, 0.6-1.5mpa air assist to align the cut).
Low Light Adjustment
Set the right low light to locate the focus more accurately.
Adjust the low light through the software. The NEJE mode can be adjusted in the “Settings” column of the NEJE Win software; the GRBL mode can be adjusted in the “Grbl Configuration” of the laserGRBL software, which has been explained above.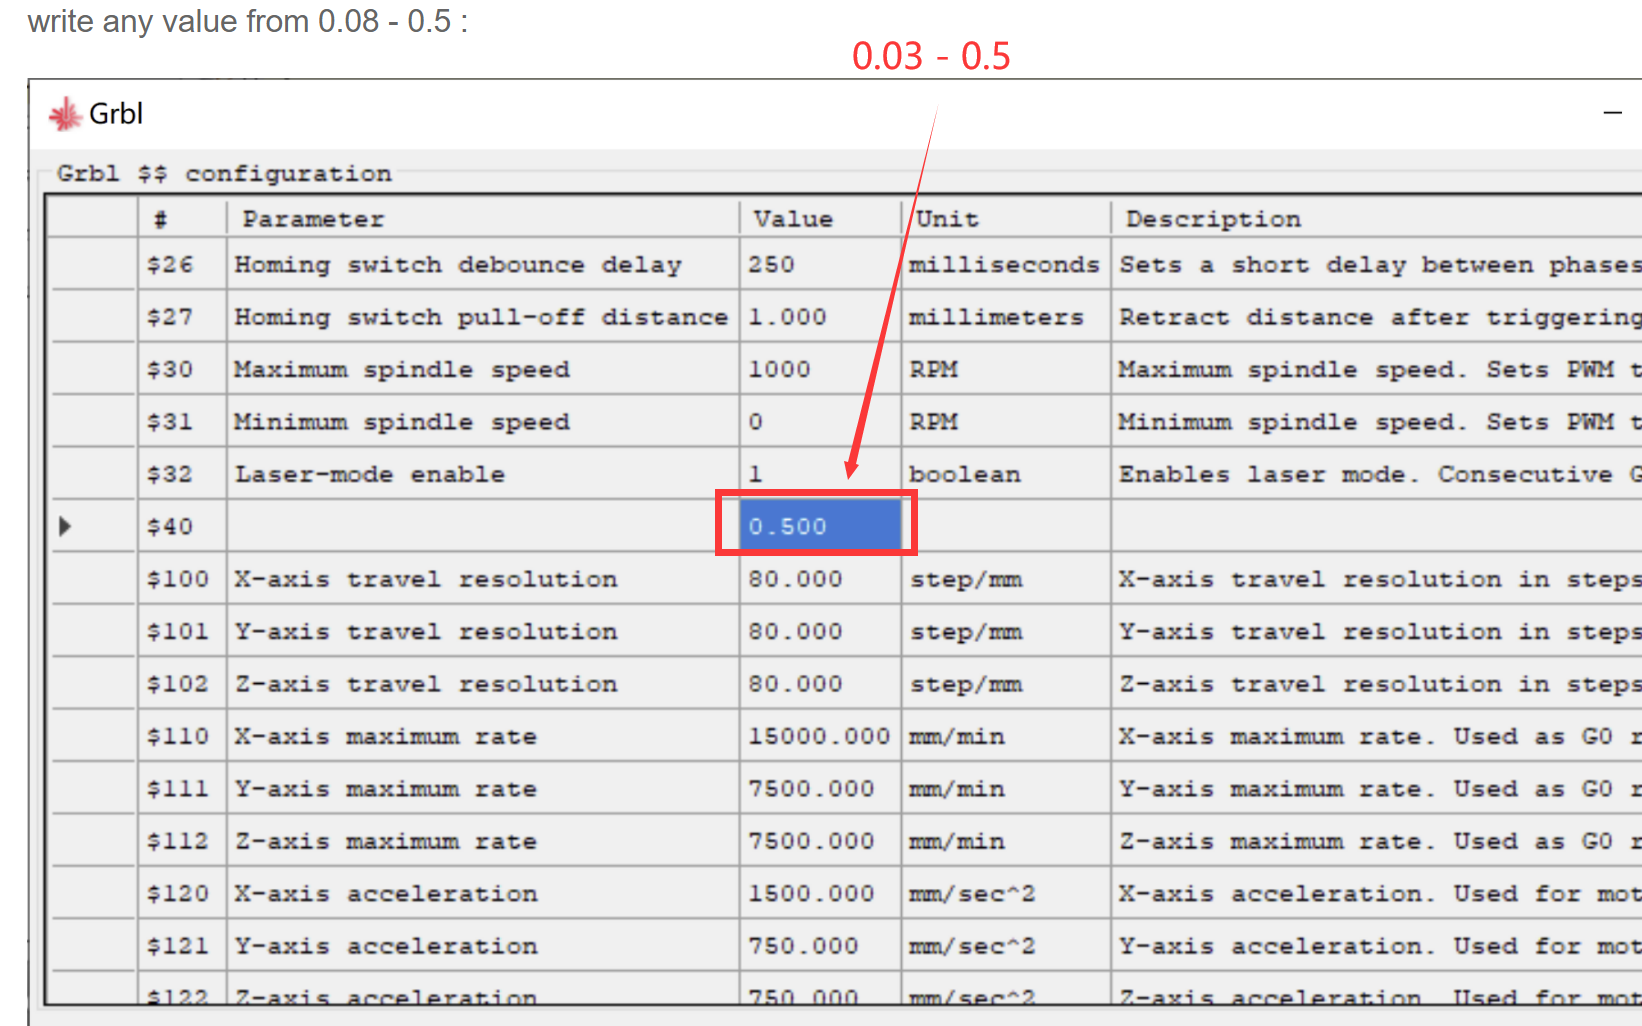
Place gray cardboard on the surface of the white material (such as plywood) as a focus reference to locate the precise focus. A fine focal point can be observed through the protective goggles or the shade of the module.
Set the best focus by rotating the lens. If it is a module with a fixed focus, the distance between the module and the object should be found in a breeze. Usually, we will get a certain thickness of material to pad under the module.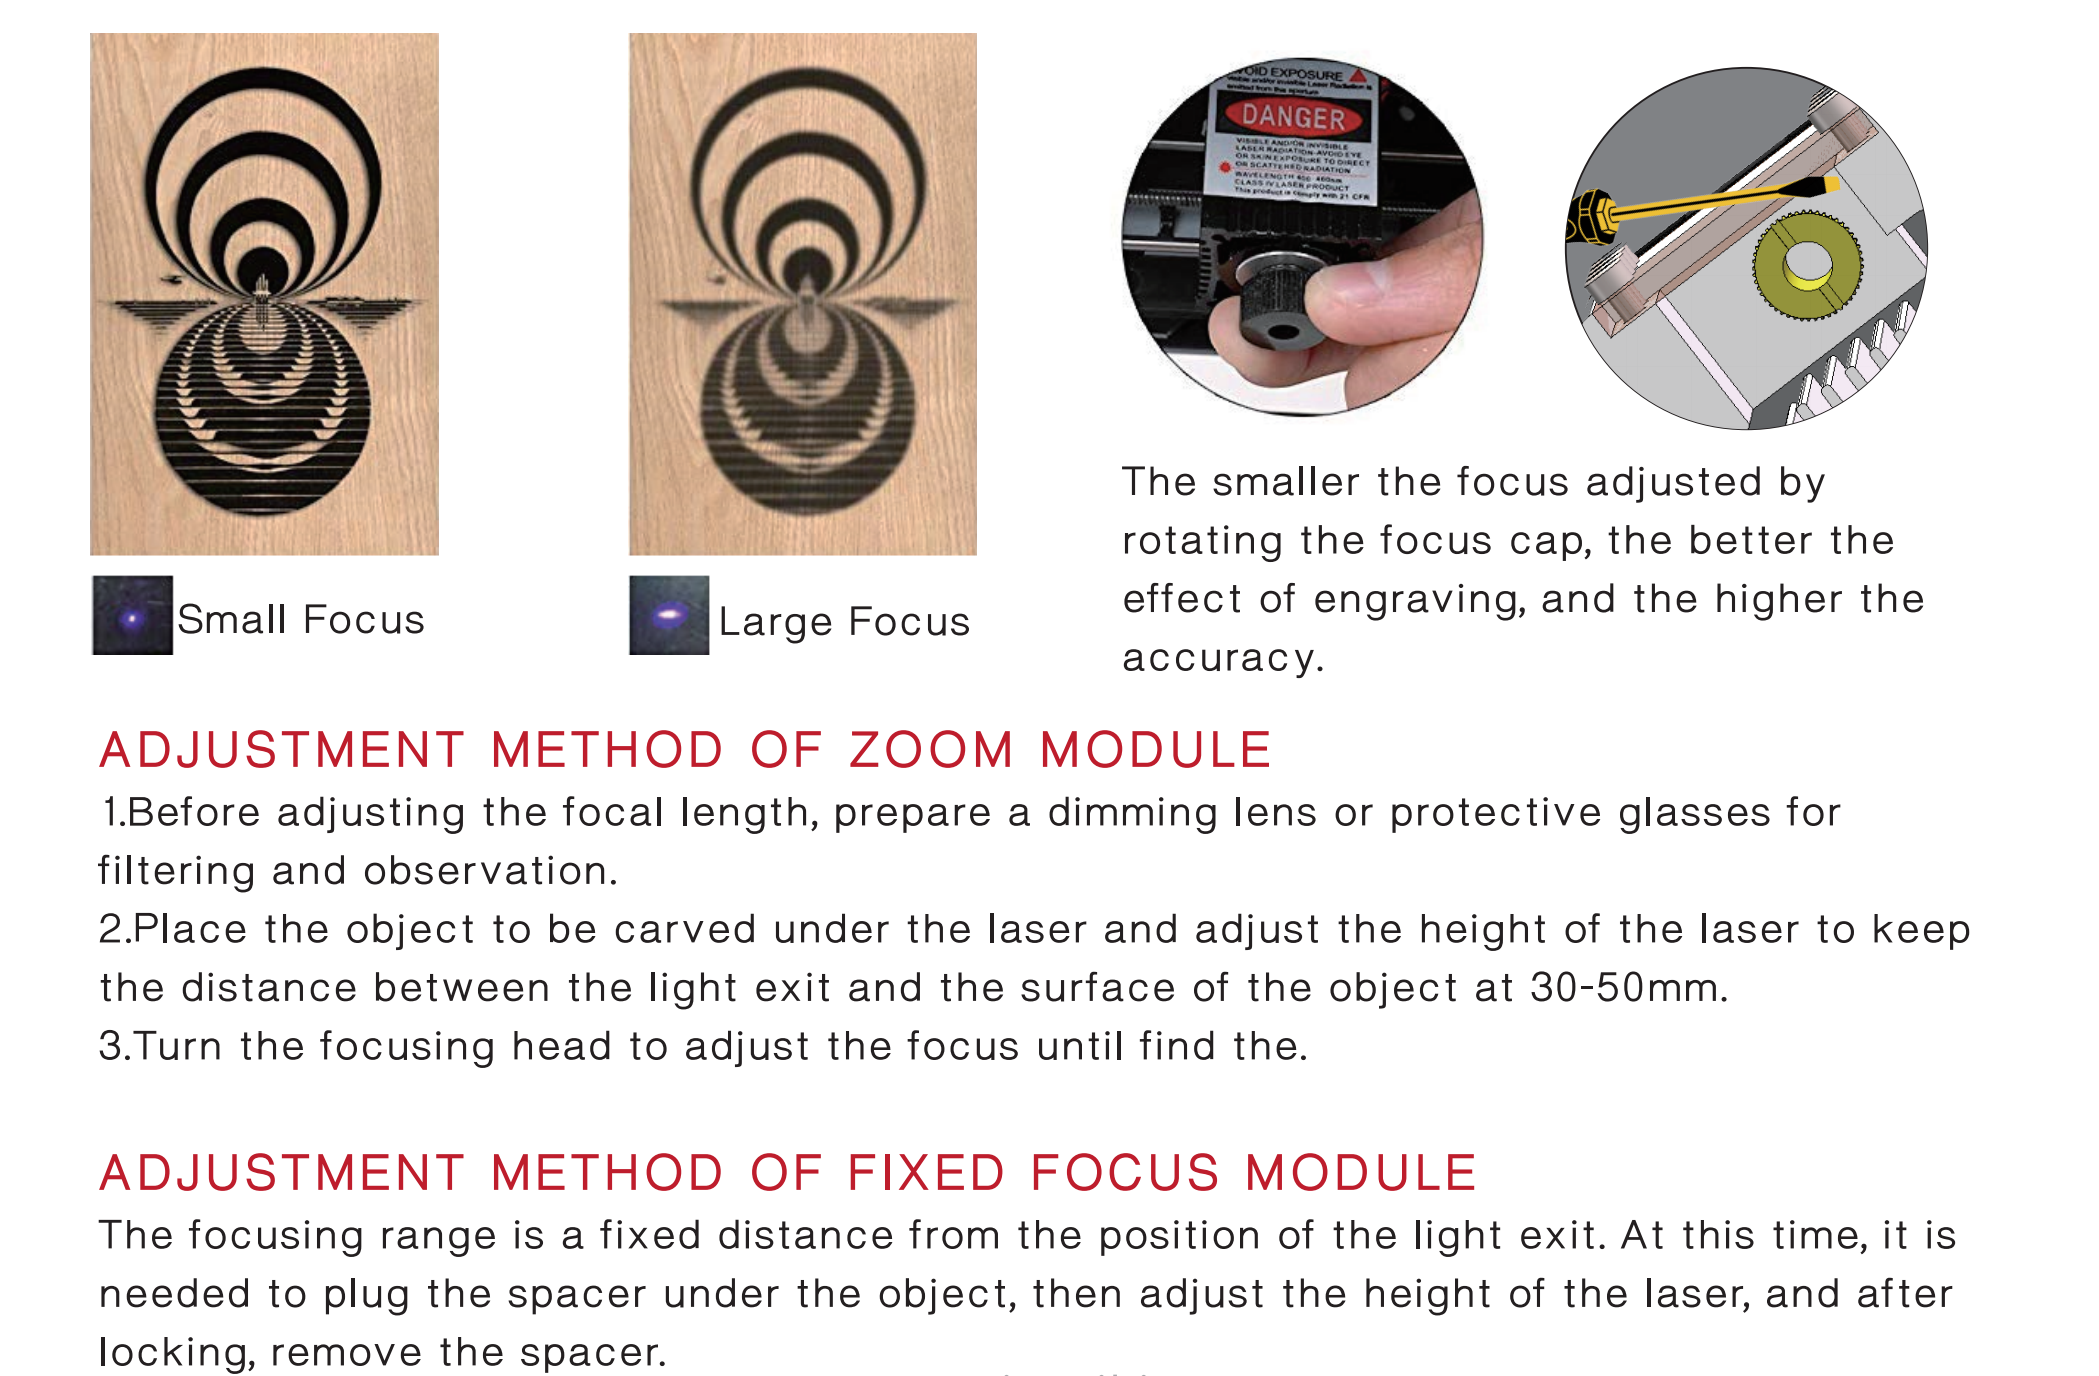
Install Air Assist
Air Assist Nozzles are only available for A40640 laser module, STL Download: 40640_3d.STL

-
STL and Gcode File Download: 40qz.STL , 40qz.gcode, This part is included in the NEJE 3 series machine kit or the module purchased separately;

-
Please make sure that the air outlet is aligned with the focus point;
-
Cutting MDF board requires 0.6-1.5mPa air pressure to efficiently clean the carbonized material. The MDF board needs high-pressure gas to assist in cutting. Ordinary oxygener cannot provide high-pressure gas.
-
The air-assisted module designed in the cavity, try to choose a clean origin, oily or unclean origin may be Causes the lens to be broken at high temperature;
-
A40640 modules and modules with similar external air sources shall work without air assistance, and the modules designed with the cavity must work under the conditions of increased air assistance, otherwise, it is easy to contaminate the lens and cause high-temperature rupture to it.
-
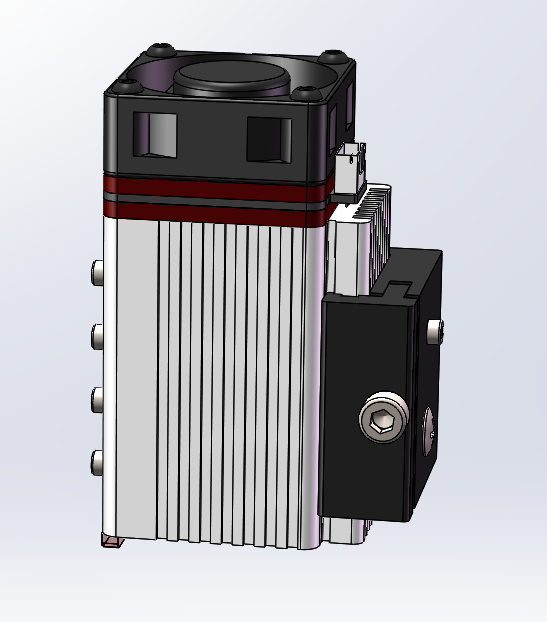
Specification
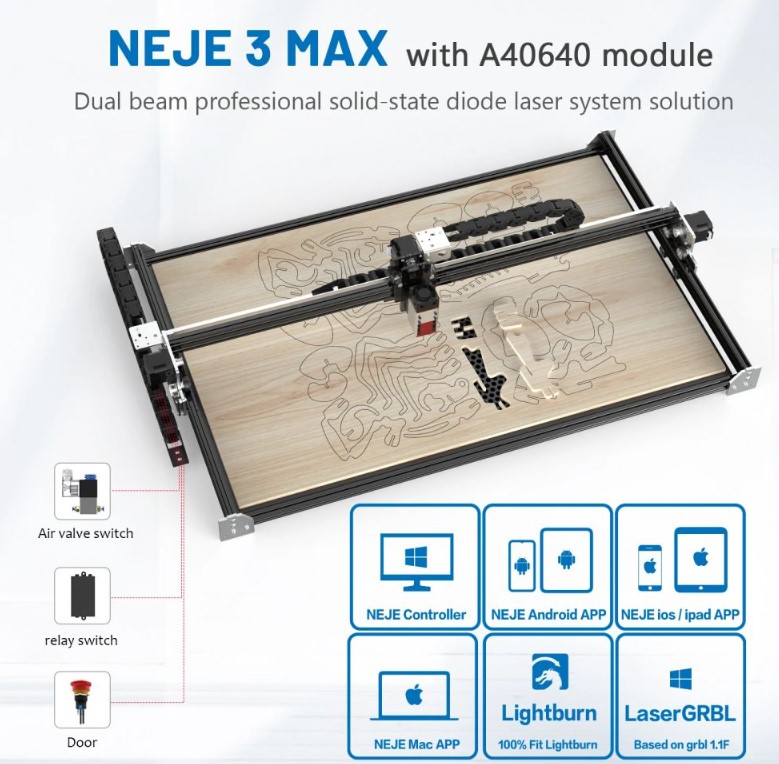
Radiator Size:	40 x 50 x 60 mm
Weight:	204g
Speed of the Fan:	10600RPM(Double ball bearing)
Interface:	PH2.0 4Pin
Drive Design:	Built-in
Input:	12V 4A +
Optical Power:	10W +
Wavelength:	450nm
Laser Class:	Class 4
Number of Diodes:	2
Light Source:	2 X LD + FAC Tech + C-Lens
PWM Input:	VPP(3.3-12V), Recomend 1KHz,
Quiet Design:	Drive the built-in control ic, judge the working state and adjust the fan work.
Max Cutting & Carving Depth:	20mm (The data is tested by NEJE users, and it needs to be done under more accurate focusing and adding correct and certain strength of air assist.)
Brushed Stainless Steel Carving:	Yes
Mirror Stainless Steel Carving:	Yes
Material Database
NOTE: The data below need to add air assist correctly (0.6-1.5mPA) with laserGRBL or lightburn; lightburn: 60mm/min=1mm/sec,S1000=100% Power (In lightburn, the unit is 60mm/s)
Interface

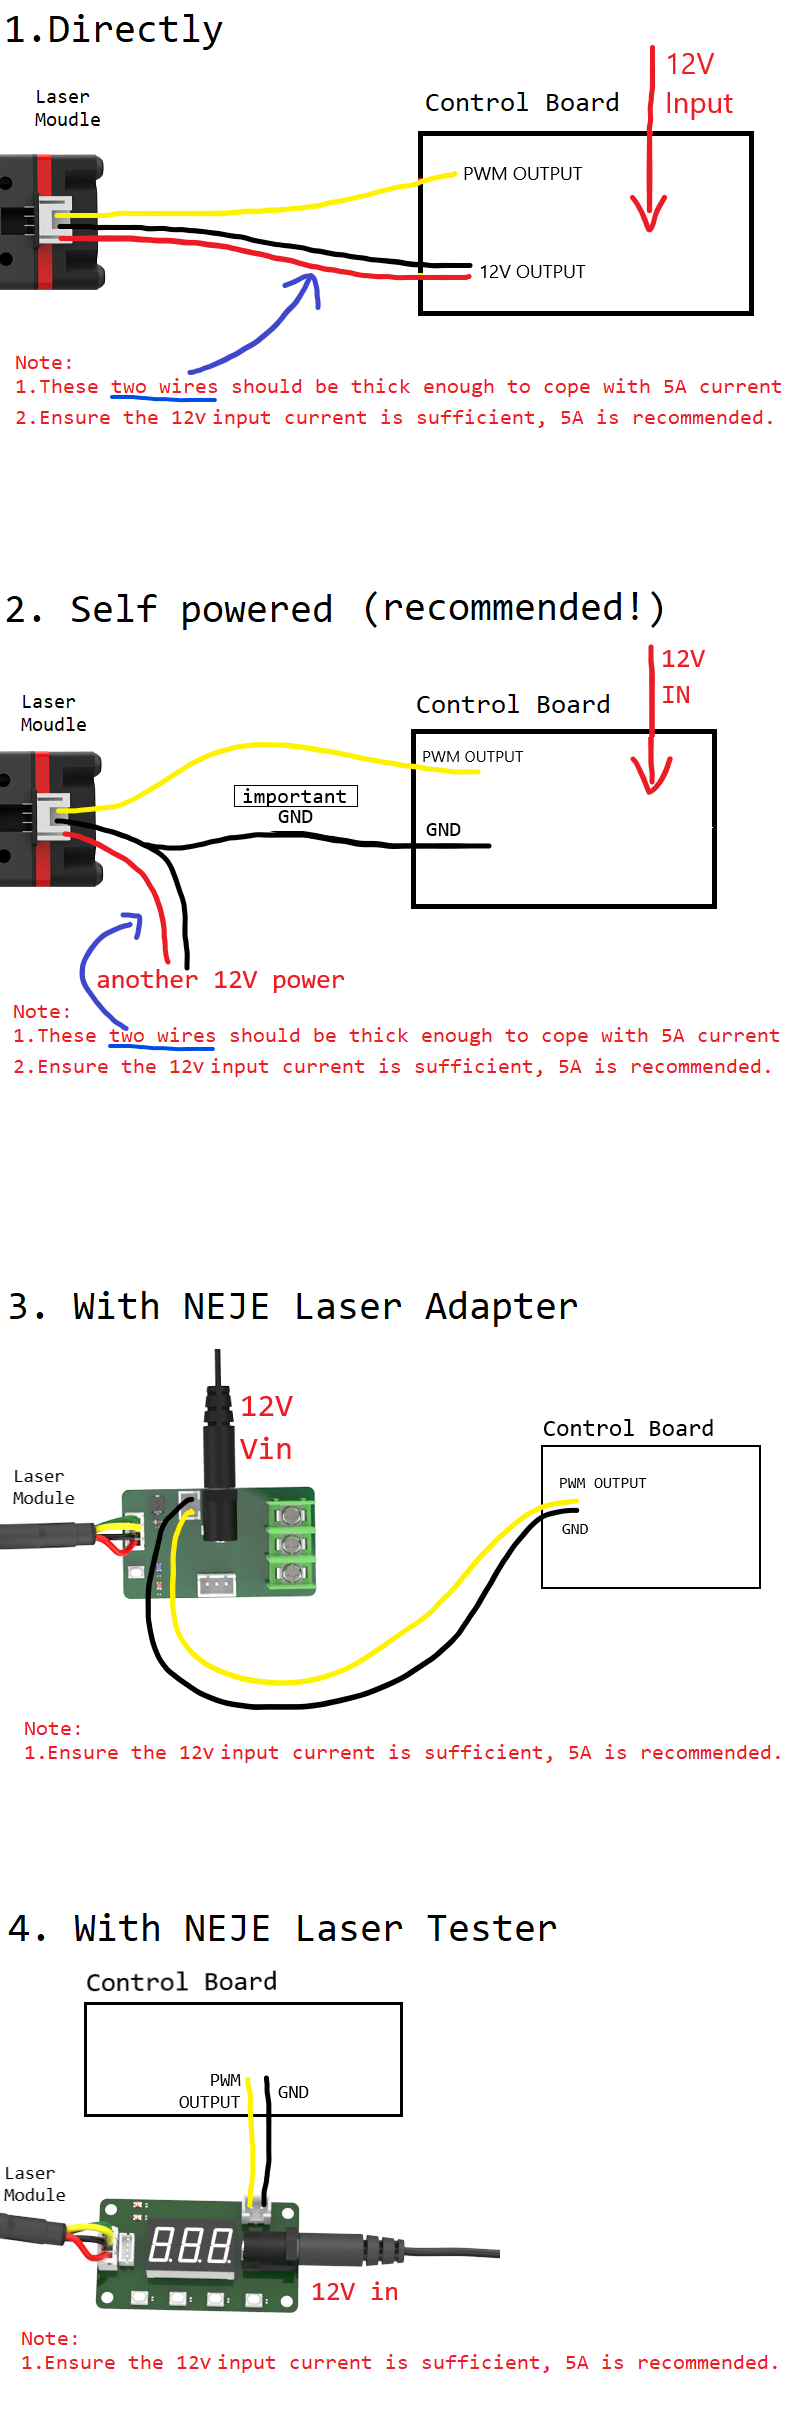
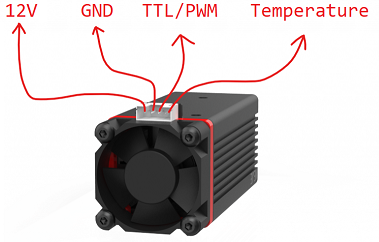
12V: Power positive.
GND: Power ground or power negative.
TTL/PWM: TTL = PWM, input 3.3V~12V to turn on laser module, connect to GND to turn off laser module.
Temperature: do not connect, please ignore.
Connect 12V and GND pin to 12V power, ensure the power adapter is sufficient, 5A is recommended.
Connect TTL/PWM pin to your control board PWM output pin.
NEJE A40640 Laser Module FAQ
The input power of the A40640 module is about 40W with a certified power supply of 12V4A or 12V5A UL. If the module is purchased separately, you need to ensure that your power supply is enough. For example, when the power supply is marked as 12V5A and when the power reaches 40W, the voltage will drop down to 9-10V. This type of power supply cannot provide enough voltage to the module, resulting in an insufficient release of the laser power.
2. How to test my laser module
First: distinguish your laser type
For analog-type laser module:
- Connect 12V and GND to your adapter, the fan should be on.
- Connect TTL/PWM to 12V(for test only), and the laser will on at full power.
For digital type laser module:
- Connect 12V and GND to your adapter, the fan should be on for 2seconds, and the red LED should blink about 7 times.
- Connect TTL/PWM to 12V(for test only), and the laser will be on at full power.
3. About PWM signal specification
How to set the laser module at 50% power?
The input PWM signal need follow conditions:PWM frequency: 0 ~ 20KHz
PWM Vpp: 2.5V ~12V(0~2V turn off, 2.5V~12V turn on, 2~2.5V unknow)
Drive current capability should > 1mA
Test your laser module and make sure your laser module is working properly.
Turn on PWM output at 100% at your control software.
Without laser, module connect, measure the voltage of your control board PWM output voltage by a multimeter(DC gear), and record it as V1.
Connect the laser module to your control board, measure the voltage of your control board PWM output by a multimeter(DC gear), and record it as V2.
If V1 is higher than 3.3V and V2 is lower than 2.5V, that means your control board drive’s current capability is too low, you may need to change another control board and try again.
How to measure PWM signal voltage?
Set your multimeter to the DC voltage gear. Connected the black probe to GND and the connect red probe to TTL / PWM. The display of the multimeter is your TTL / PWM voltage.
Does PWM frequency affect power output?
No, Only the PWM duty cycle determines the output power(make sure frequency is < 20KHz).
4. How to distinguish the laser modules
NEJE laser modules can be divided into three types:
- Analog type
- Digital type
- New digital type
How to distinguish them? by powering them up
- For analog type:
- the fan will always on
- with no red led on the inside control board
For digital type:
- the fan will turn on for 2 seconds when you power up your laser module.
- red led will blink 7 times when power up your laser module.
- the fan will turn off when the laser temperature is <37.
- red led will breathe when the laser module is idle.
- red led will be on constantly when the laser module is at work.
For new digital type:
- the fan will turn on for 1 second when you power up the laser module
- red led will blink 7 times when powered up your laser module, then off
- red led will ON when input PWM/TTL try turn on the laser
- red led will OFF when the laser module is idle
- the fan will turn off when the laser temperature is <37
- the fan will turn on when input PWM/TTL try turn on the laser
- the fan will turn on at full power when the laser temperature is >40
5. How to make laser module work with your control board
First: you need to know which pin is the PWM output pin of your control board
There are many kinds of control boards on the market. We can’t test each of them. But there is still a trick to figuring out how to connect. The following methods may be faulty. Please consult your control board vendor for details in advance.
Generally, the PWM output pin will have a PWM mark, TTL mark, or LASER mark nearby.
On Arduino, For Grbl v0.8 and v0.9+ with variable spindle disabled, PWM output is D12.
On Arduino, For Grbl v0.9 and v1.1+ default builds, the PWM output is D11.
For MakerBase MKS DLC v2.1:

Note for MakeBase MKS DLC with NEJE Laser Adapter: The TTL line of the attached 2p is opposite to the polarity of the makebase TTL, and two lines need to be exchanged before putting it into use. .
For CNC SHIELD v3.0: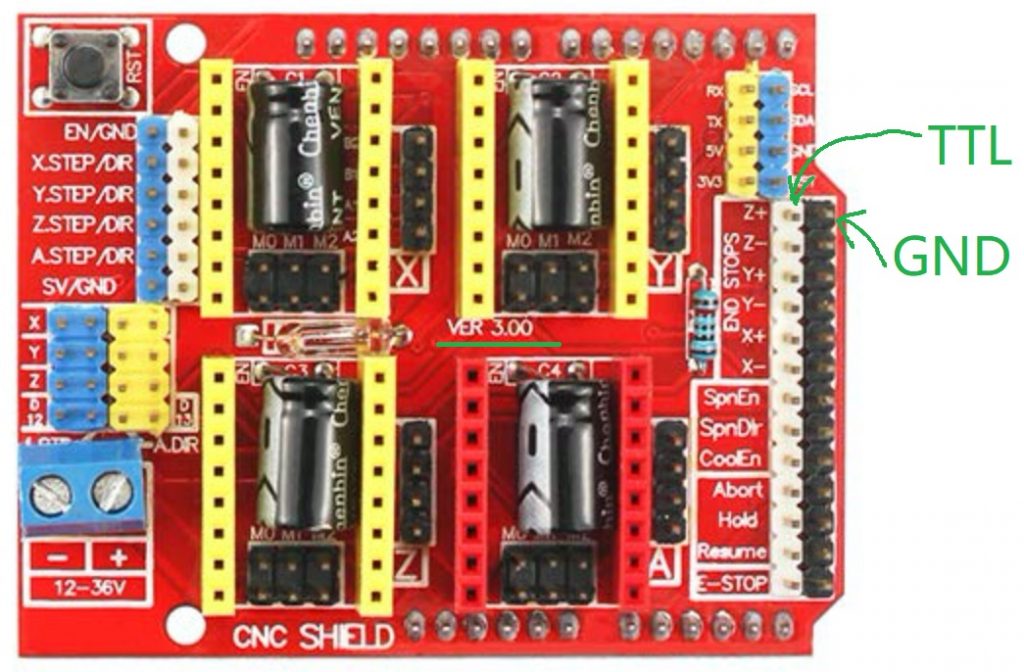
Second: Connect the laser module to your control board.
4 ways to connect the laser module to your control board: