Attention
- Please strictly follow the standard operation when installation.
- Please put the printer away from the reach of kids.
- Must be guided by adults when children are installed or used.
- Take care when installing, to avoid electrical shock hazards.
- The hotbed has a high temperature even the printer stops working.
- Please keep well-ventilated condition! May produce toxic gases when the printer is working.
Parts List

- Bottom Assembly
- Top Assembly
- Controller Assembly
- Hot End Assembly
- Control Panel
- Left Z Carrier Assembly
- Right Z Carrier Assembly
- Hotbed
- Hotbed Bracket
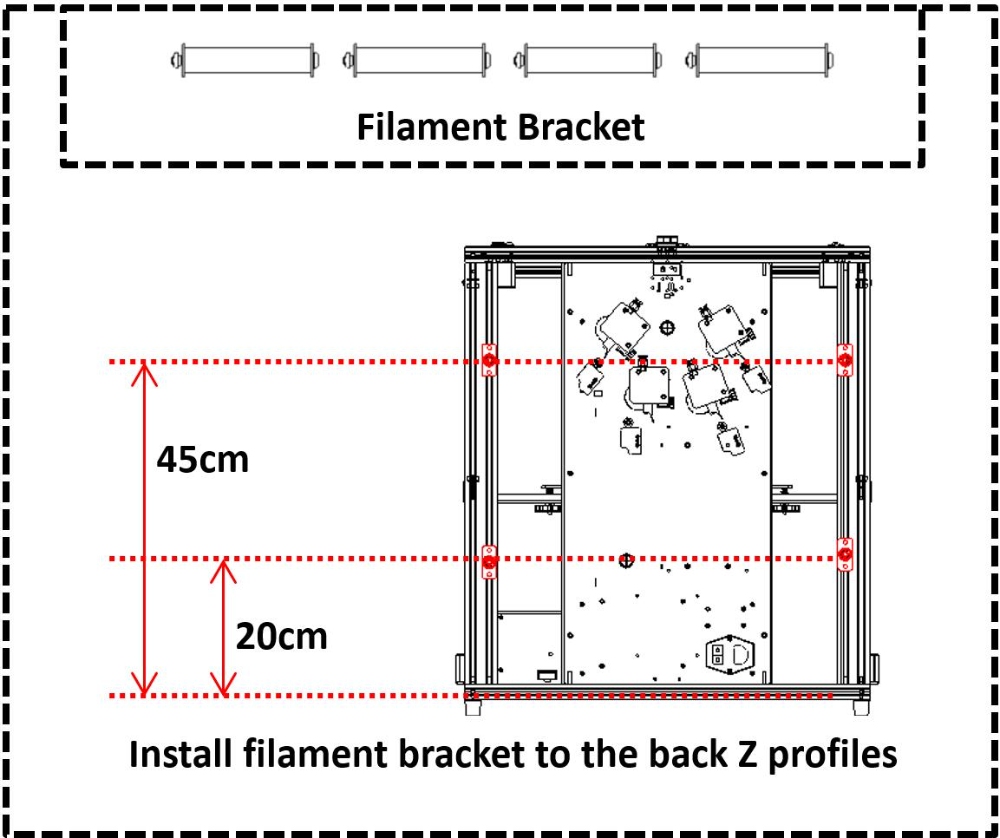
- Filament Bracket
- Magnetic Hotbed Sticker
- Hotbed Screws/Nuts
- Z-axis Profile
- Others (screws, tools, cable tie, SD card, spare parts, etc.)
Before Installation
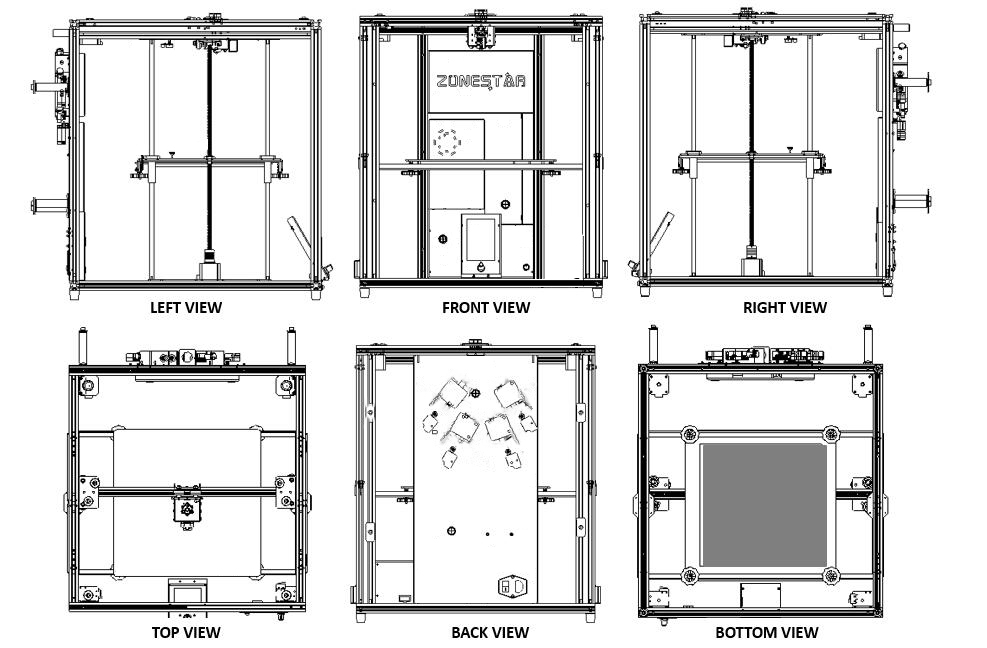
Machine view (after installed)
Installation direction

Pay attention to distinguishing the front and back of the top and bottom assembly.

Pay attention to distinguishing the left Z carrier assembly and the right Z carrier assembly.
Assembly
Install Z profiles
Install 4 Z Profiles to the bottom assembly. Note that there is a hole on one of the sides of the Z profile, this side should be toward the upper. There is a hole next to the rubber foot pad of the bottom assembly, which is used to fix the Z-axis profile. Mount M5x22 screws from the bottom profiles upwards and secure to the Z profile.

Pay attention to the hole on the Z profiles, it should be put on the top and outside.
Install Left & Right Z carriers
Install Left & Right Z carriers to the bottom assembly. Note that the side with a Z limit switch of the Z carrier should be towards the back of the machine. Mount M4x18 screws from the bottom profile upwards and secure to the sheet metal of the Z carrier.

Pay attention to distinguishing the Left Z carrier assembly and the Right Z carrier assembly.
Install top assembly
Place the top assembly (the side with motors on the back) on the Z-axis profiles, note that the screw cap of the Z carriers should be placed in the groove of the profile of the top assembly. Two sides are fixed to the sheet metal of the Z carriers by using M4x36 long screws, use 4 PCS M5x22 screws to fix the top assembly and the Z-axis profiles, and use other 4 PCS M5x22 screws to fix the side of the Z profiles and the Y-axis profiles.
Don’t tighten these screws in this step.

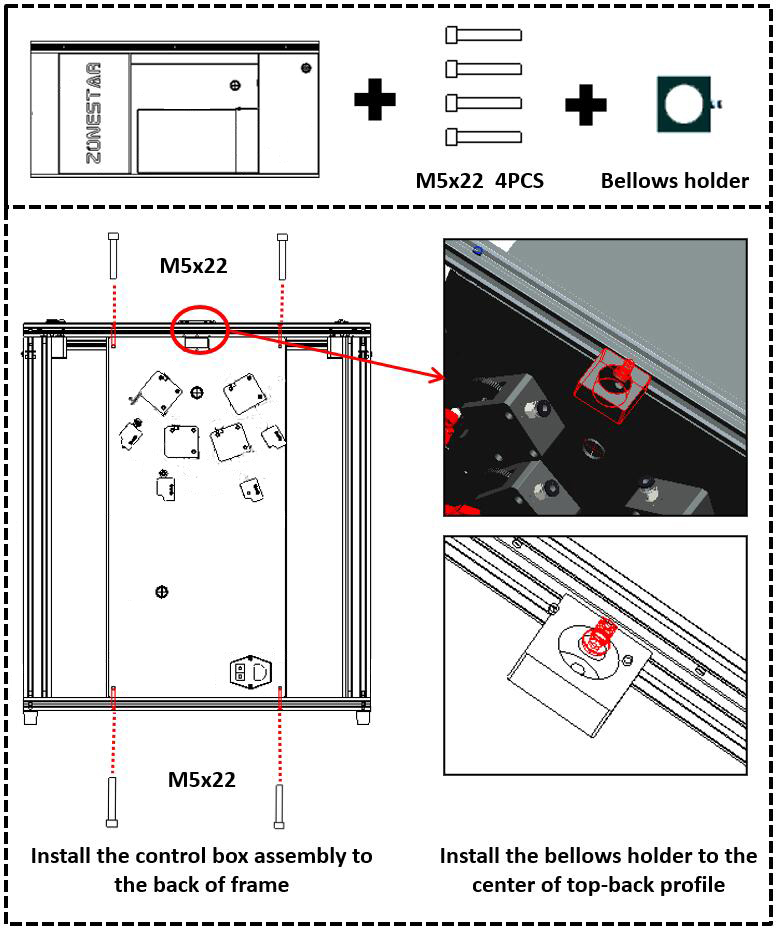
Install controller assembly
- Put the control box assembly between the top assembly and the top assembly of the back of the machine, and use 4 PCS M5x22 screws to fix it on the profiles.
- Tighten all those screws installed in step 3.
- Install the bellows holder to the center of the top-back profile.
Adjust the eccentric columns
- Adjust the eccentric columns (2 PCS on the left and 2 PCS on the right) under the Y carrier, and move the Y profile from front and back, ensuring it can move smoothly and doesn’t shake.
- Adjust the eccentric column under the X carriers, and move the X carriers from left and right, ensuring it can move smoothly and doesn’t shake.

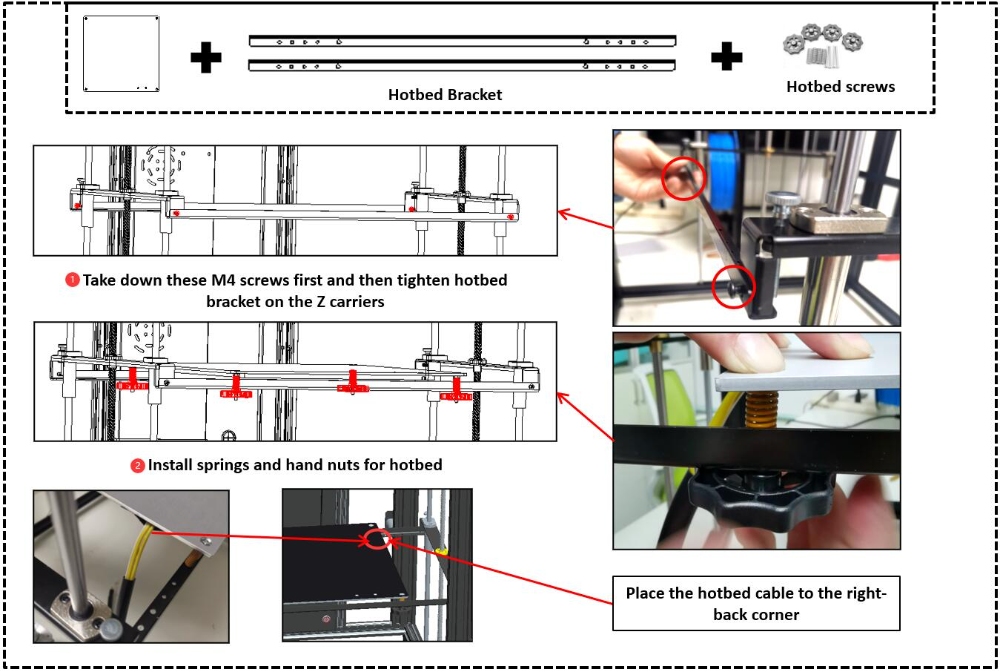
Install hot bed parts
- Take down these M4 screws first on the Z carrier’s metal pieces and then use these M4 screws to mount hot bed brackets on the Z carriers,
- Install the aluminum heat bed to the hotbed brackets, the springs should be placed between the heat bed and the bracket, and install the hand nuts under the brackets.
Note that the hotbed cable should be placed in the right-back corner of the machine.
Install control panel
Install the control panel to the center of the bottom-front profile.

Install filament holders
Install 4 sets of filament brackets to the back Z profiles.
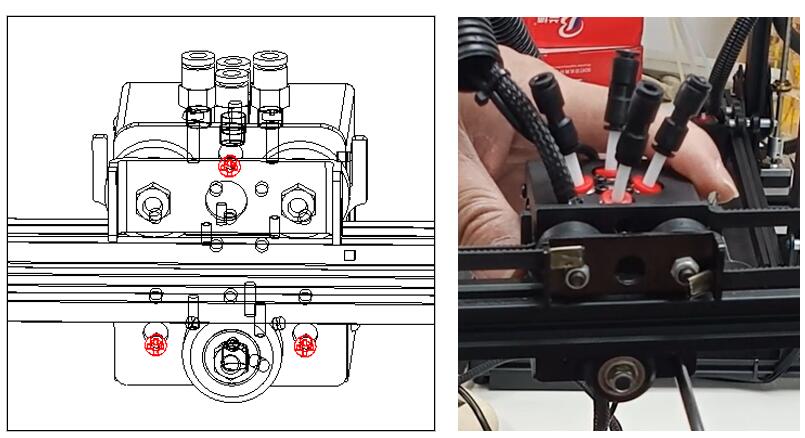
Install hot-end assembly
Loosen the 3 pcs of screws on the hot end assembly and then mount the hot end assembly to the X carrier.
Past the heat bed sticker
Place the “A side” of the magnetic hotbed sticker (that with PC film) on the hot bed (B side has already been pasted on the heat bed).

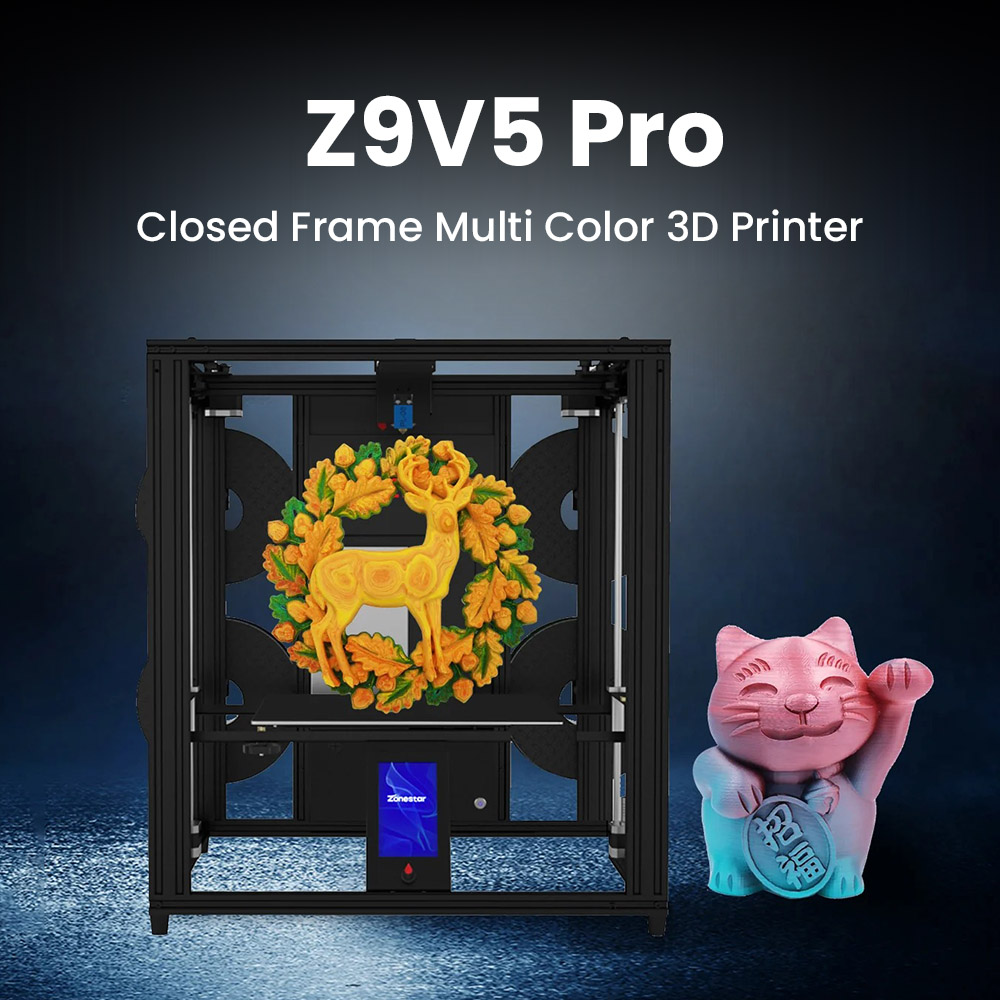
Zonestar Z9V5MK6 4 Extruders 3D Printer


