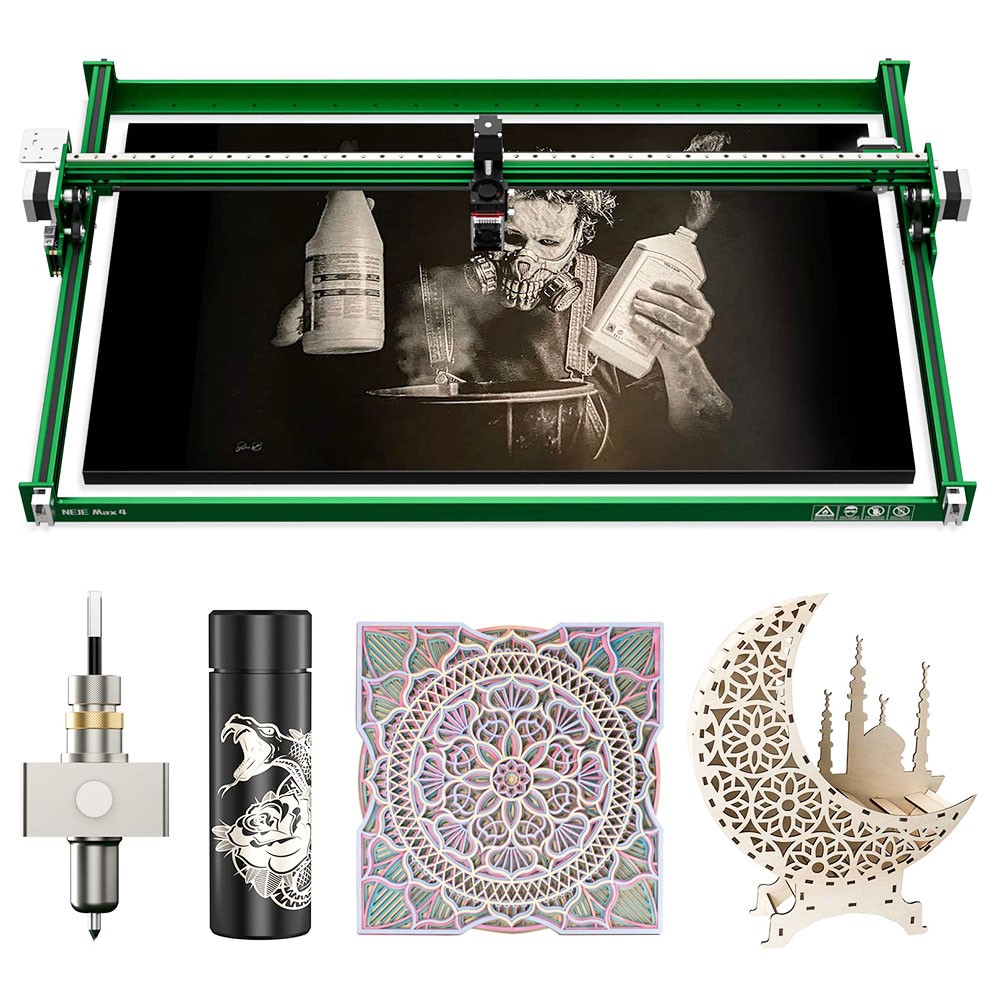
The latest laser engraver, NEJE Max 4, has improved in many aspects, such as 750*460mm large engraving area, high-performance laser module configuration, wireless offline of LighBurn work files, diamond tool cutting linear track, 0.001mm repeat positioning accuracy, support vertical work and so on. In order to help you better use the NEJE Max 4 laser engraving and cutting machine, this article will introduce the tutorial in detail for you.
Structural Install
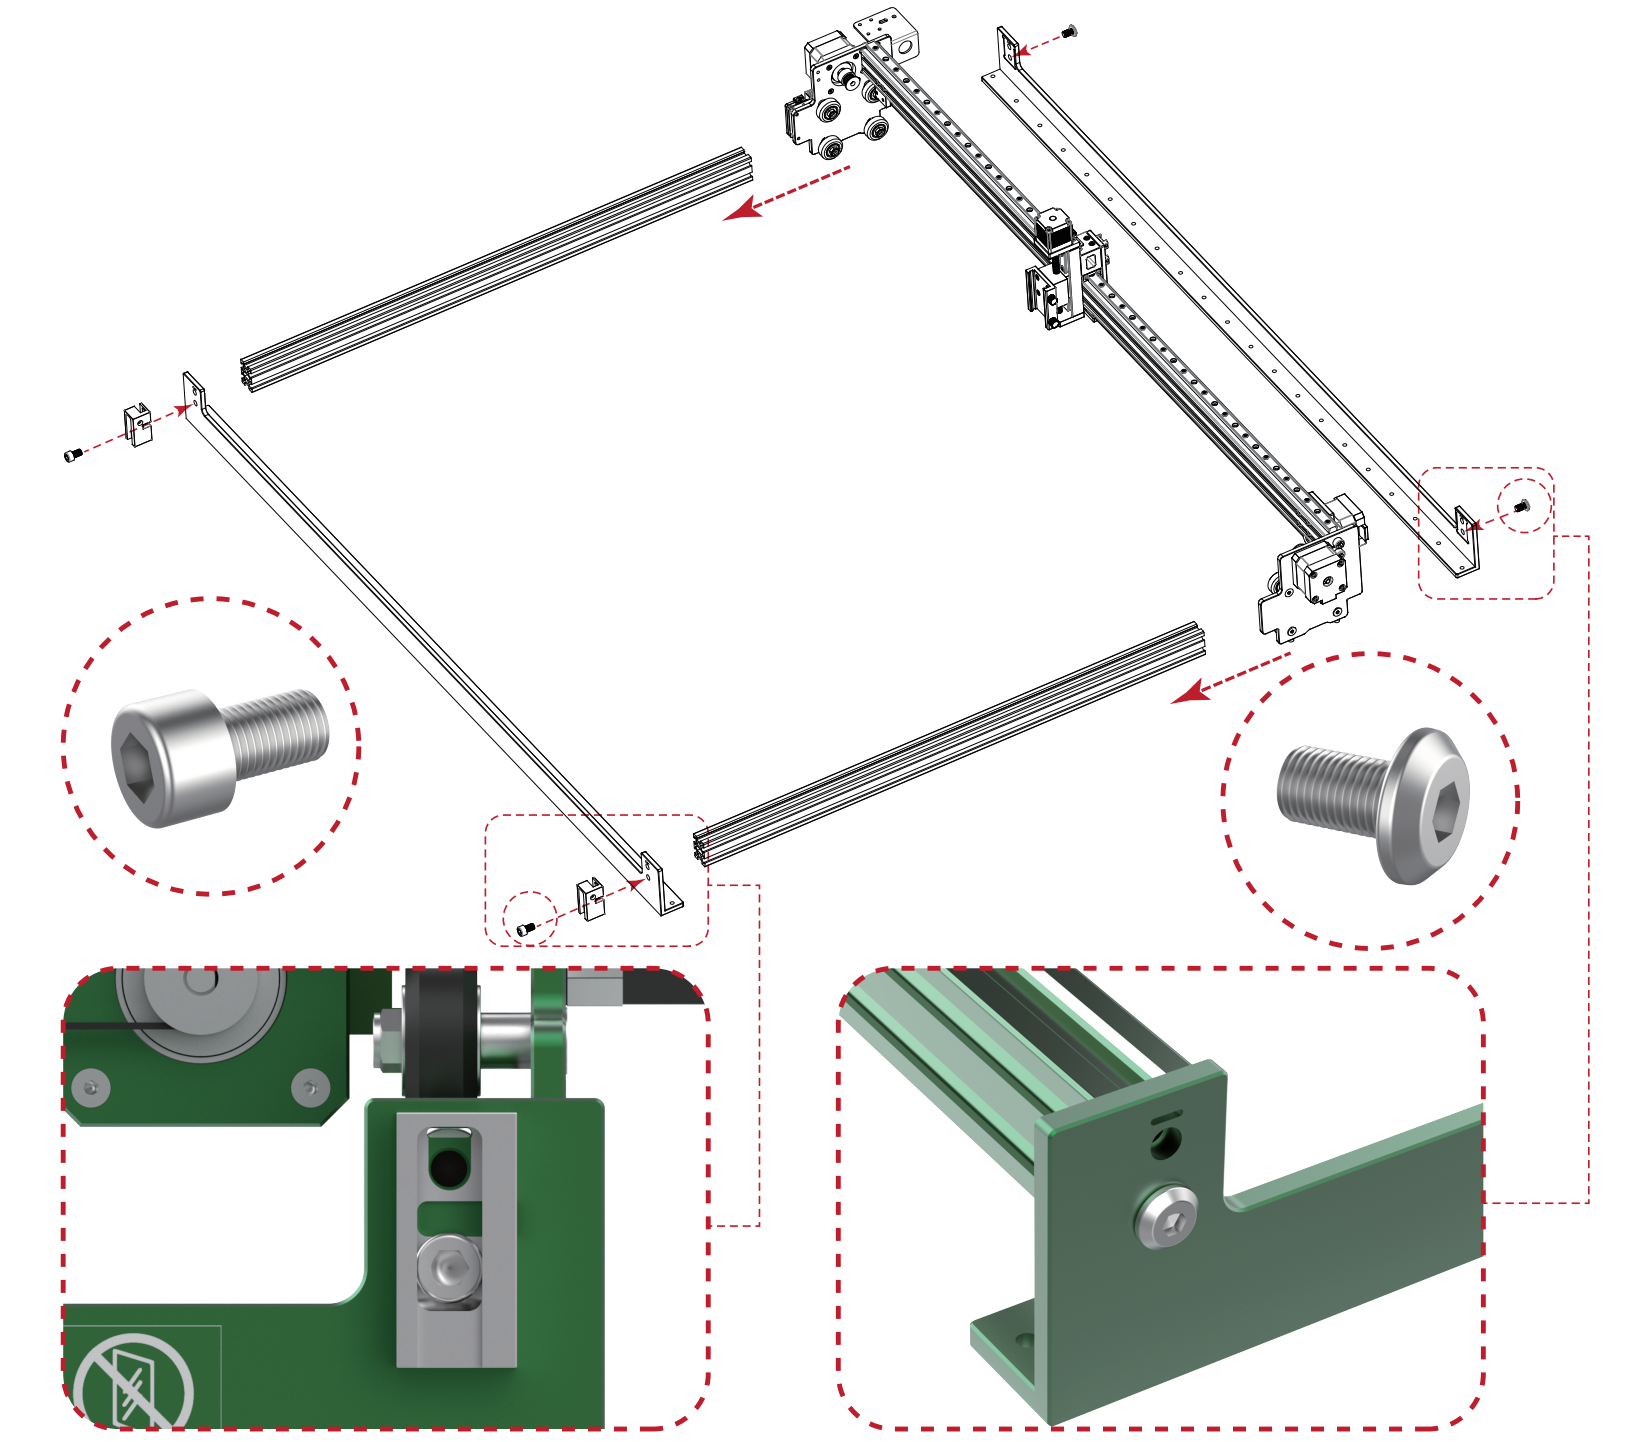
STEP 1: FRAME INSTALLATION
The belt adjuster can also not be installed, the actual error range is very small, just install 8 M6x10 screws directly.
STEP 2: BELT INSTALLATION
If you don’t plan to install the belt adjuster at the beginning, you can reserve a piece of timing belt for later installation of the belt adjuster.
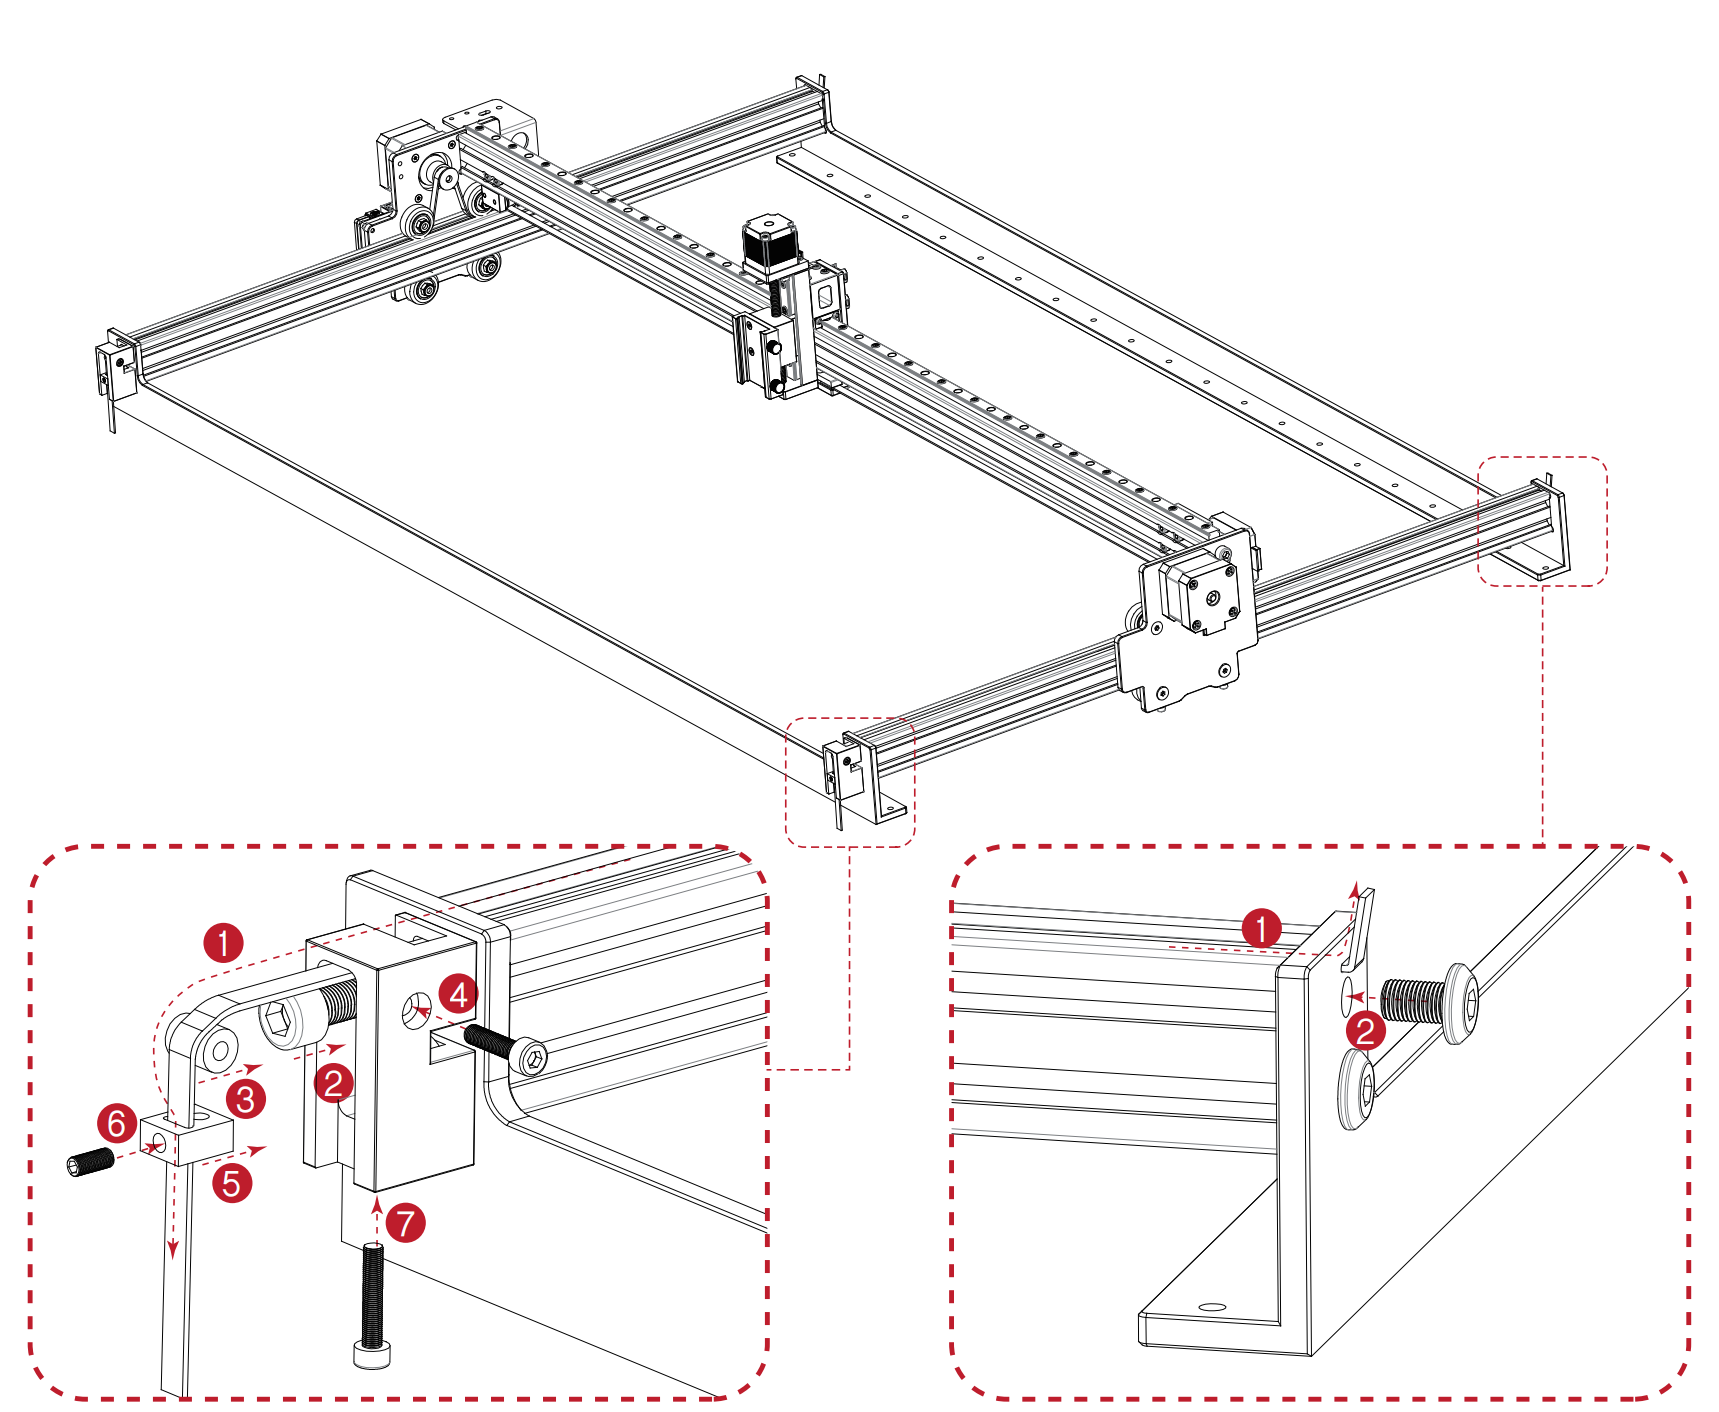
STEP 3: ADJUST
The default has been adjusted, do not adjust too tight, should reduce friction as much as possible.
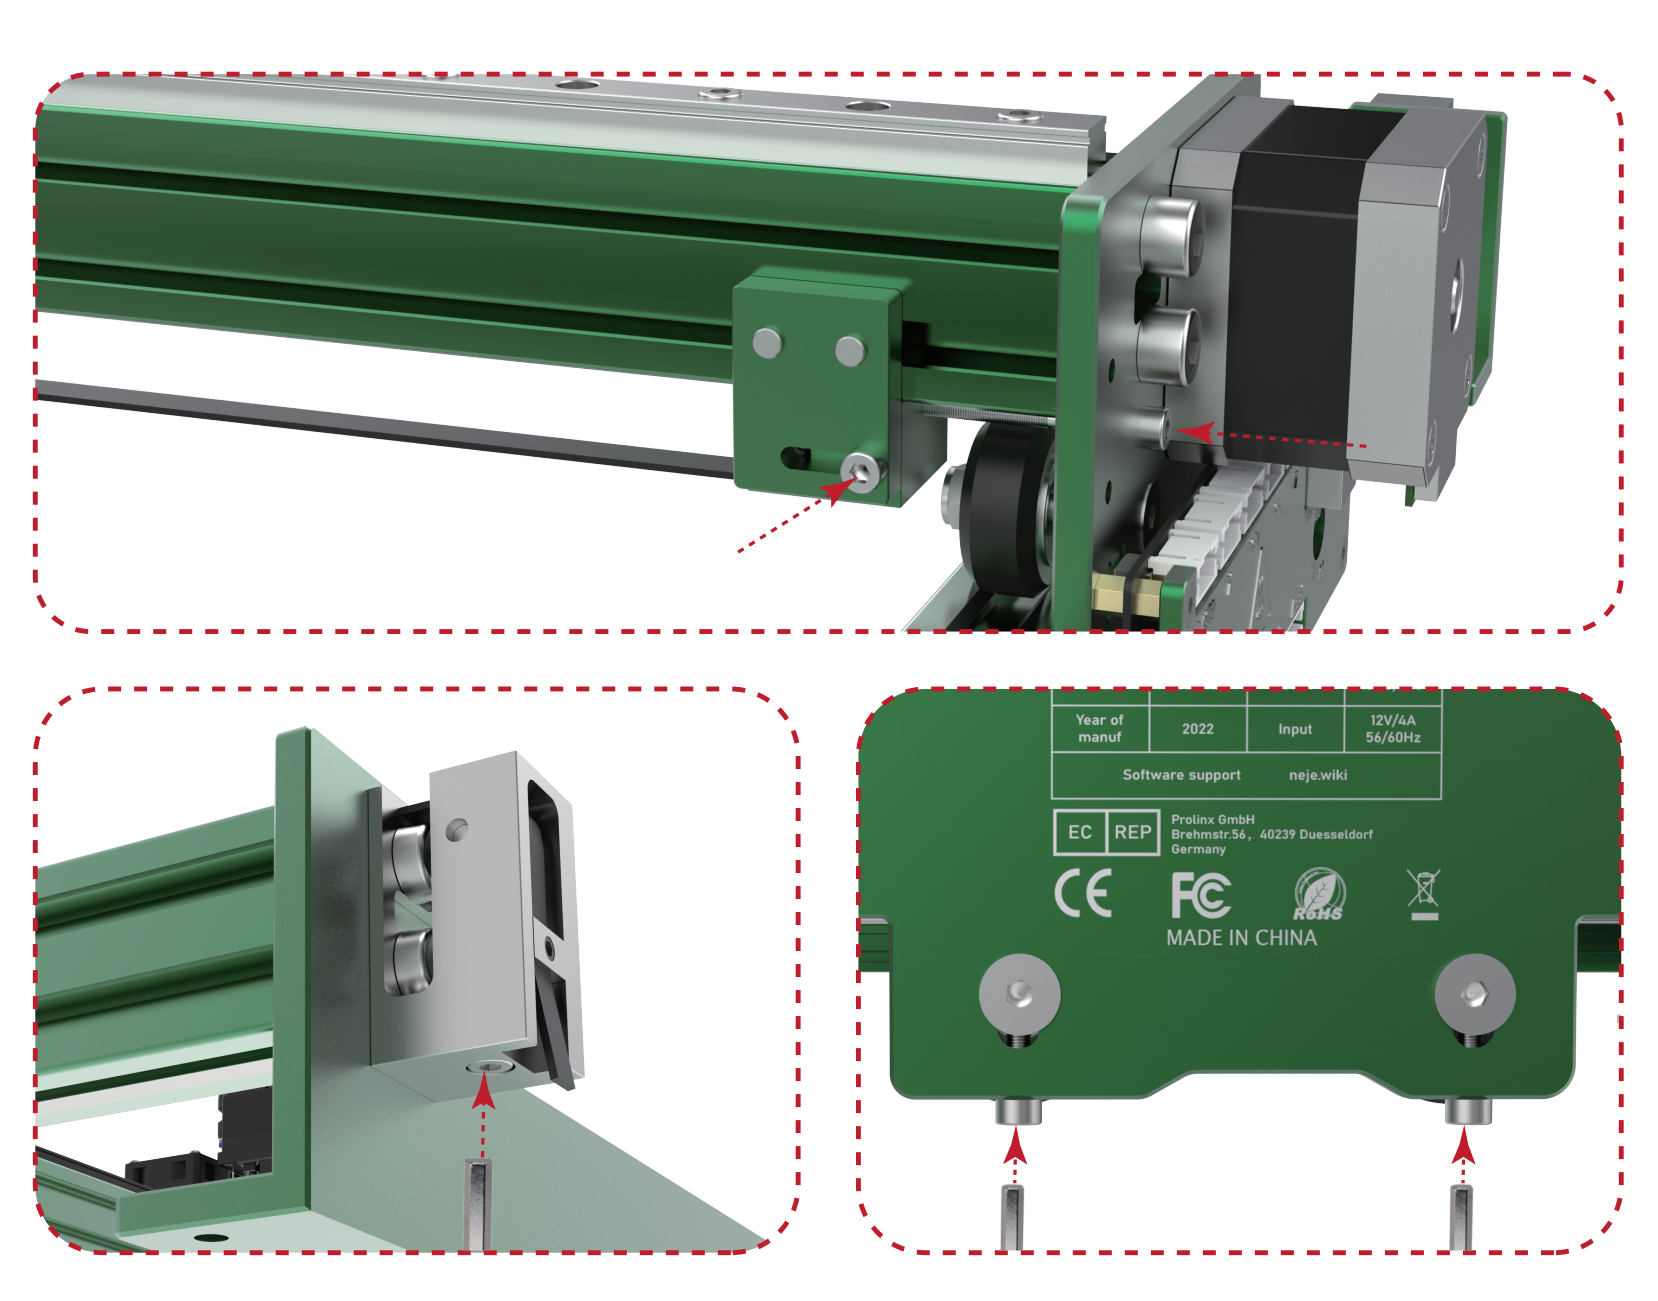
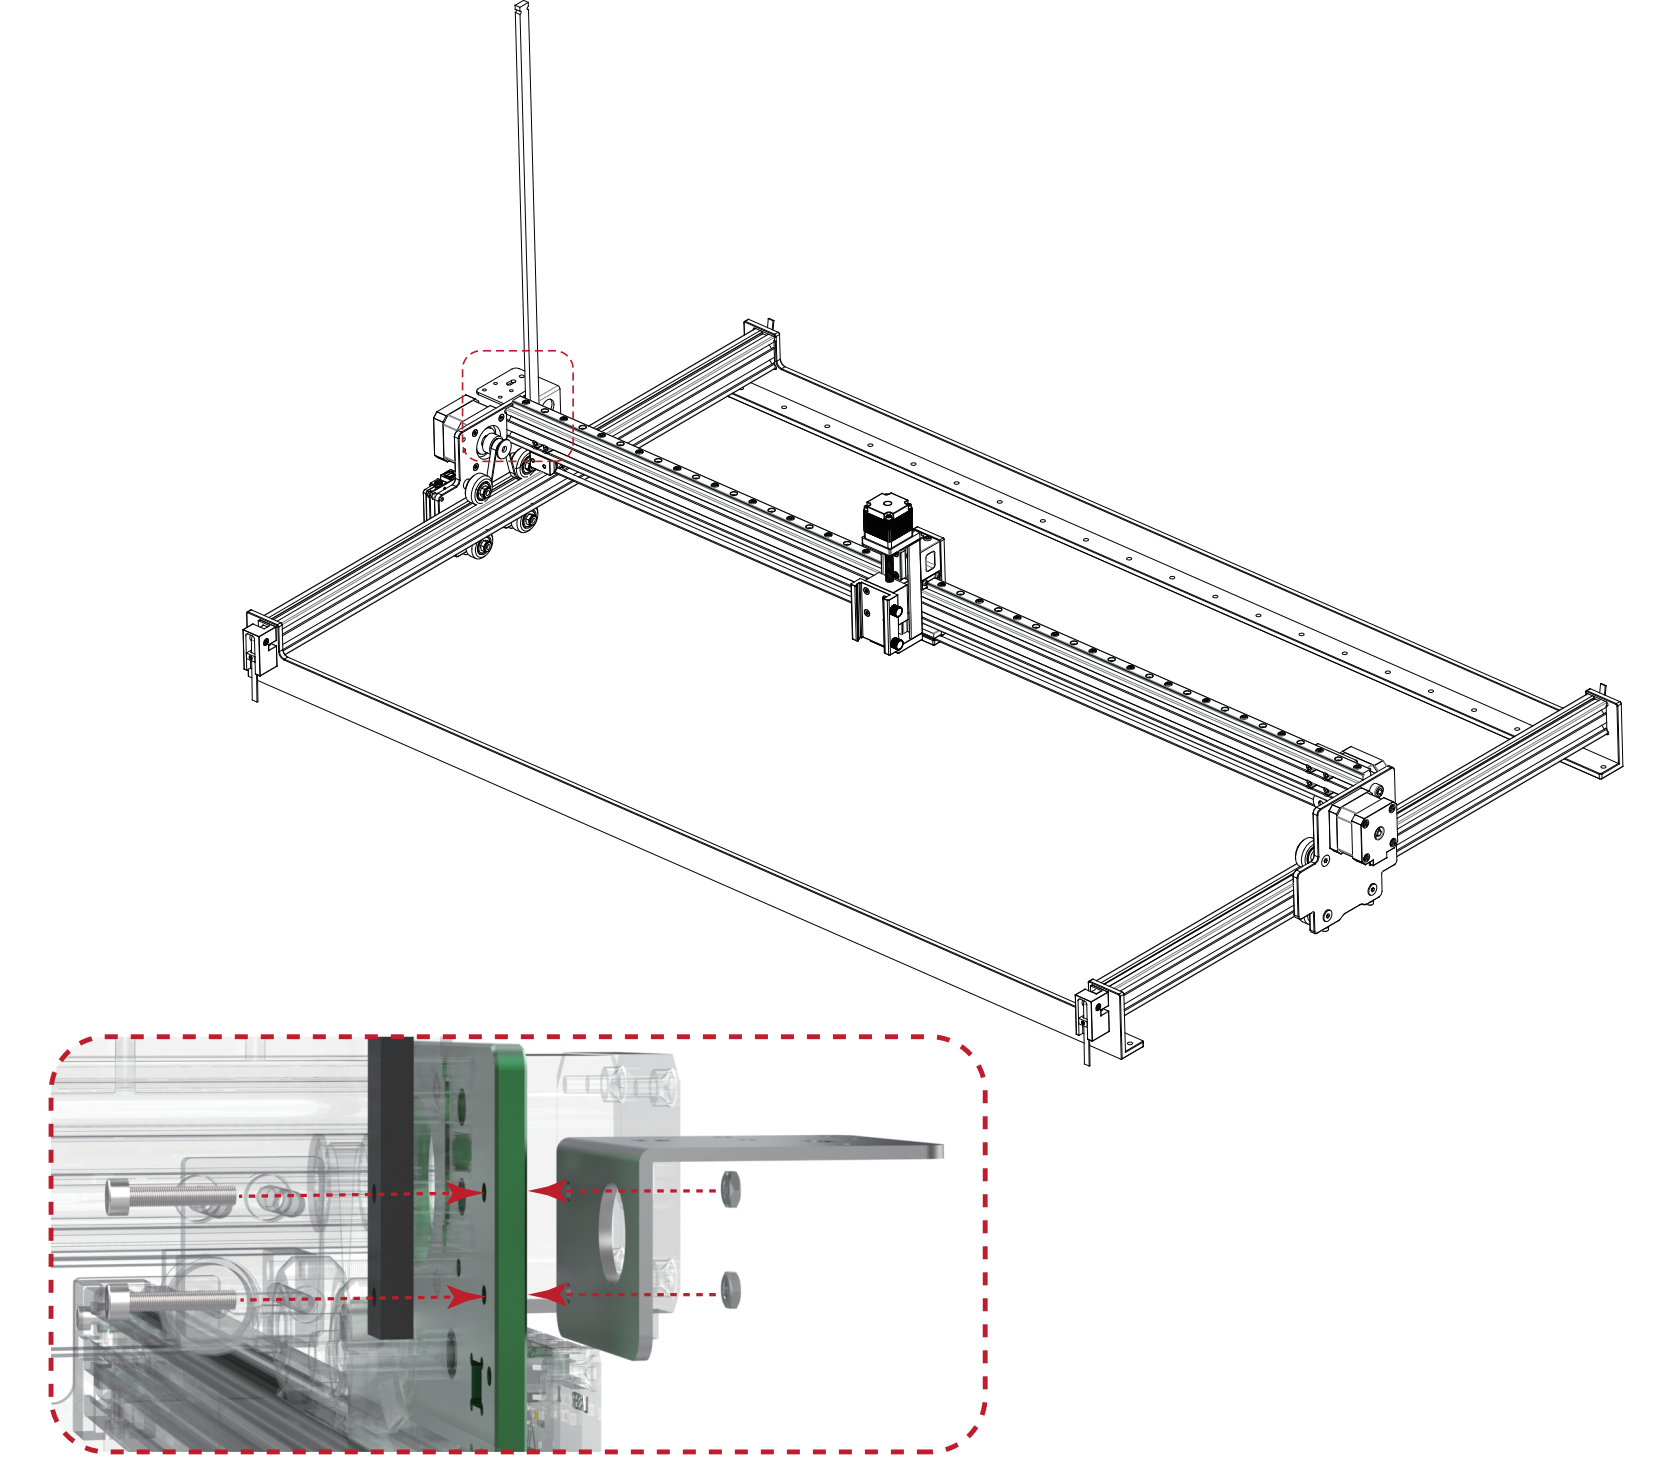
STEP 4: INSTALL SUPPORT STRIPS AND CORNER CODES
The elastic support strip can play the role of supporting the cable. Currently, it is installed by default and can be ignored.
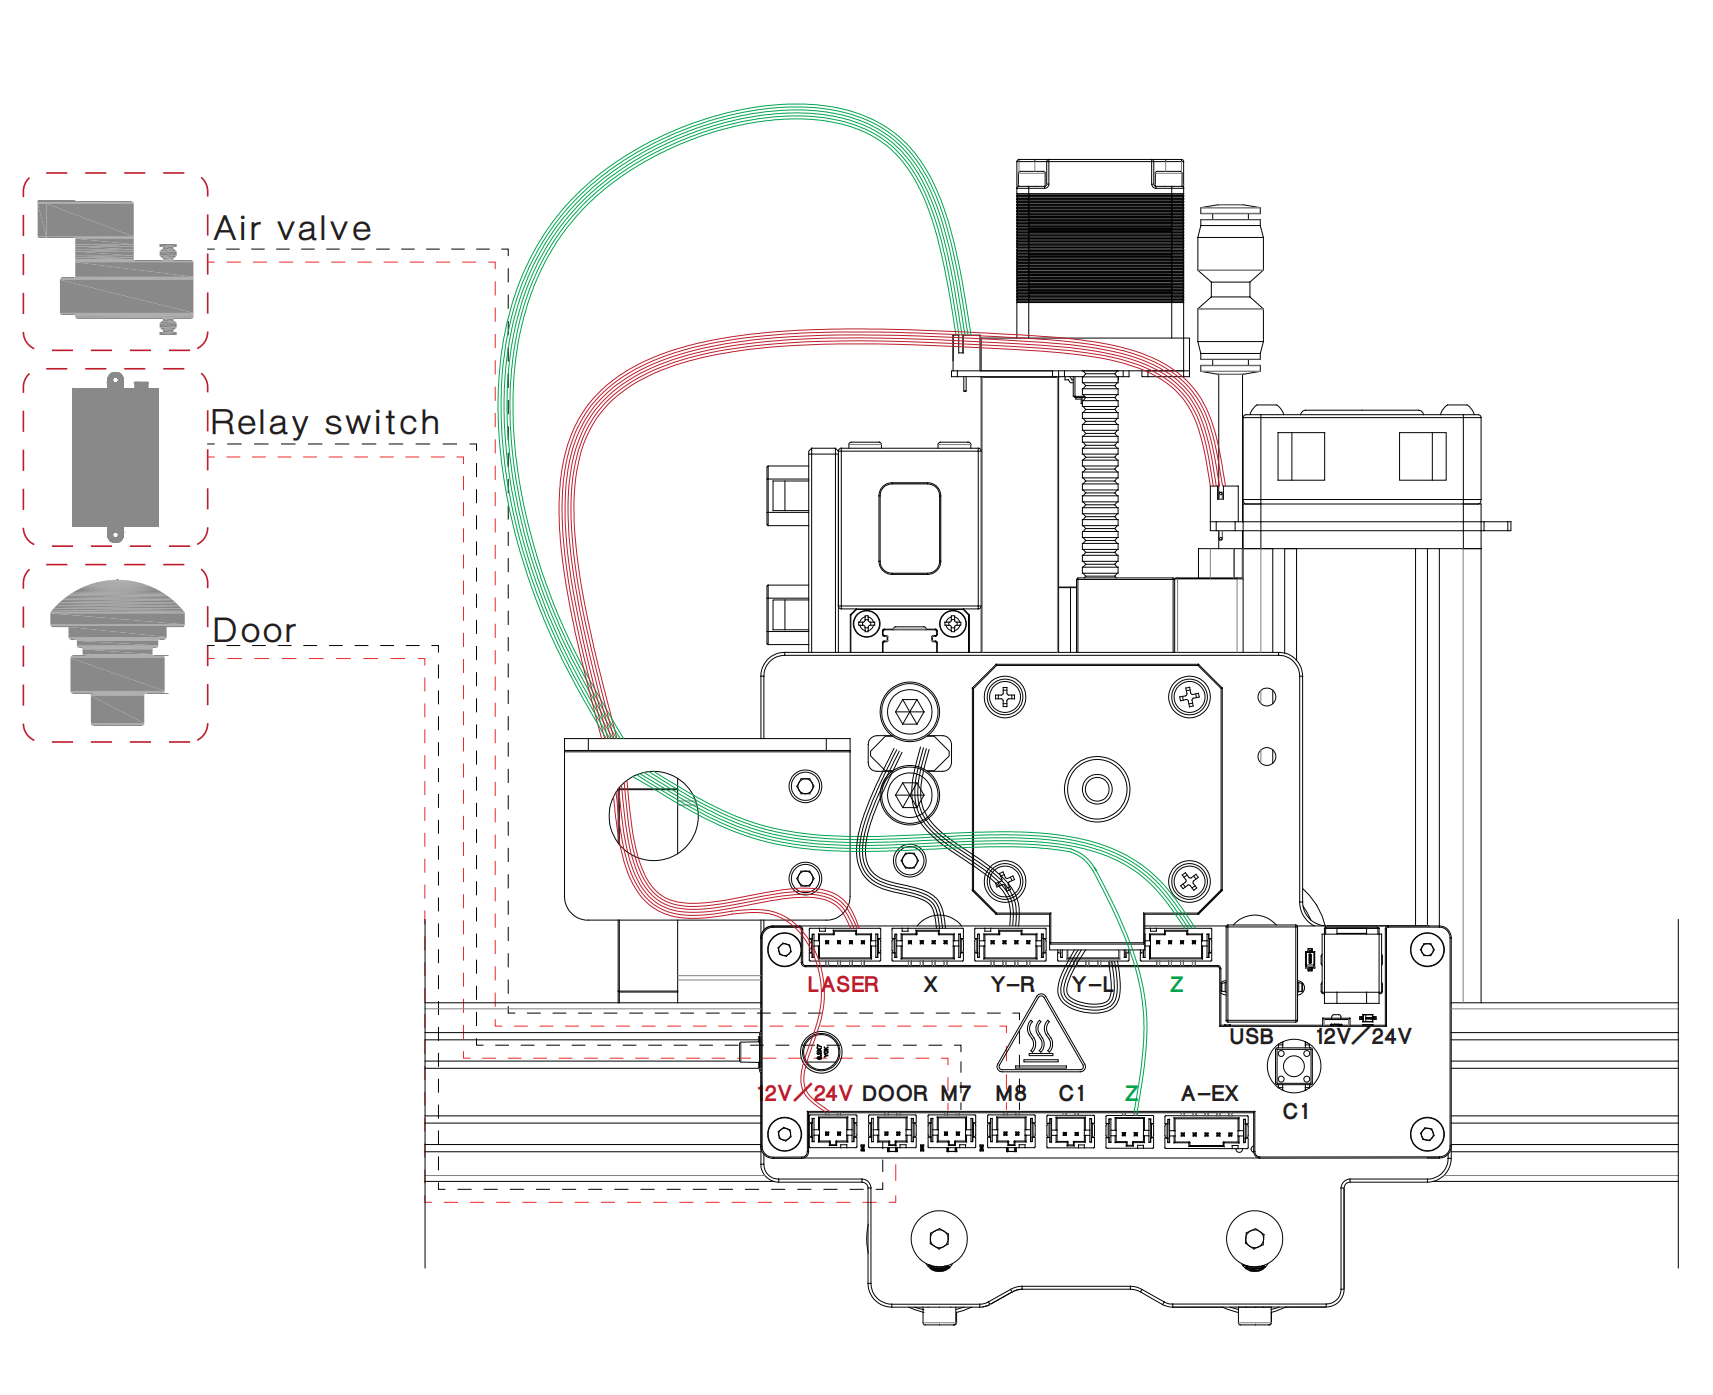
(CONNECTION DESCRIPTION)
A-axis expansion requires the installation of the A-axis adjustable current drive module provided by NEJE. NEJE provides a rotary module with an adjustable current. You can also use the Z-axis or Y-axis as the rotary axis.
M8 and M7 interfaces can be used to expand the automatic air assist and automatic smoke exhaust system, and the Door interface can expand functions such as emergency stop, safety door, and flame detection. Considering that most users do not need professional expansion functions, NEJE Max 4 temporarily canceled Automatic solenoid gas valve and relay module configurations. If you need to modify NEJE Max 4, it can be compatible with NEJE 3 Max accessories. The 12V relay module can also work on a 24V platform. The solenoid valve needs to be adapted according to the input voltage, and the 12V solenoid valve cannot be used for 24V input, otherwise, the motherboard may be damaged due to overpowering.
Safety Attention
Please do not leave the equipment when the equipment is working, the long-term stay may cause the material to burn!
Please wear protective glasses before the operation!
Please do not touch the laser outlet with your hands. It may burn your hands!
Please avoid a strong impact on the machine!
Children under 14 years of age are prohibited from using this product!
Children over 14 years of age need adult supervision when using this product!
Avoid accidental touch by pets!
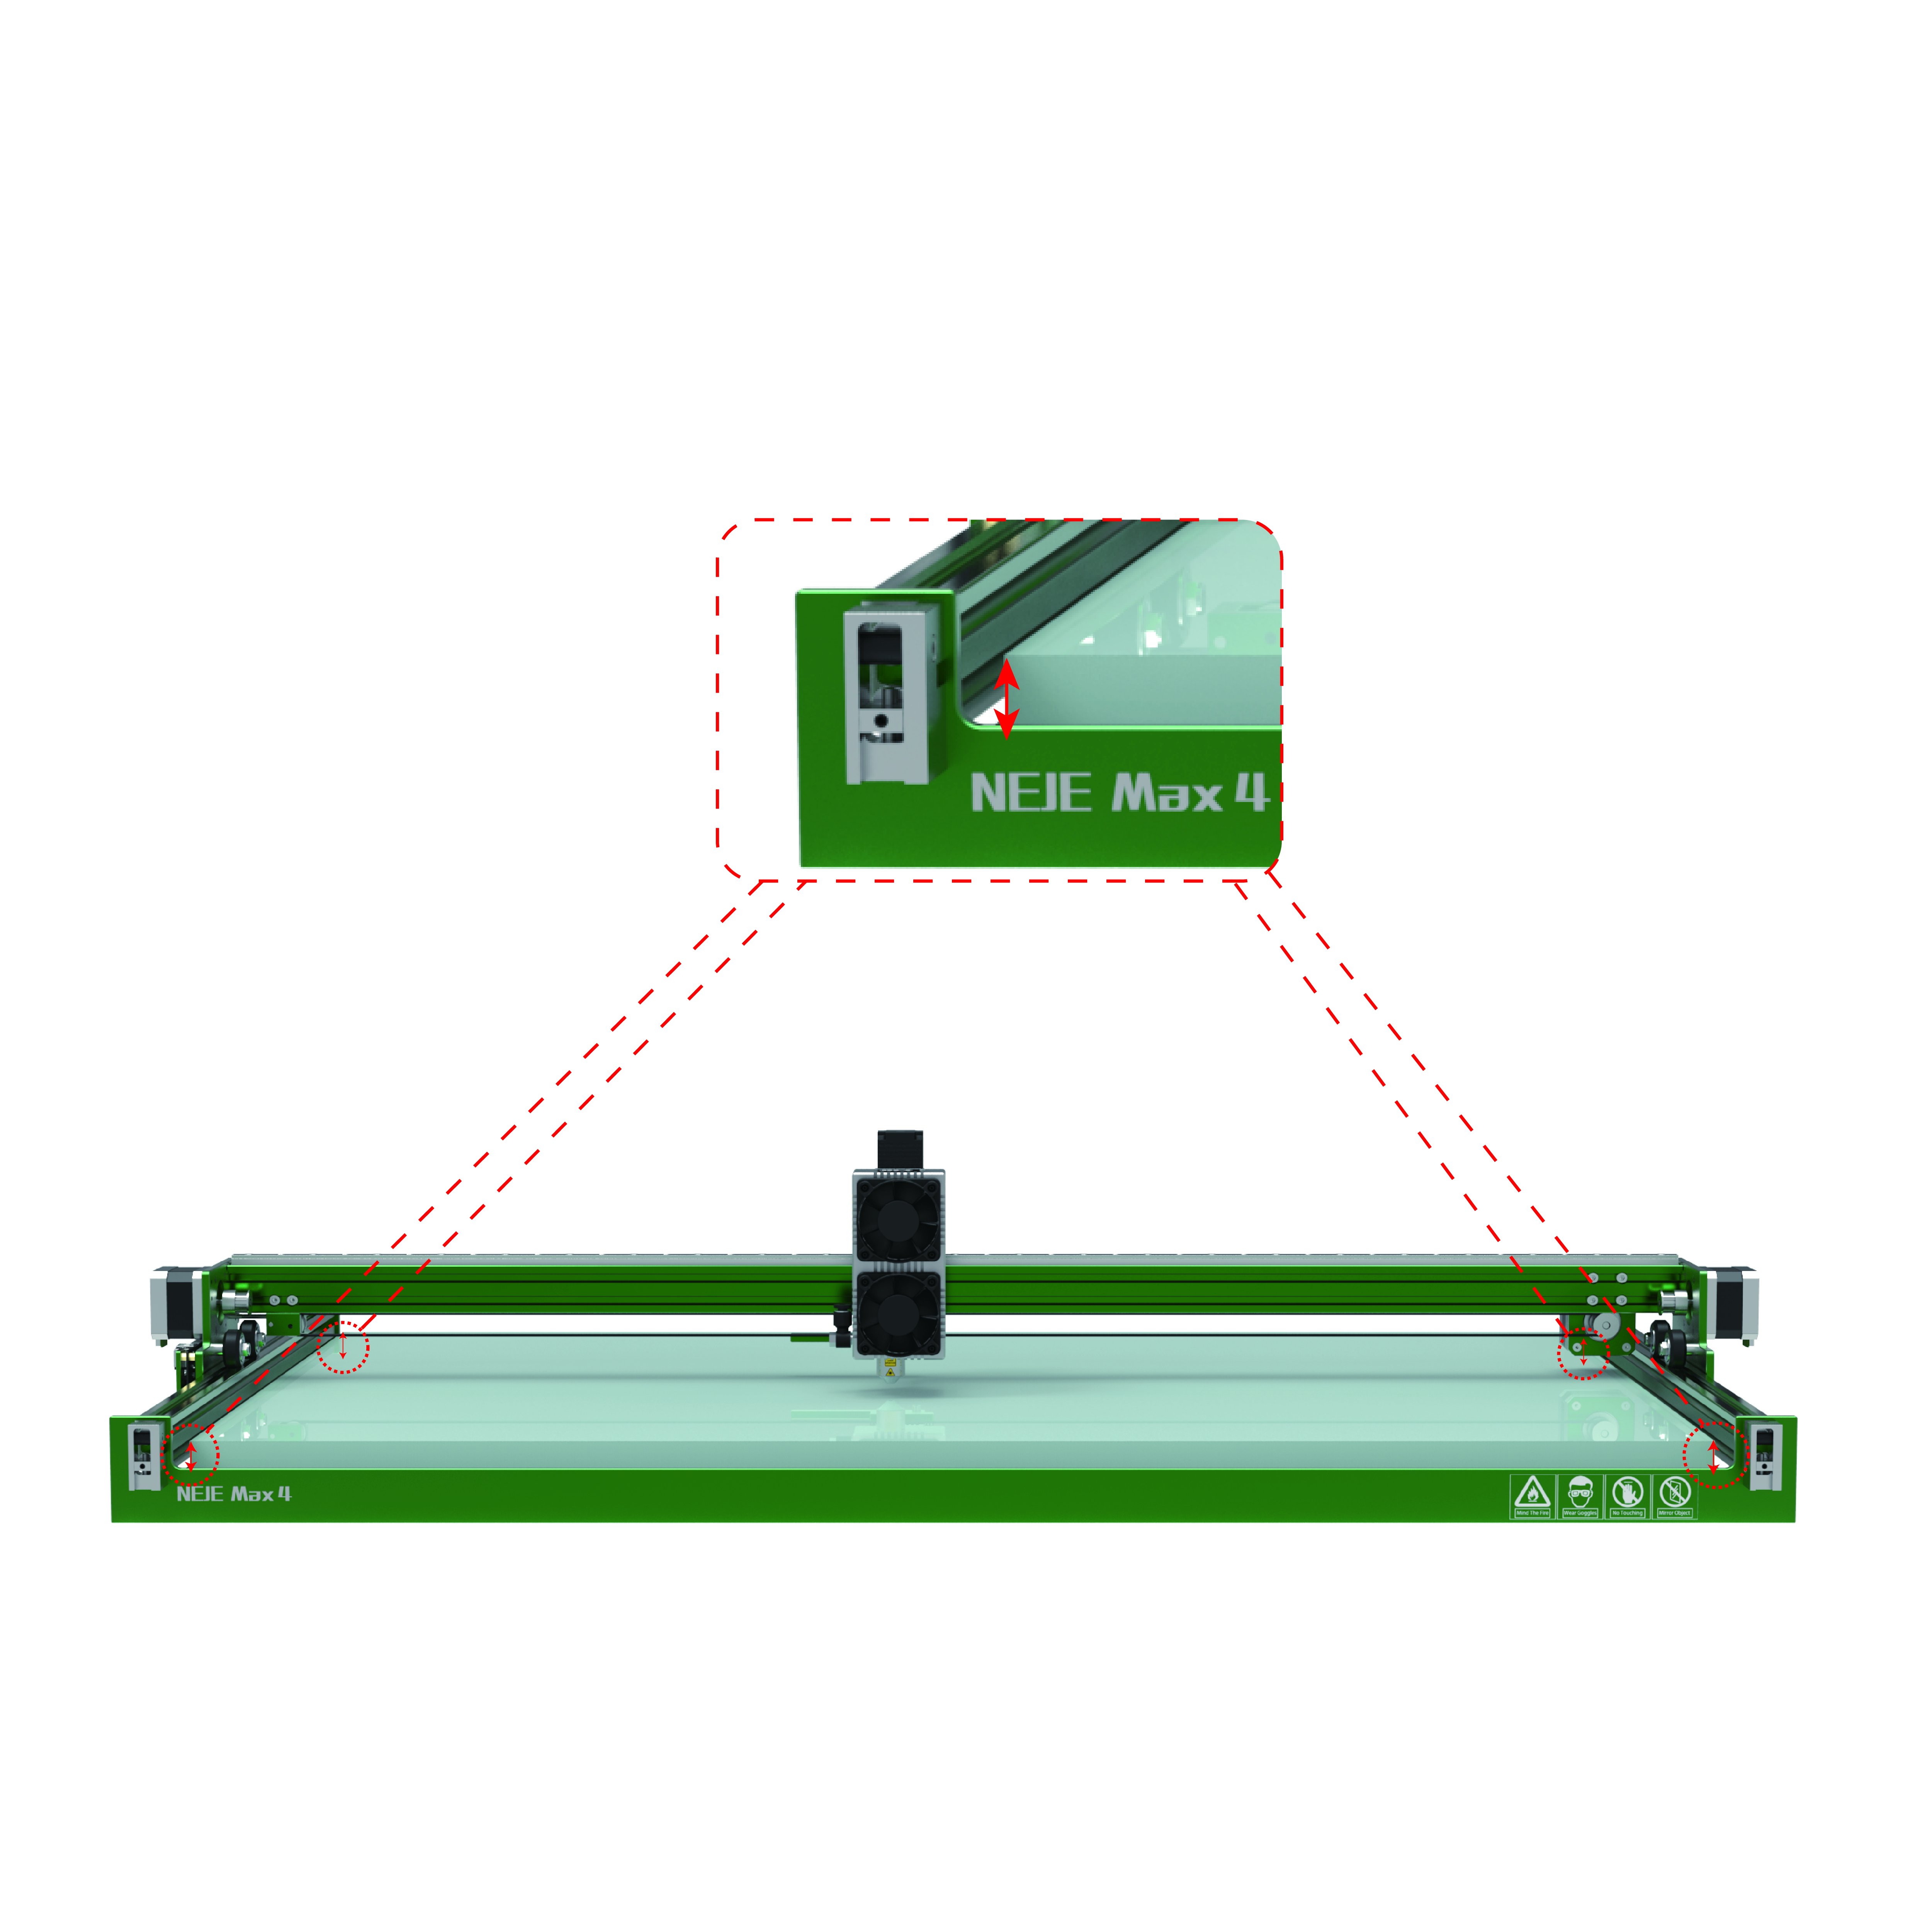
Leveling
Put the honeycomb platform flat to ensure that each position of the platform is the same distance from the laser.
Make sure the plane of the engraved material is at the same distance from the laser so that the focus position is consistent and the engraved image is burned evenly.
Set Default Focus Position
When using the Lightburn software to operate NEJE Max 4 for the first time, please enable the Z-axis in the device settings first. After enabling the Z-axis, you can control the focus position on the layer.
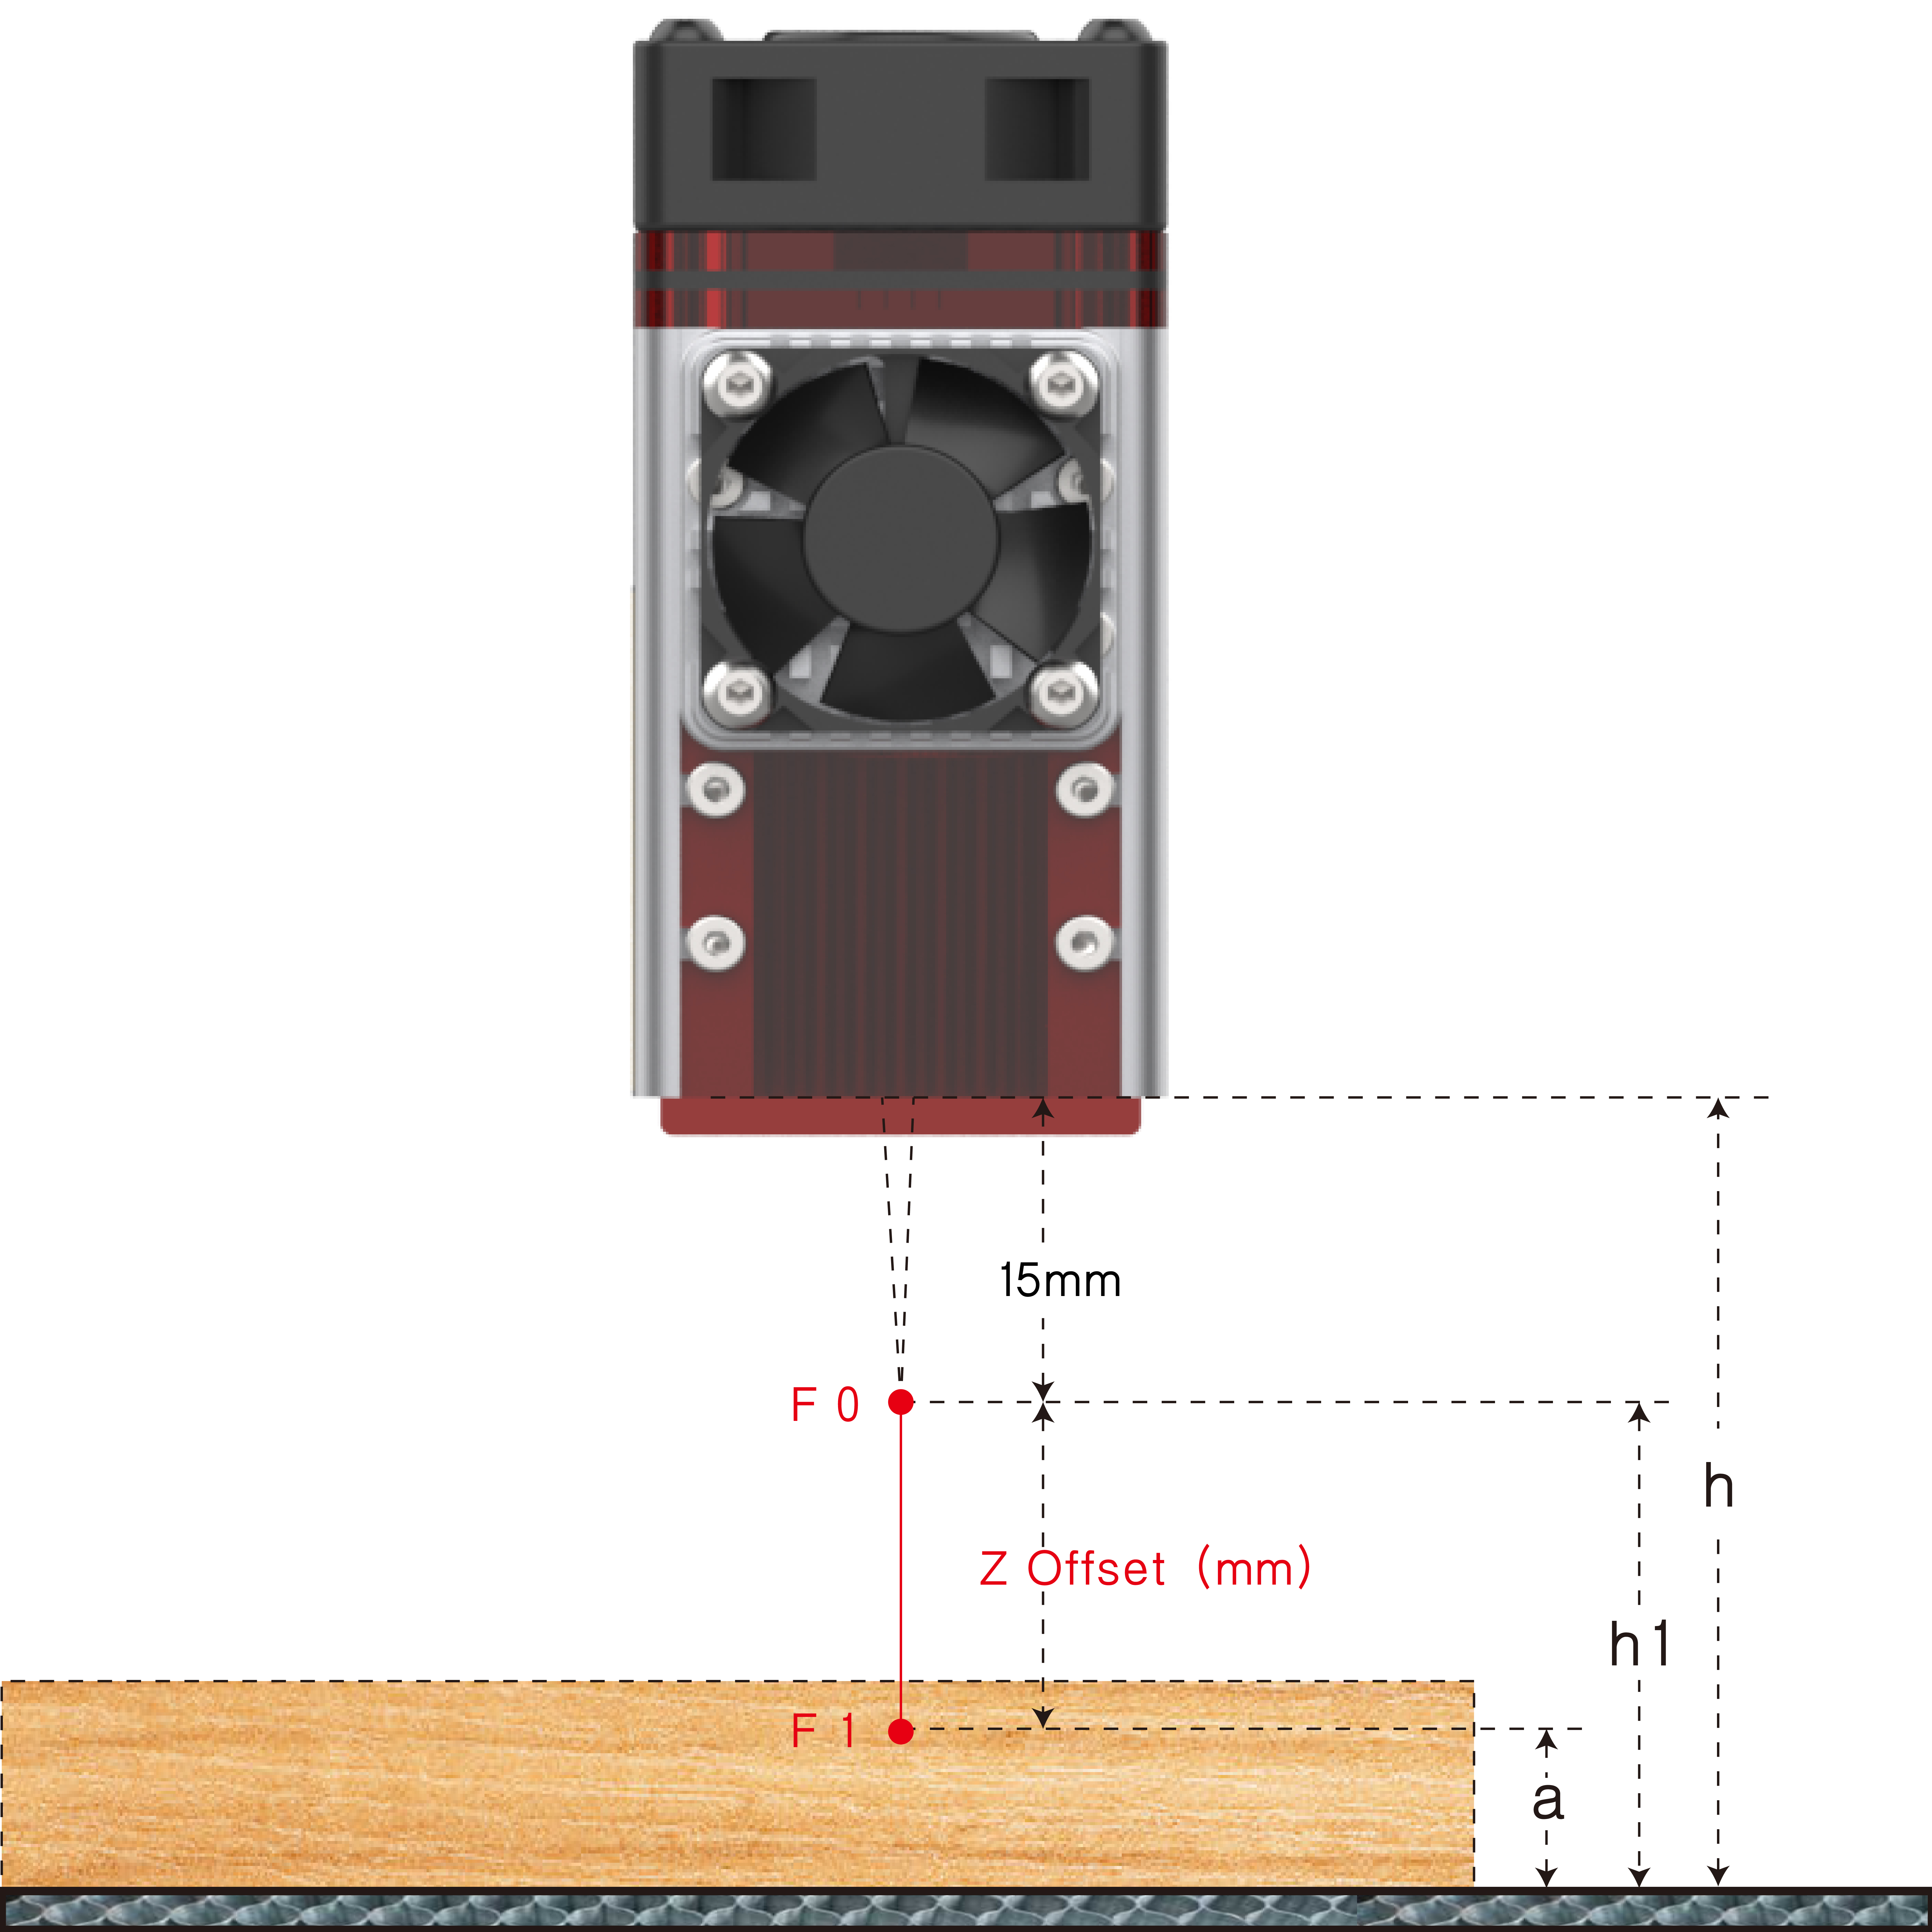
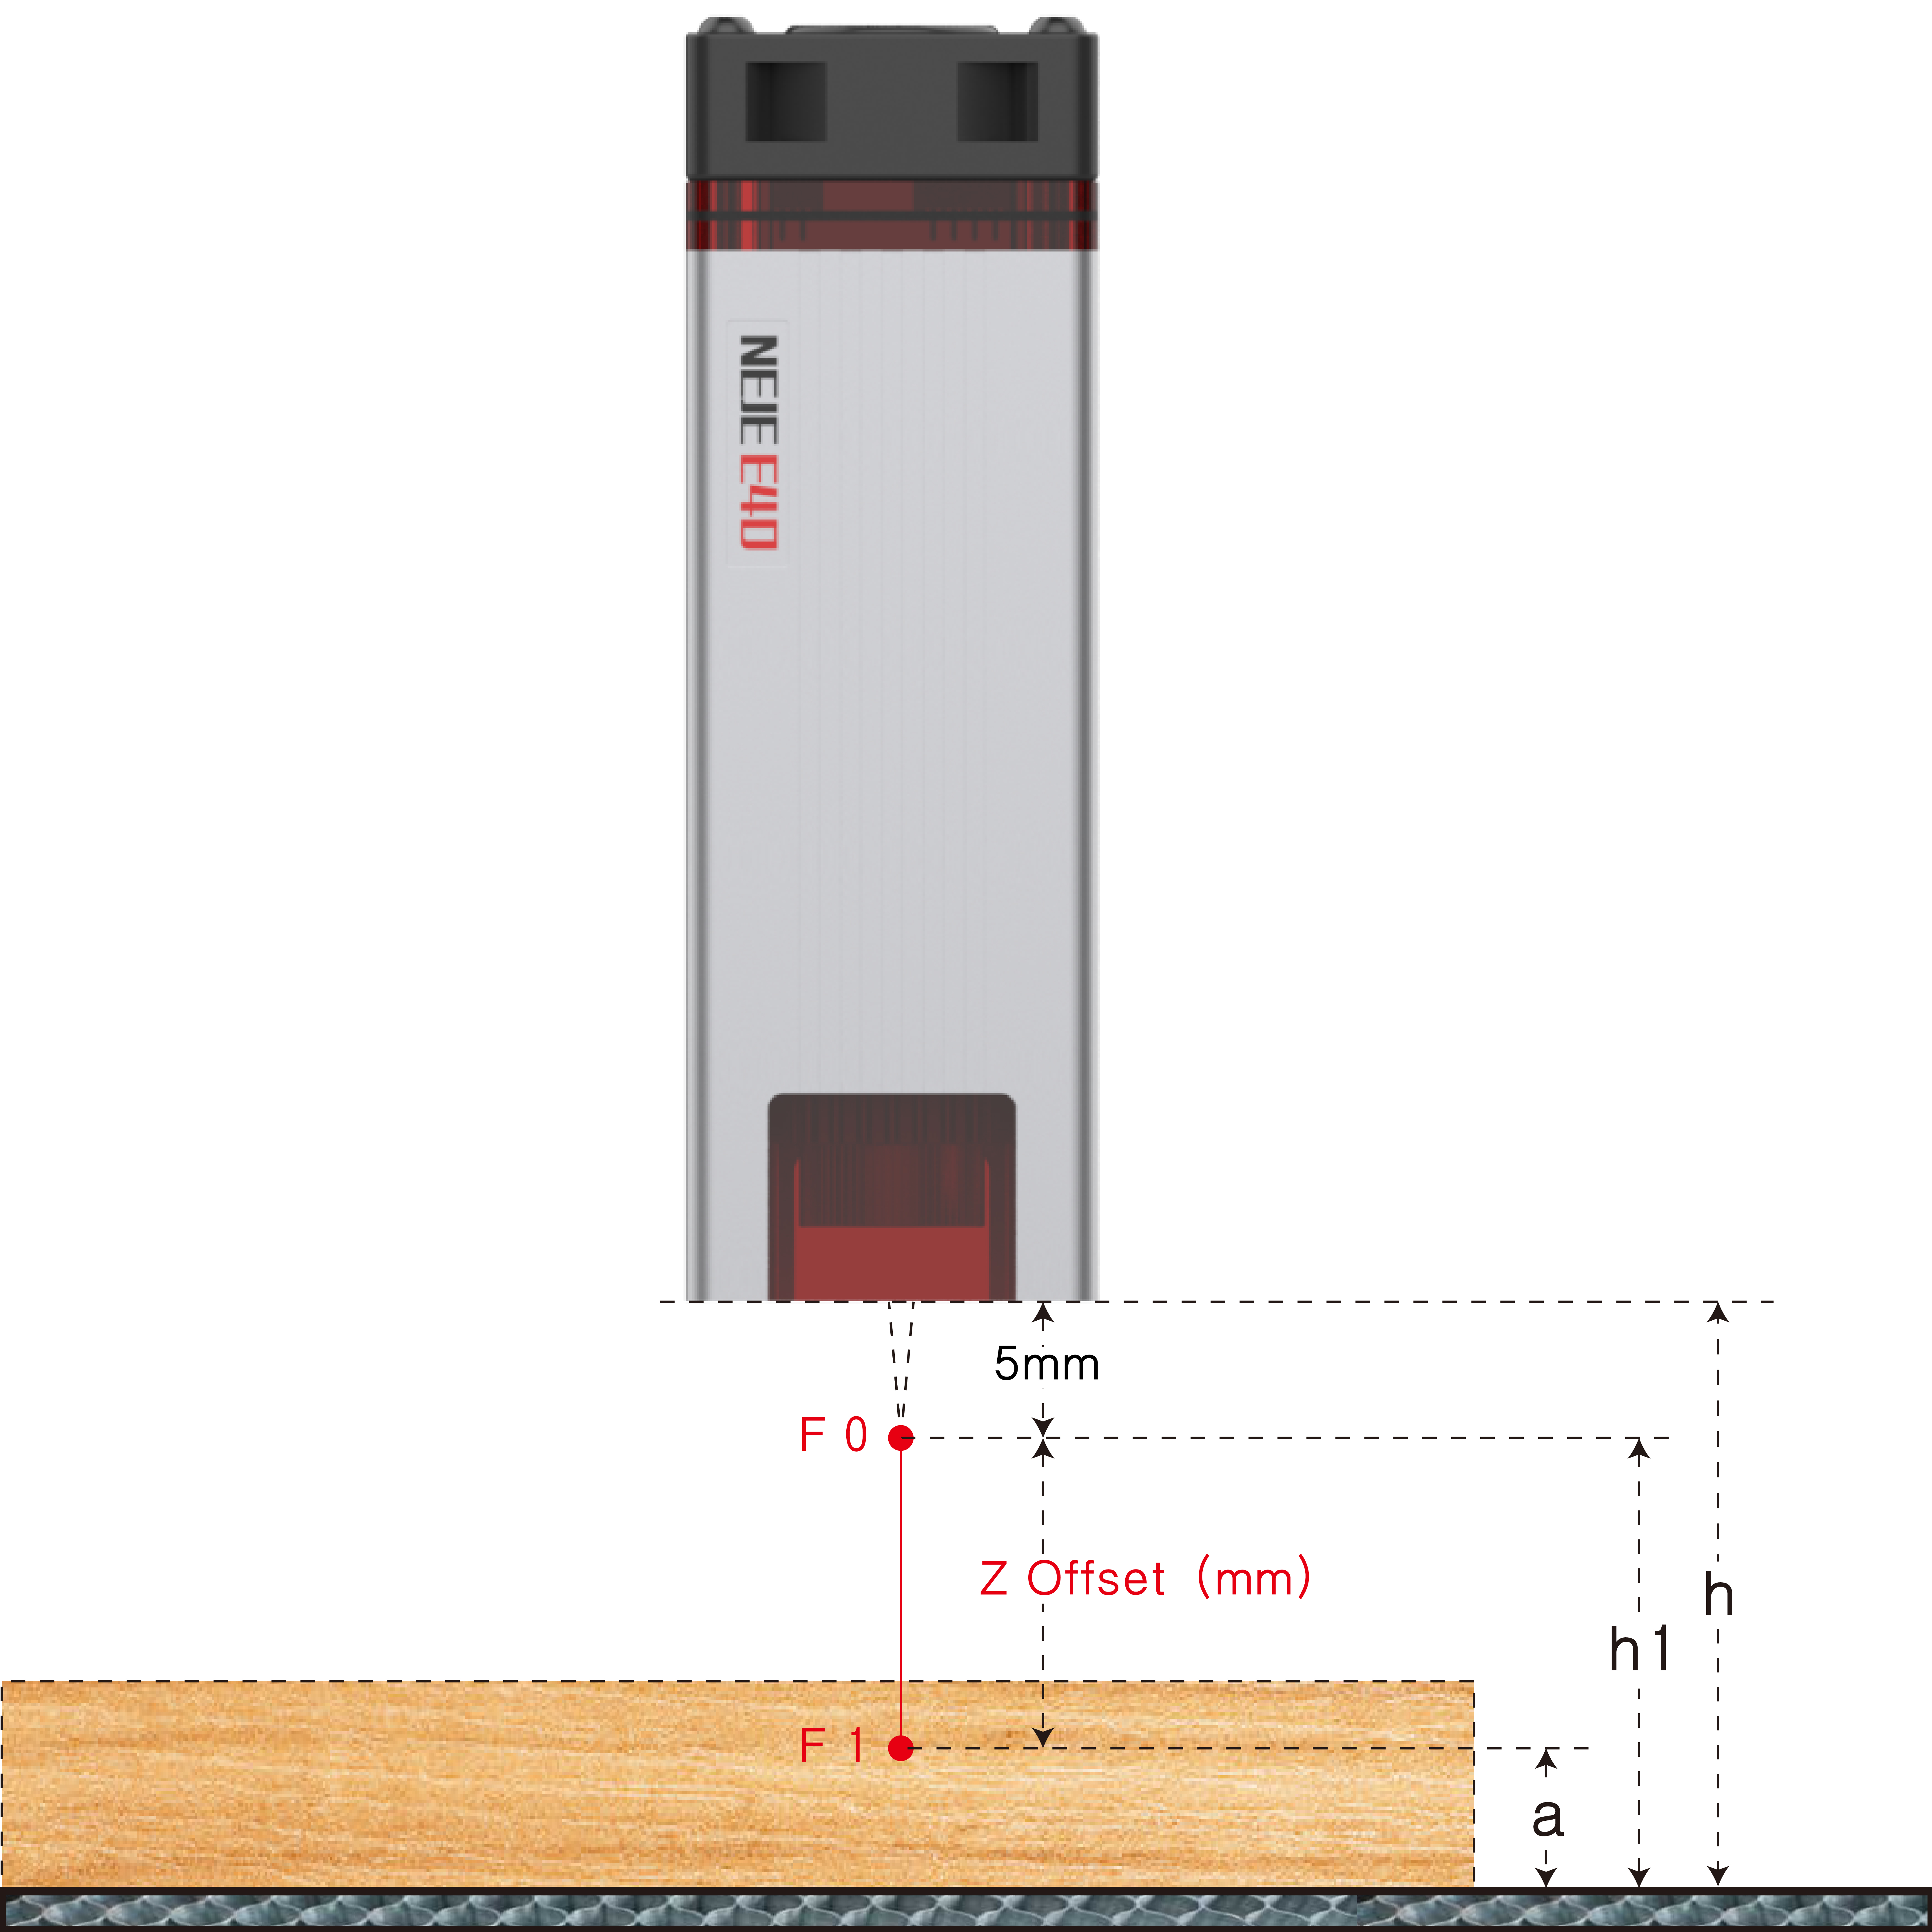
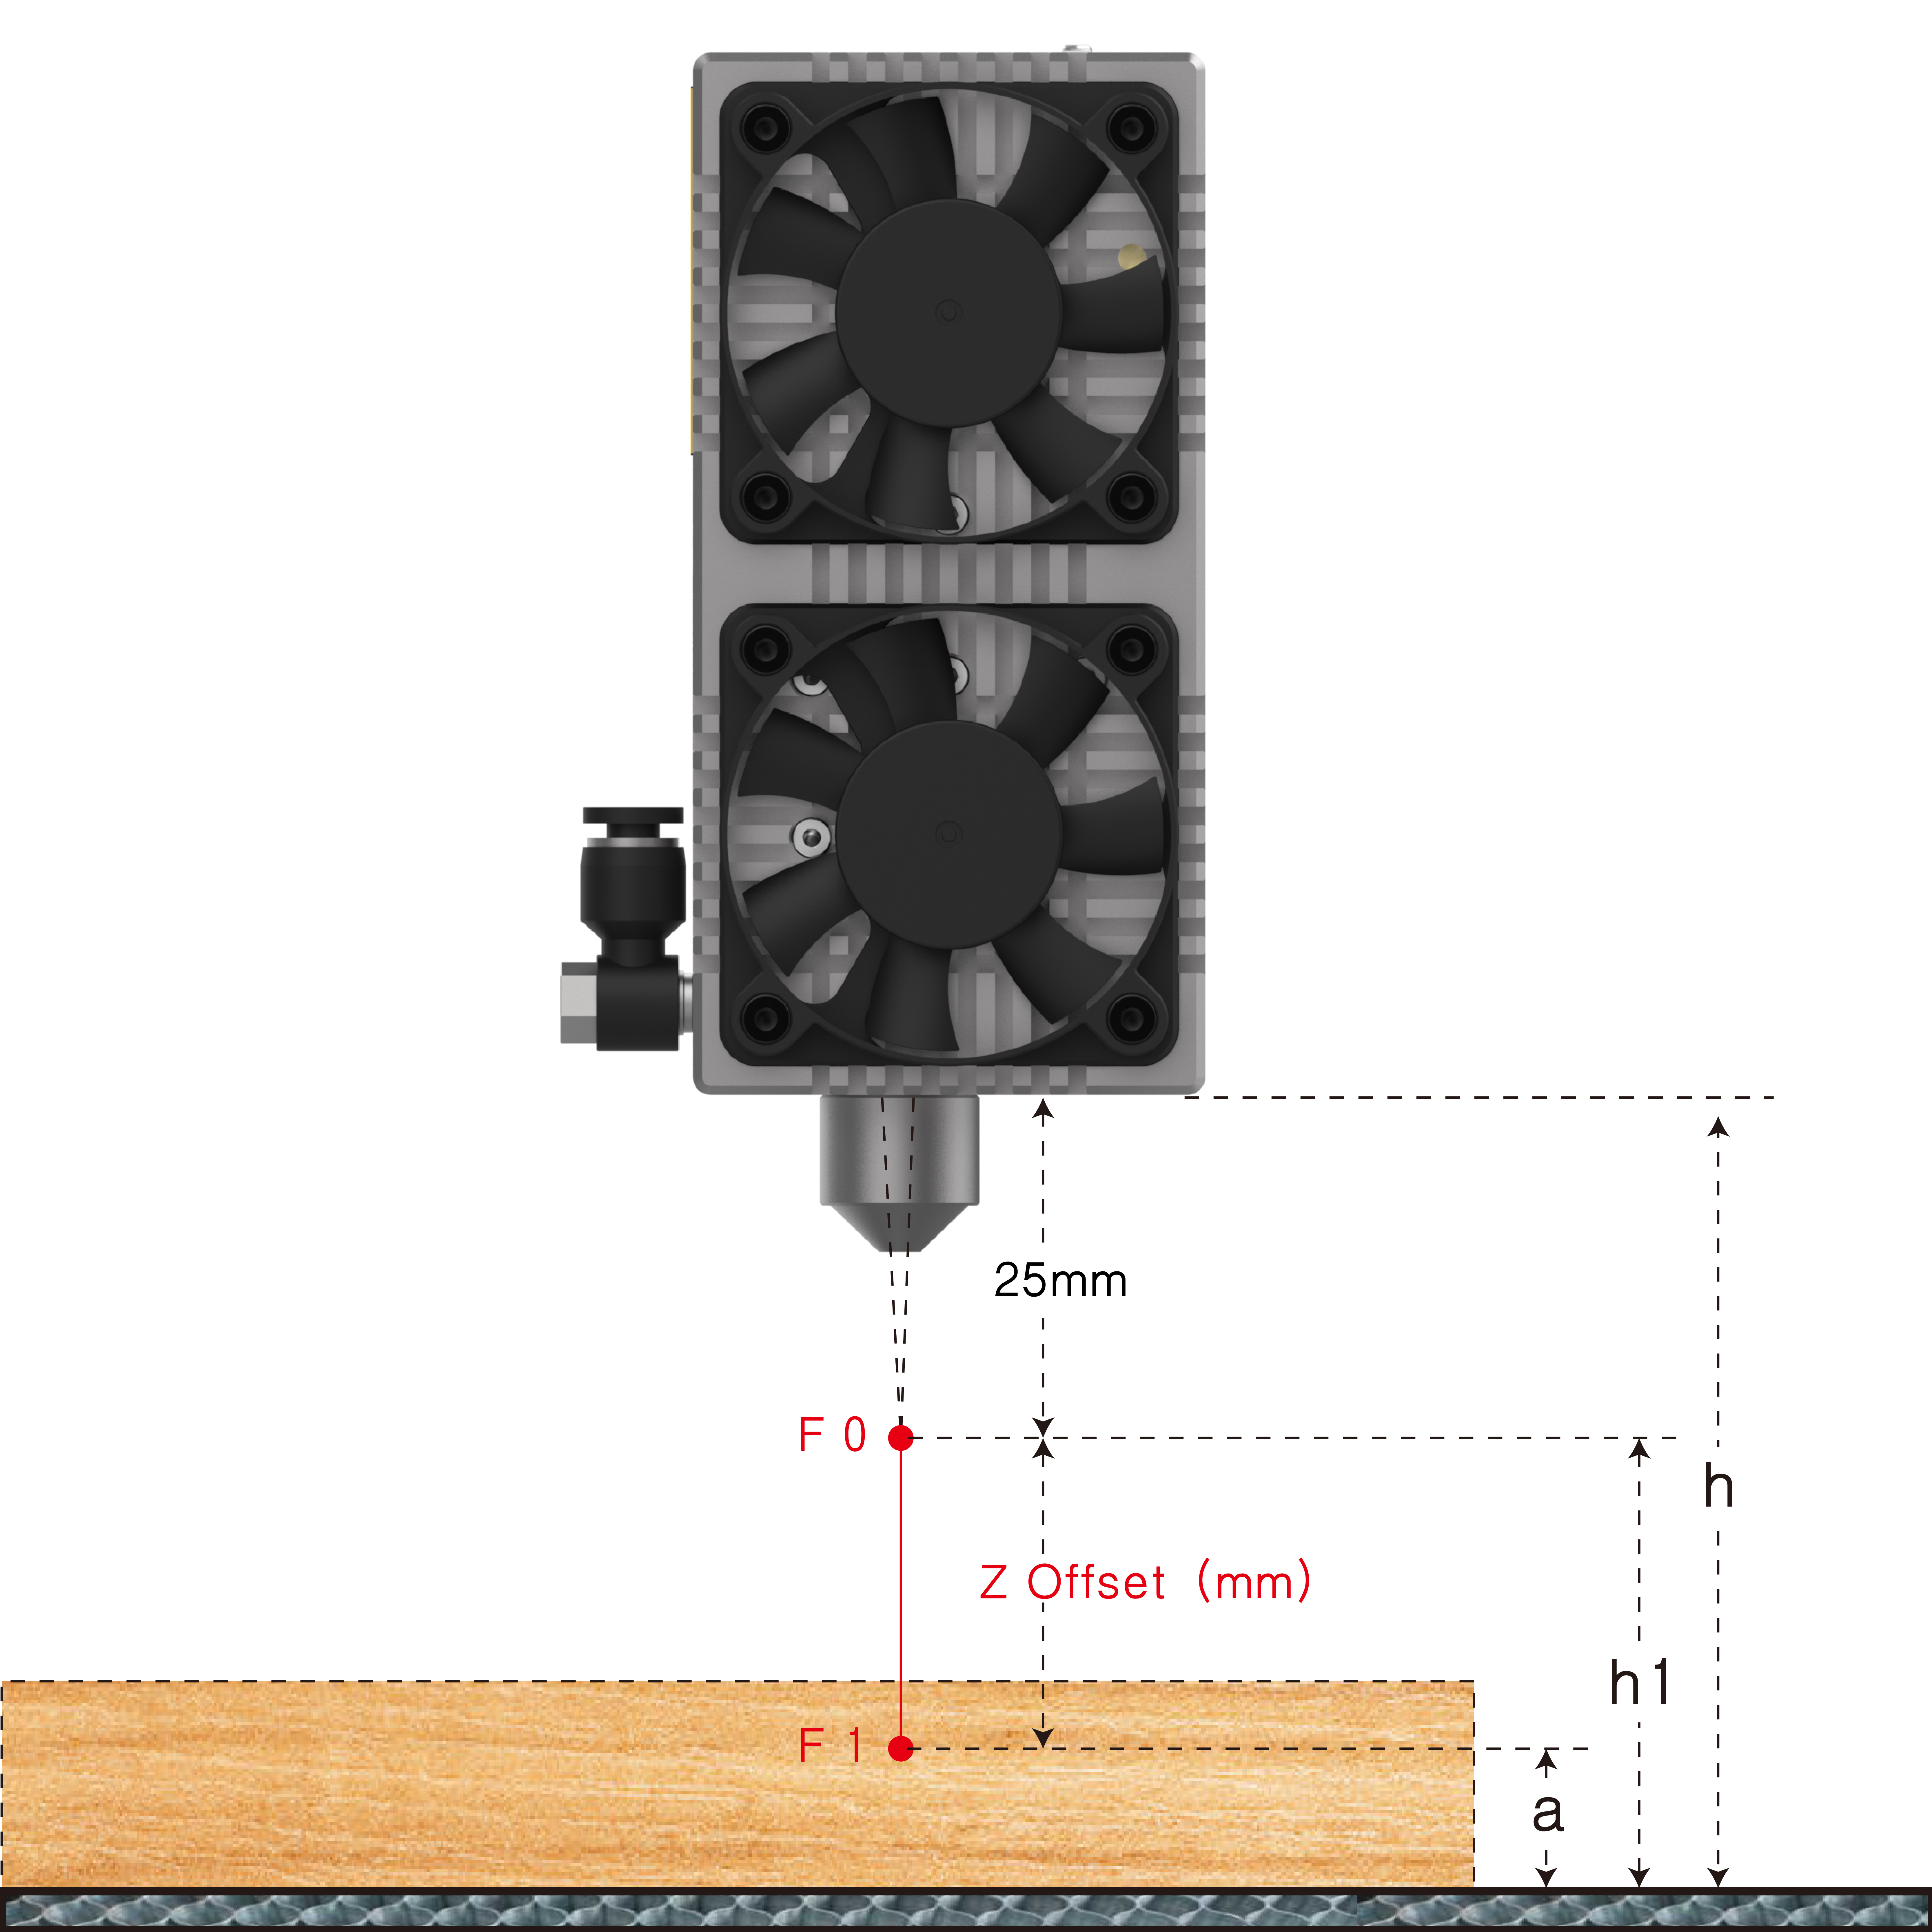
After starting the device, the Z-axis will automatically reset, the Z-axis has a high-precision automatic reset sensor, and the position of the Z-axis after reset is Z0. The travel of the Z-axis is 45mm.
First here will be some definitions for the diagram. Z offset means the distance the Z axis moves, yet the distance the focal point moves.
F0: The position of the focal point when you assembled the module
F1: The position of the focal point after the Z-axis moves
Z offset=The distance from F0 to F1=h1-a
h1=the distance from F0 to honeycomb board
a=the distance from F1 to honeycomb board
To make it easier to figure out the Z offset, you can set the h1 with a certain number within 45mm. For example, with E80, you can adjust the h1=45mm (choose a number you like), then adjust the height of the module with a ruler (h=h1+focal length=45mm+25mm=70mm).
And the a=the thickness of the material – the distance from F1 to the surface of the material. For example, if I use E80 to cut a 5mm plywood in 1 pass, you need to make the F1 1mm lower from the surface of the plywood. The a=5mm-1mm=4mm.
So simply, you only need to know the h1 and the a. Then you can set different focus on different layers, in the three-dimensional space Give full play to the performance and creation of Light Knife.
If you are using it for engraving, make the F1 on the surface of the board. If you are using it for cutting, you can make the F1 on the surface of the board or make it lower than the surface. For example, for a 17mm pine board, the F1 of the first pass is recommended to be set at 4mm below the surface of the pine board, the a=17mm-4mm=13mm, according to the characteristics of the module, we recommend you to set the Z step per pass less than 1.5mm. It is determined according to the characteristics of the module.
When cutting thick materials, we need to set (Number of Passes) and (Z step per pass). E80 can cut pine boards larger than 6mm at a speed of 300mm/min per knife. The Z step per pass (mm) parameter setting can give full play to the performance of the tool, so, we need to set the Z step per pass parameter and the number of passes according to the representative parameters of the tool.
A40640 is a variable-focus high-power engraving tool module. The figure below is the description of the focal length as the main feature. The 15mm position needs to be adjusted manually first.
NEJE E80 Laser & Material Database
NEJE A40640 Laser & Material Database
NEJE E40 Laser & Material Database
How to quickly find focus by observing low light?
1. Adjust the suitable low light through the software. The NEJE mode can be adjusted in the “Settings” column of the NEJE Win software; the GRBL mode can be adjusted in the “Grbl Configuration” of the laserGRBL software, which has been explained above.
2. Put grey cardboard on the surface of the white material (such as plywood) as a focus reference to find the precise focus. A fine focal point can be observed through the protective goggles or the shade of the module.
About Air Assist
Method 1: Do not use air pumps. A40640 and E40 modules (after removing the air mouth) can be carved and cut directly (the thickness is recommended to be less than 3mm, and the fir board can be less than 8mm), and the built-in fan has the function of smoke exhaust. Generally, This is the most commonly used way and the most portable.
Method 2: Use the oxygen hemers to protect the lens. This method can provide oil-free and water-free gas source protection lenses. It does not receive pollution for a long time. It is suitable for long-term carvings and thin-density materials for thin materials, but it cannot provide sufficient air pressure to increase MDF The carving and cutting performance of materials such as board, leather, hard paper, and other materials.
Method 3: Use the inner diameter of about 1mm metal trachea as an air assist. This method can be provided with lower-cost inkjet equipment to provide more than 30PSI pressure, and small air compressor engine oil and water will not pollute the lens. For MDF boards, leather, hard paper, etc. The cutting of materials has an improvement effect.
Method 4: (suitable for professional players): use standard metal wind mouth+industrial oil and water filter+woodworking air compressor. This method is suitable for long-term multi-frequency operation cutting tasks, with E40 and E80 modules, to enhance the cutting performance of more powerful and portable operations, control through the M8 instruction+electromagnetic air valve The performance is very low. If you are a professional player, you can simply purchase a professional small oil and water filter, but don’t forget to release the sewage in the air pump frequently.
Software Download
Install Driver (The old Win system needs to be installed, Ignore if the driver is already installed)
.NET Framework 4.8 – Win software operating environment, Ignore if win10 and above
NEJE_v6.1.8.exe When using the machine for the first time, please open the NEJE Win software first to check the latest firmware update. The NEJE team will continue to optimize the NEJE firmware and GRBL firmware to provide you with more surprising experiences.
NEJE APP for Android v3.0.3.apk Download from Google Play Store (Support OS: Android 5.0 or later)
N-Scanner for Android (mainly uses the fast transmission between the engraving materials in your mobile phone and the NEJE Win software. You can directly shoot the image or file through the mobile phone or quickly transfer the content of the photo stored in the mobile phone to the computer for editing and engraving)
“NEJE 3″NEJE APP for iPhone, iPad, MacBook Support OS: iPhone (iOS 10.0 or later), iPad (iPadOS 10.0 or later), Mac (macOS 11.0 or later)
Software Operation
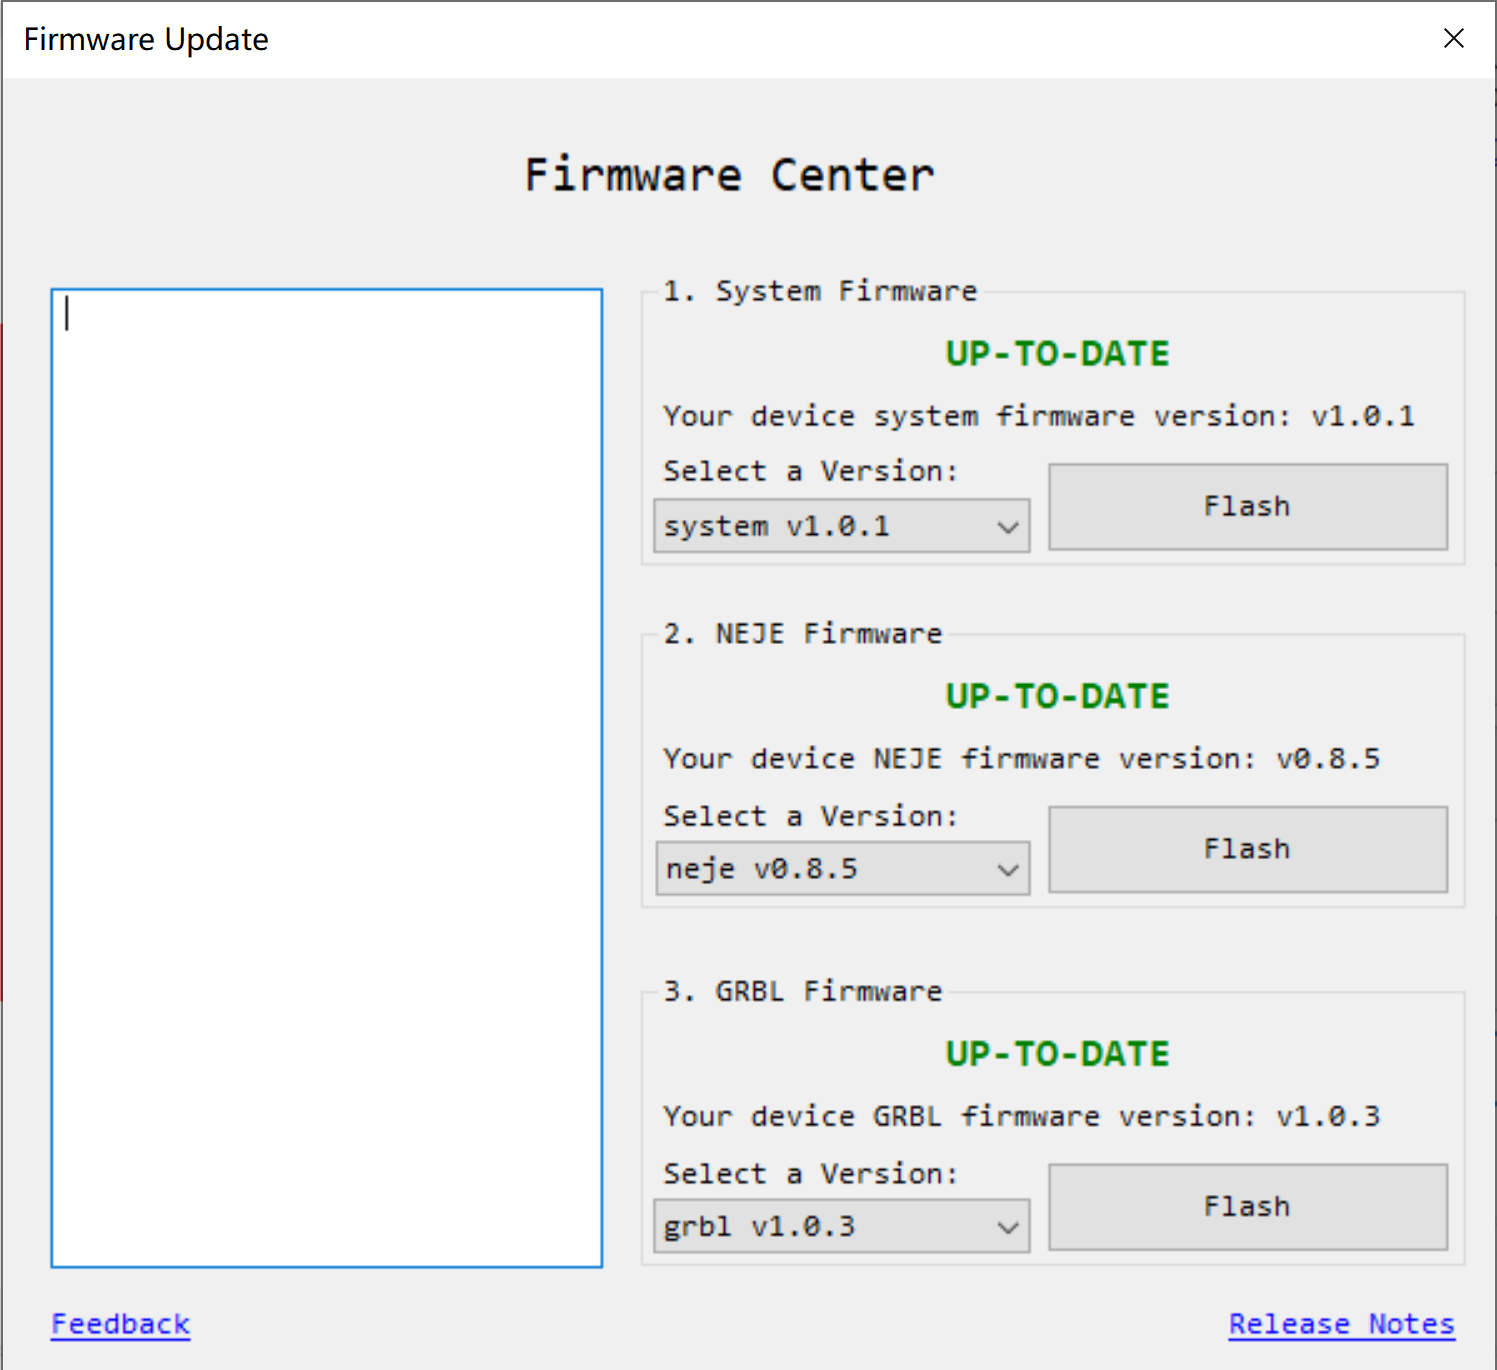
Firmware Update
When using the device for the first time, please check whether there is a firmware update. The Neje team will continue to optimize the software and firmware to help you get a more portable operating experience.
Module carving parameter settings, please find the corresponding model in the menu. Neje provides a typical parameter setting of laser materials.
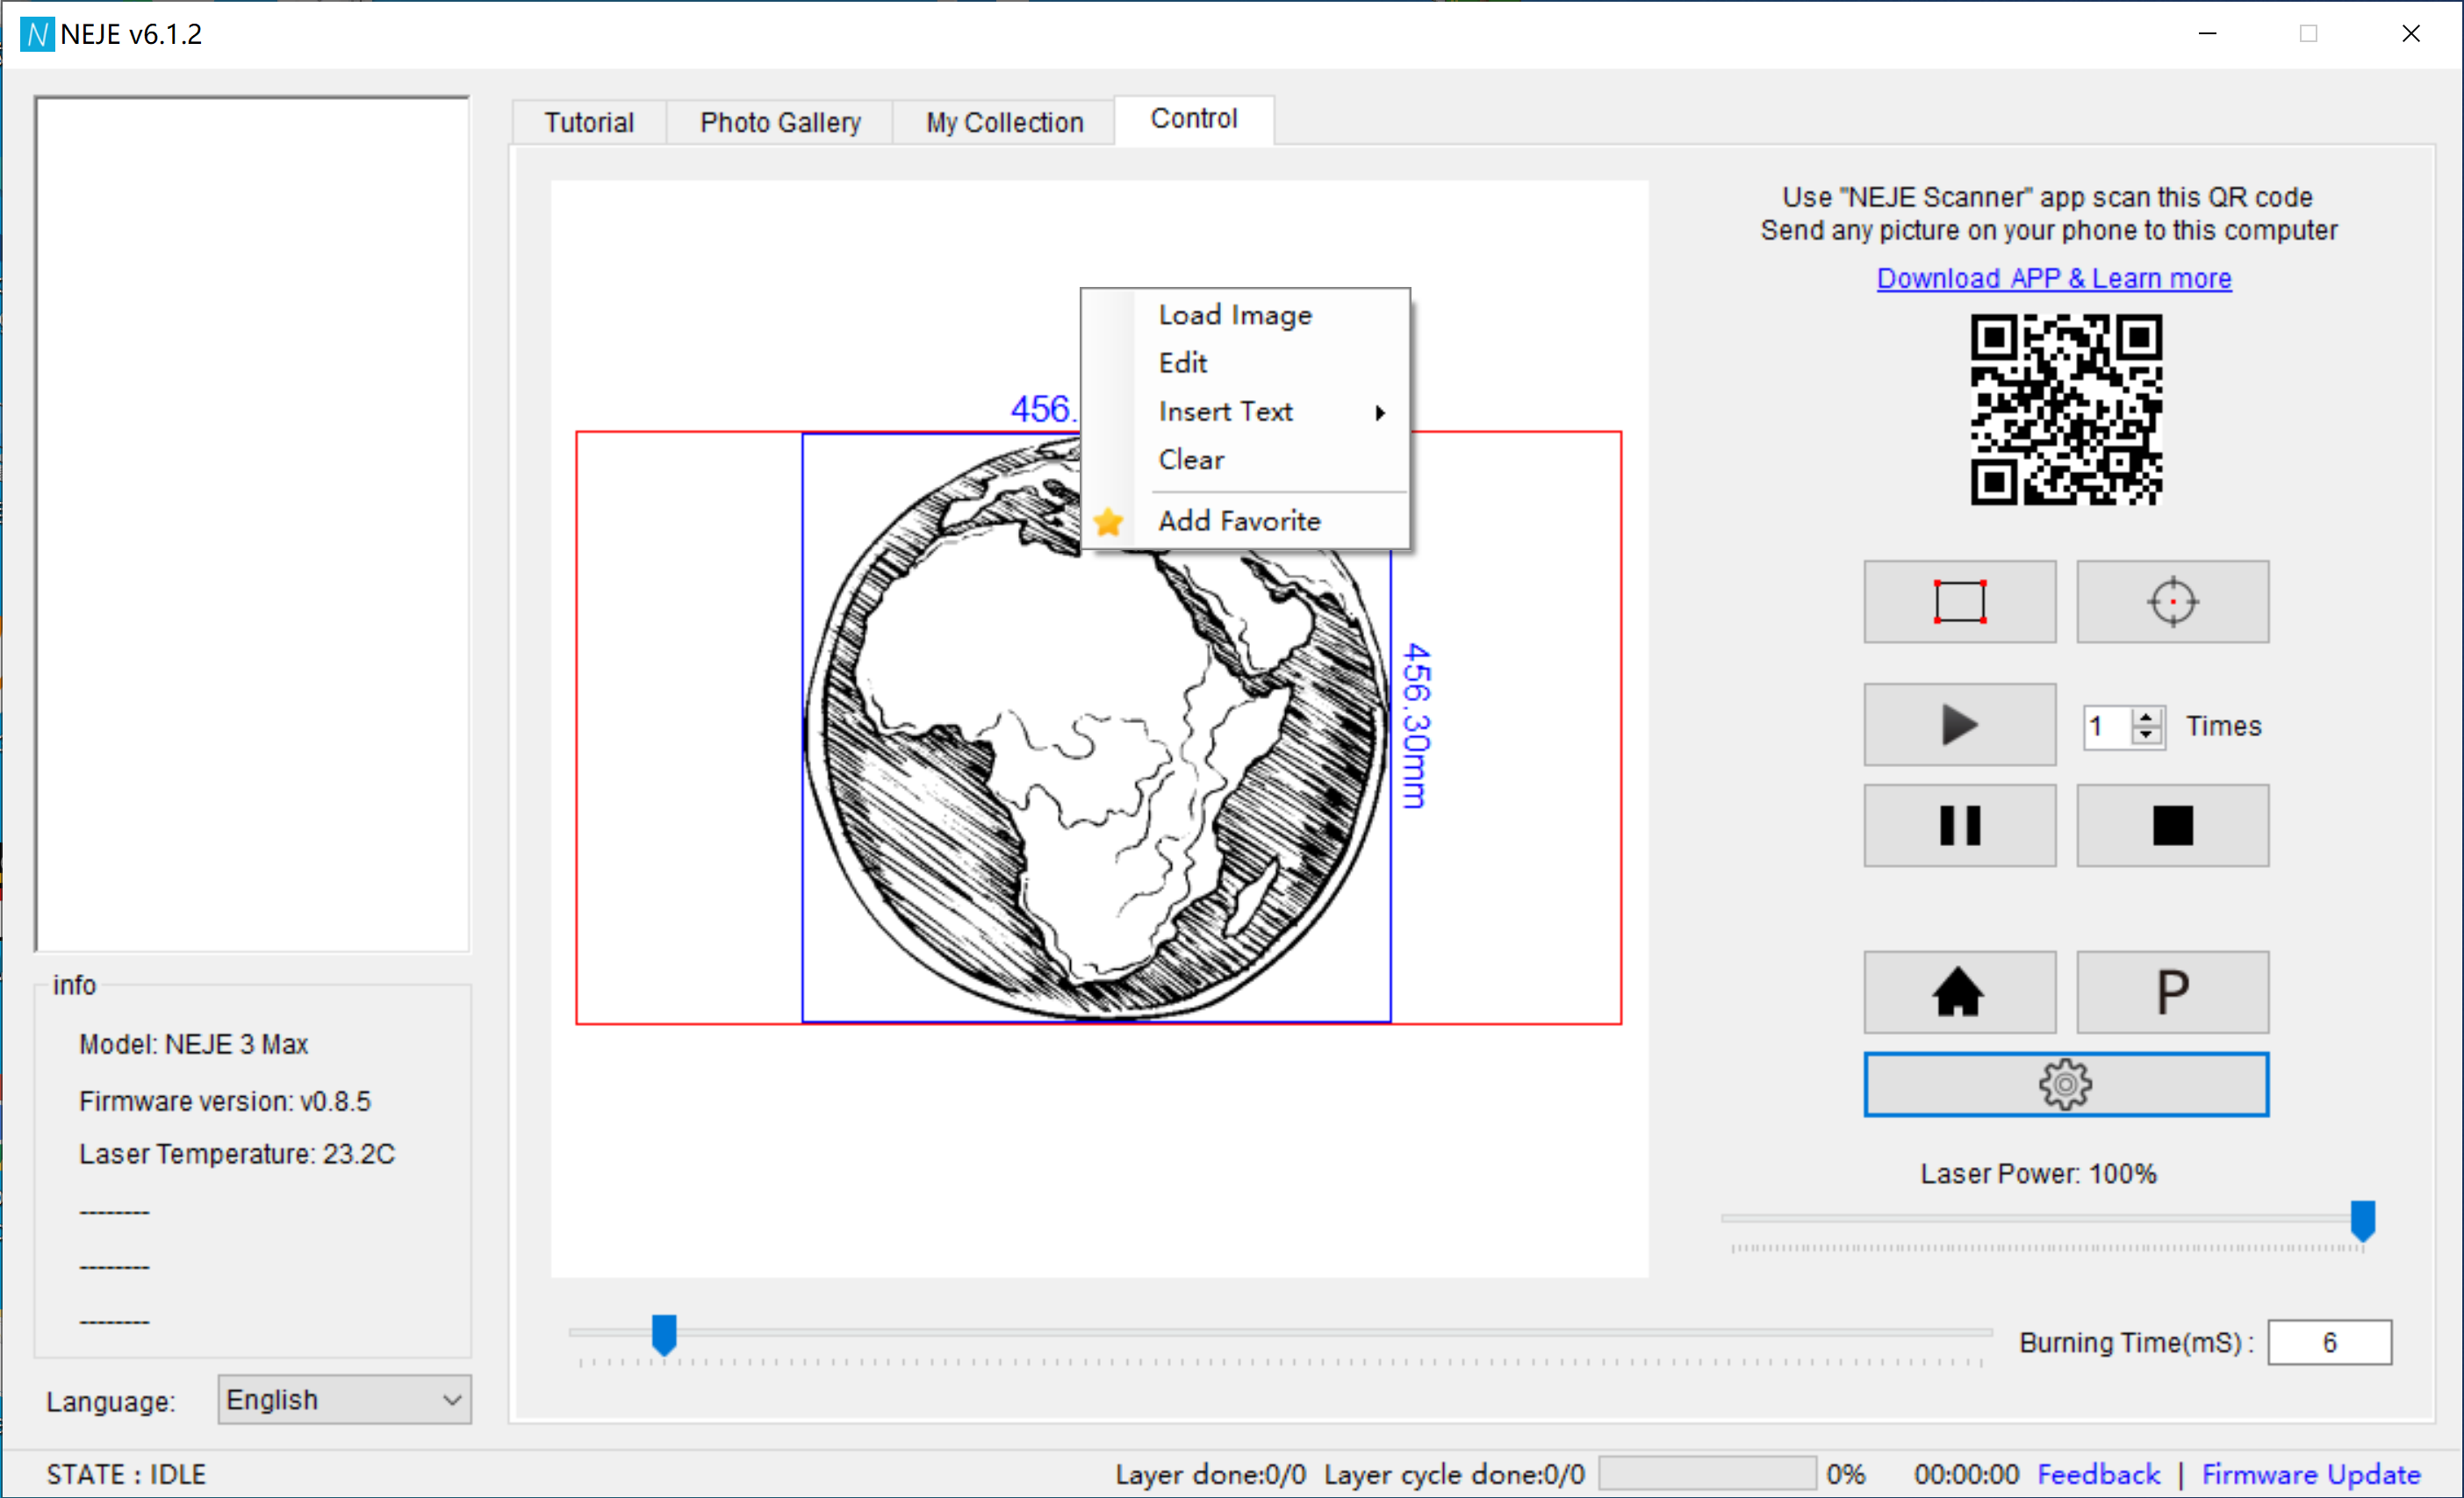
Start with NEJE Win Software
NEJE V6.1.2:
Choose an image (.bmp .jpg) from Photo Gallery, My Collection, Load Image from My Computer, Insert Text, “NEJE Scanner” APP:
Cut the range that needs to be engraved:

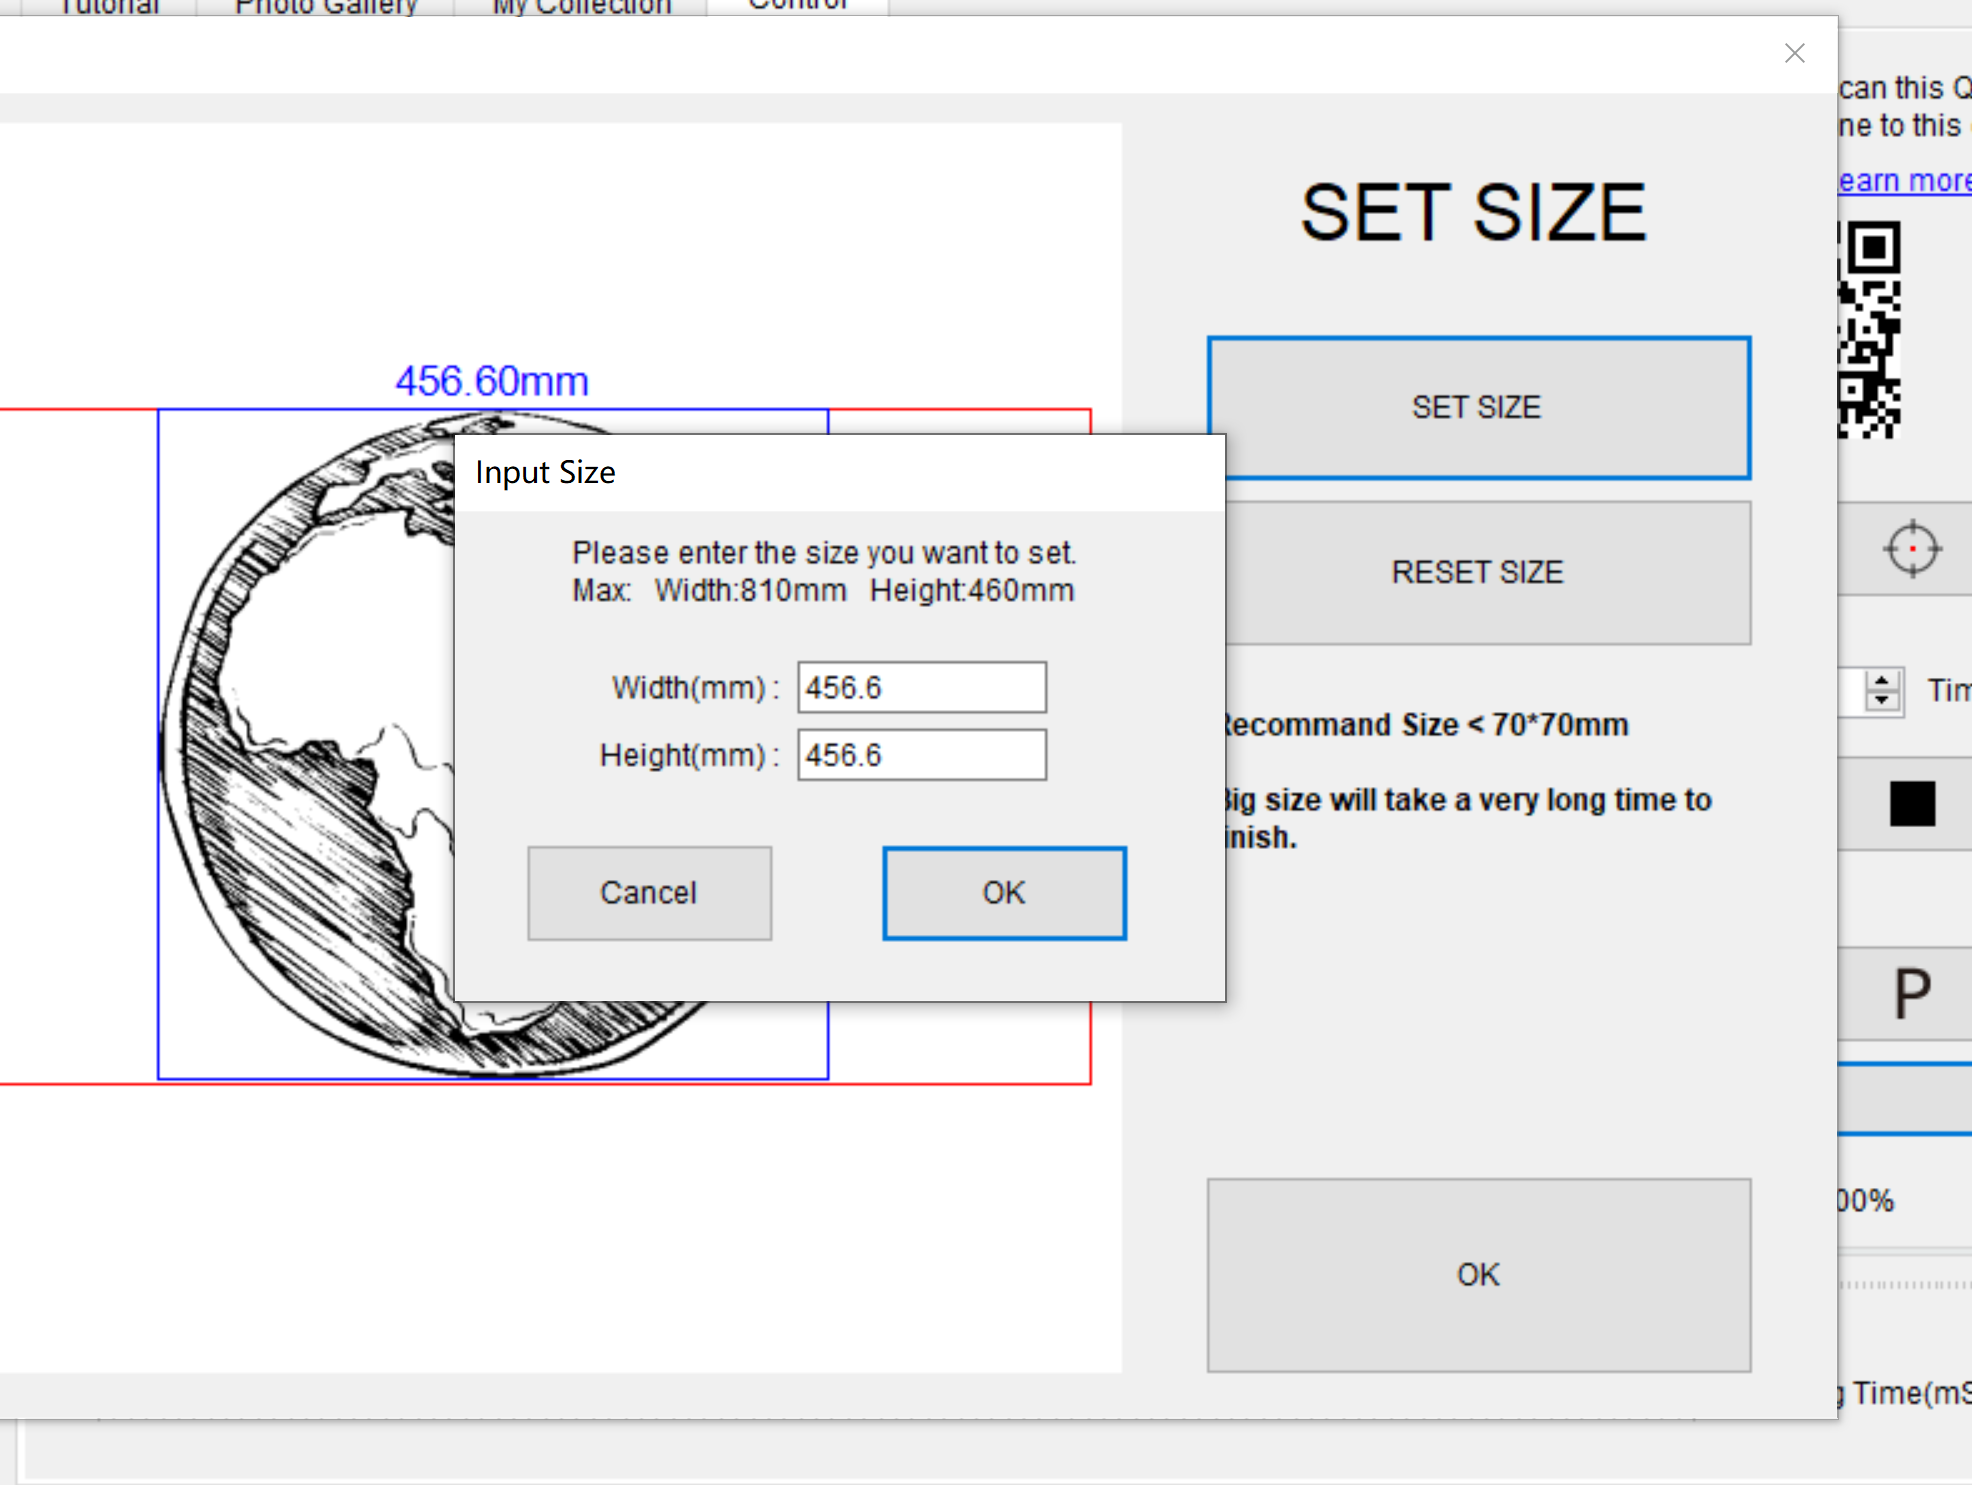
Set image size:
To adjust the rendering, or not to:
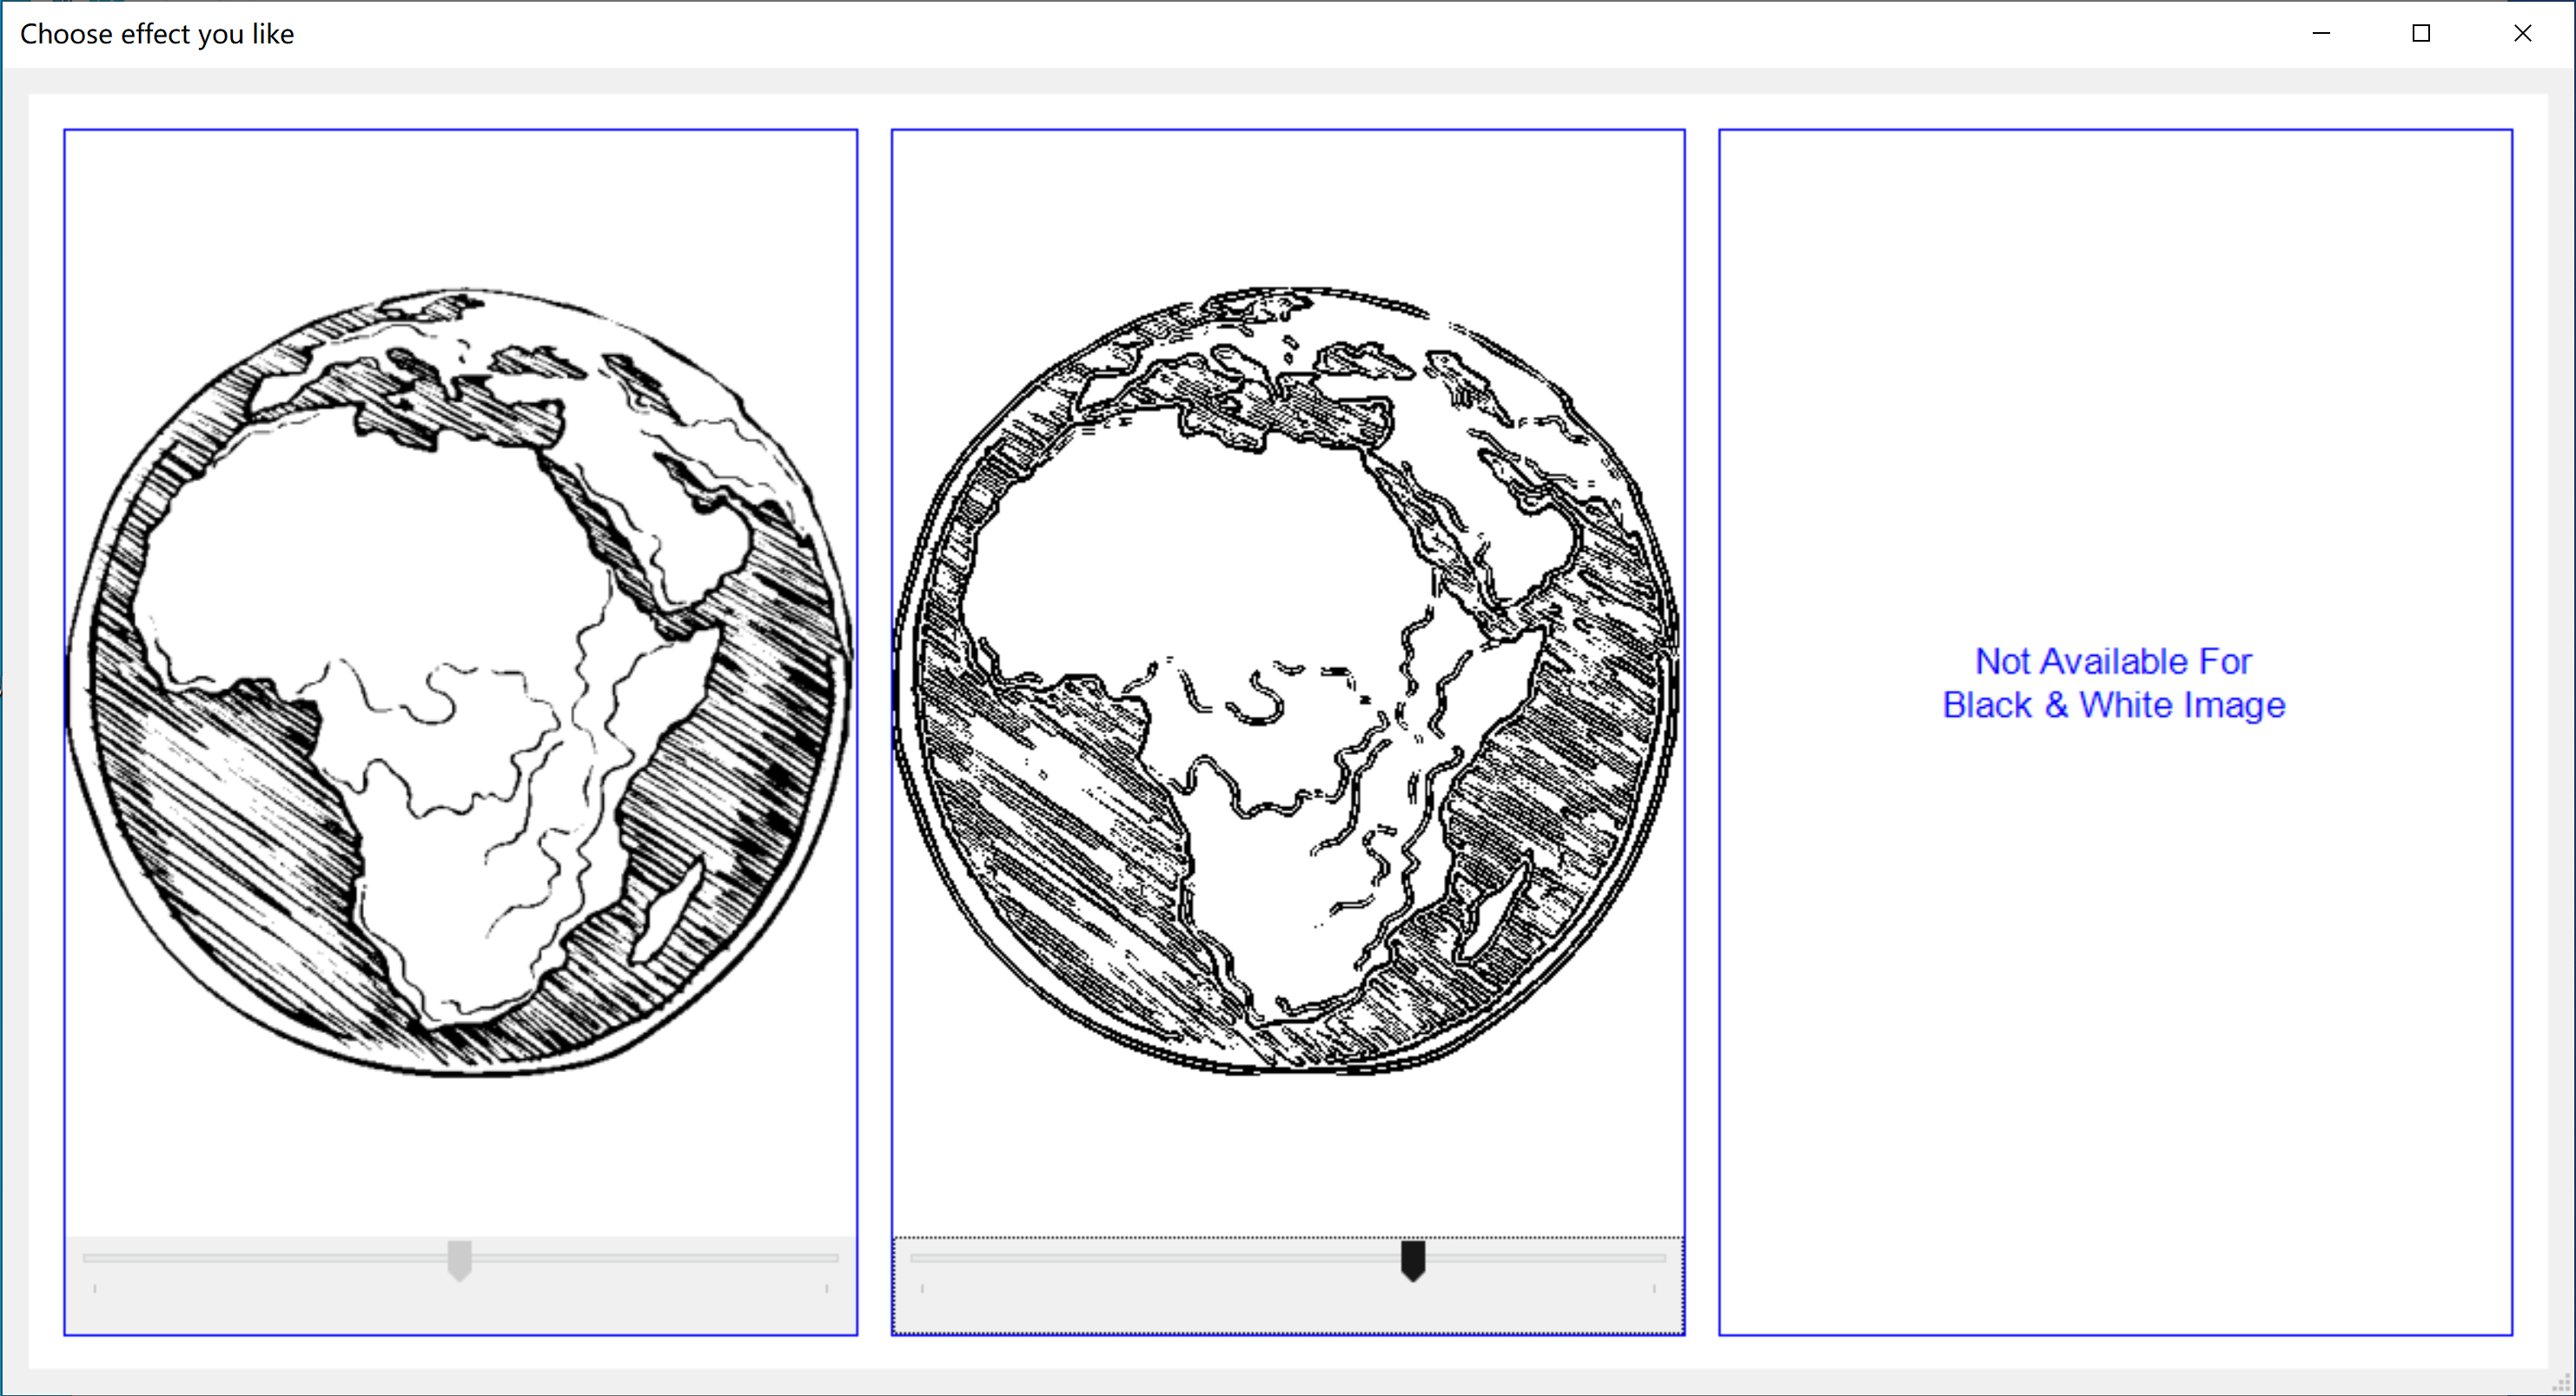
Special effects processing:

Box positioning:

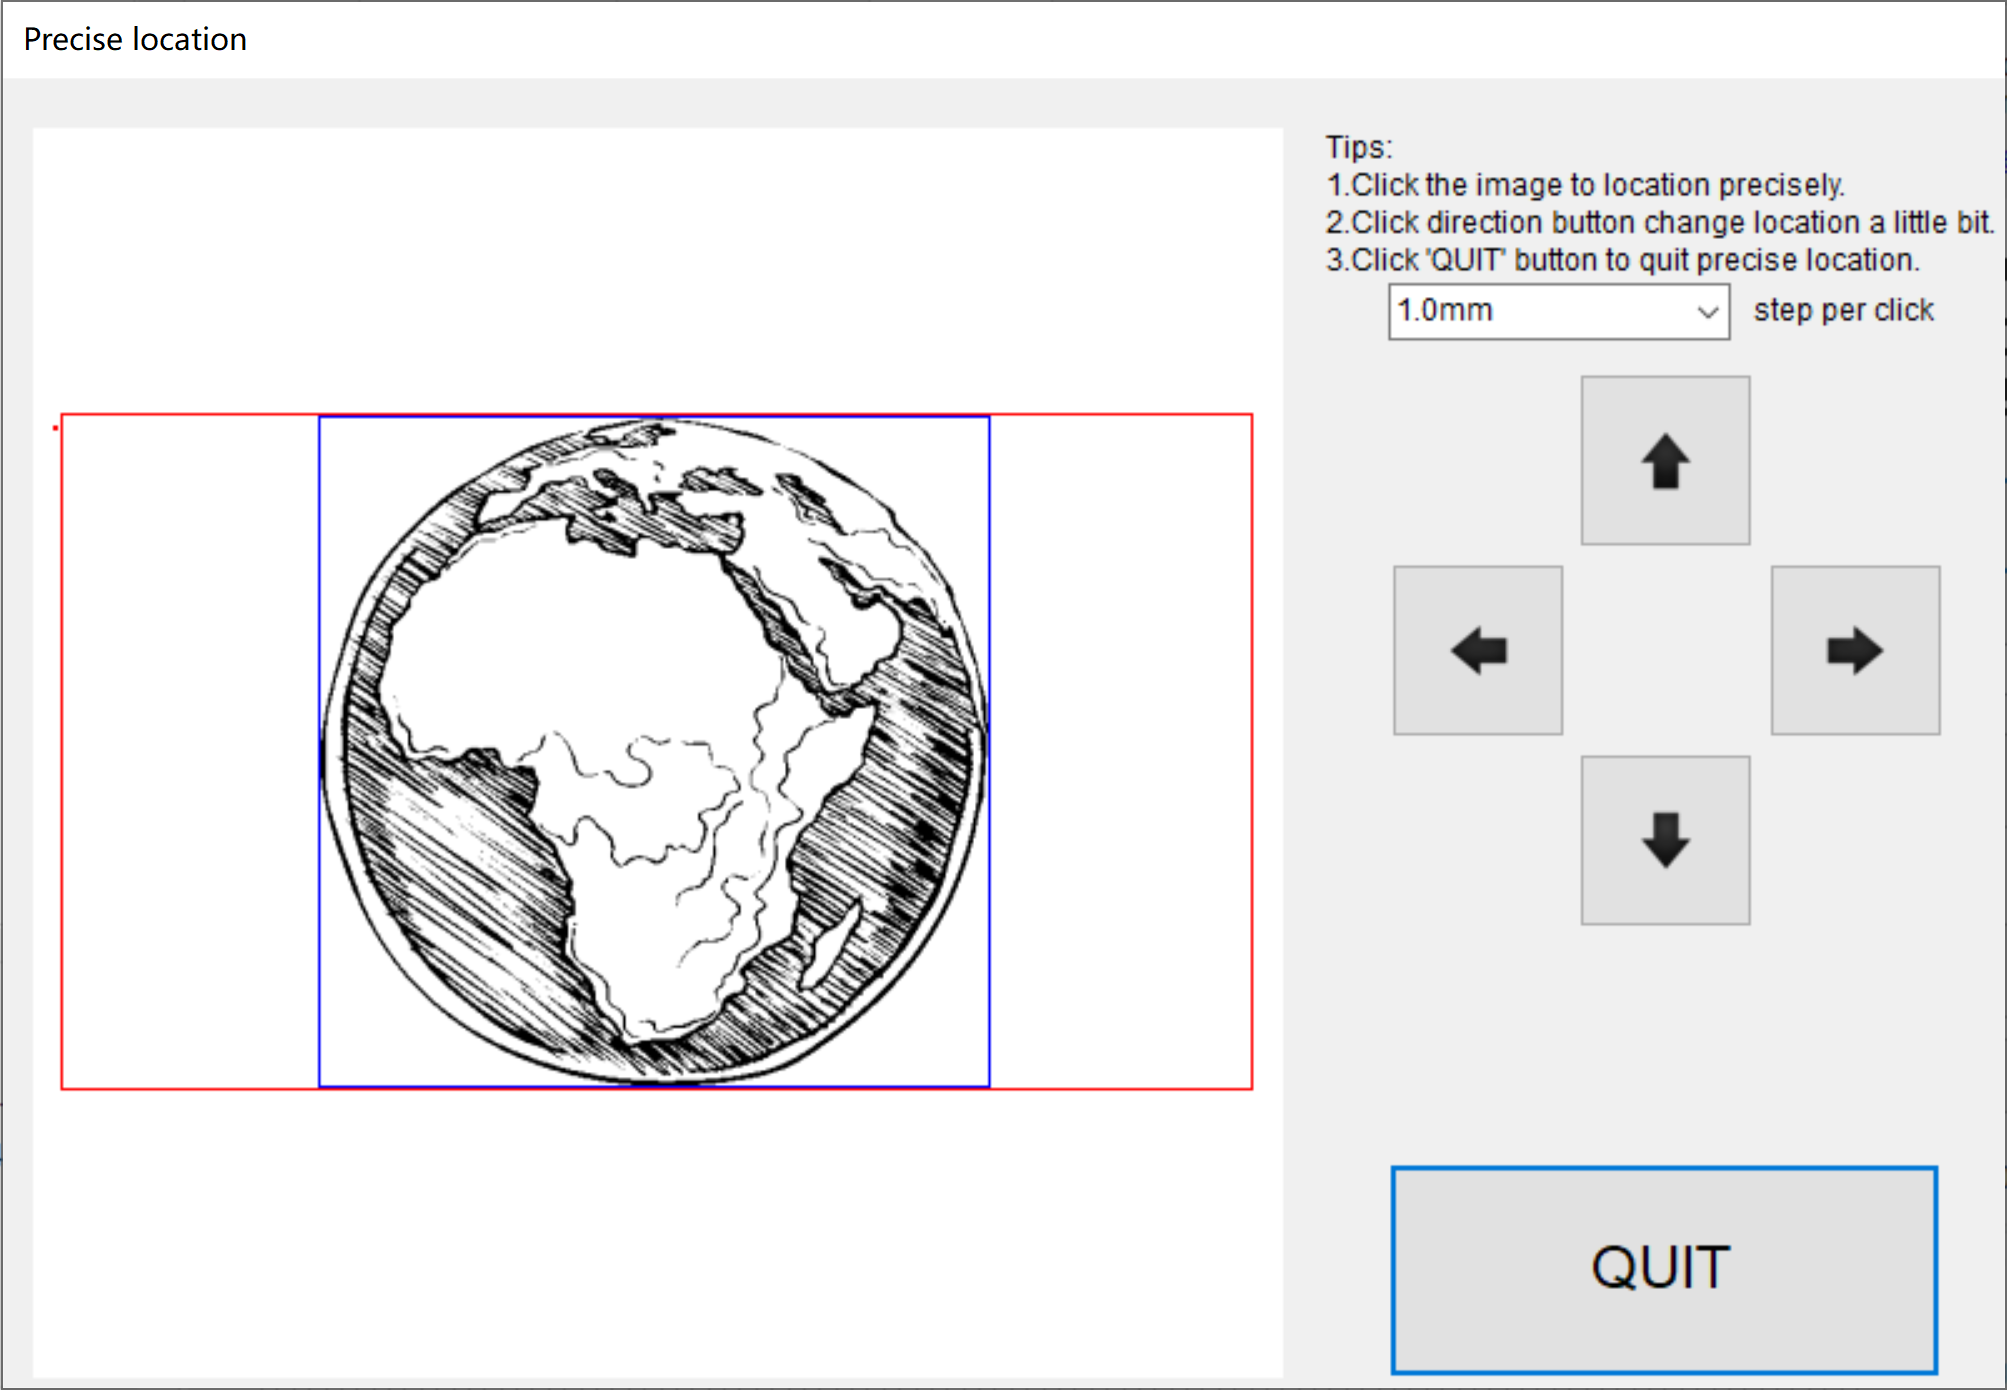
Point positioning, precise control at 0.075mm accuracy:
Setting:

Start with the “NEJE 3” Android APP

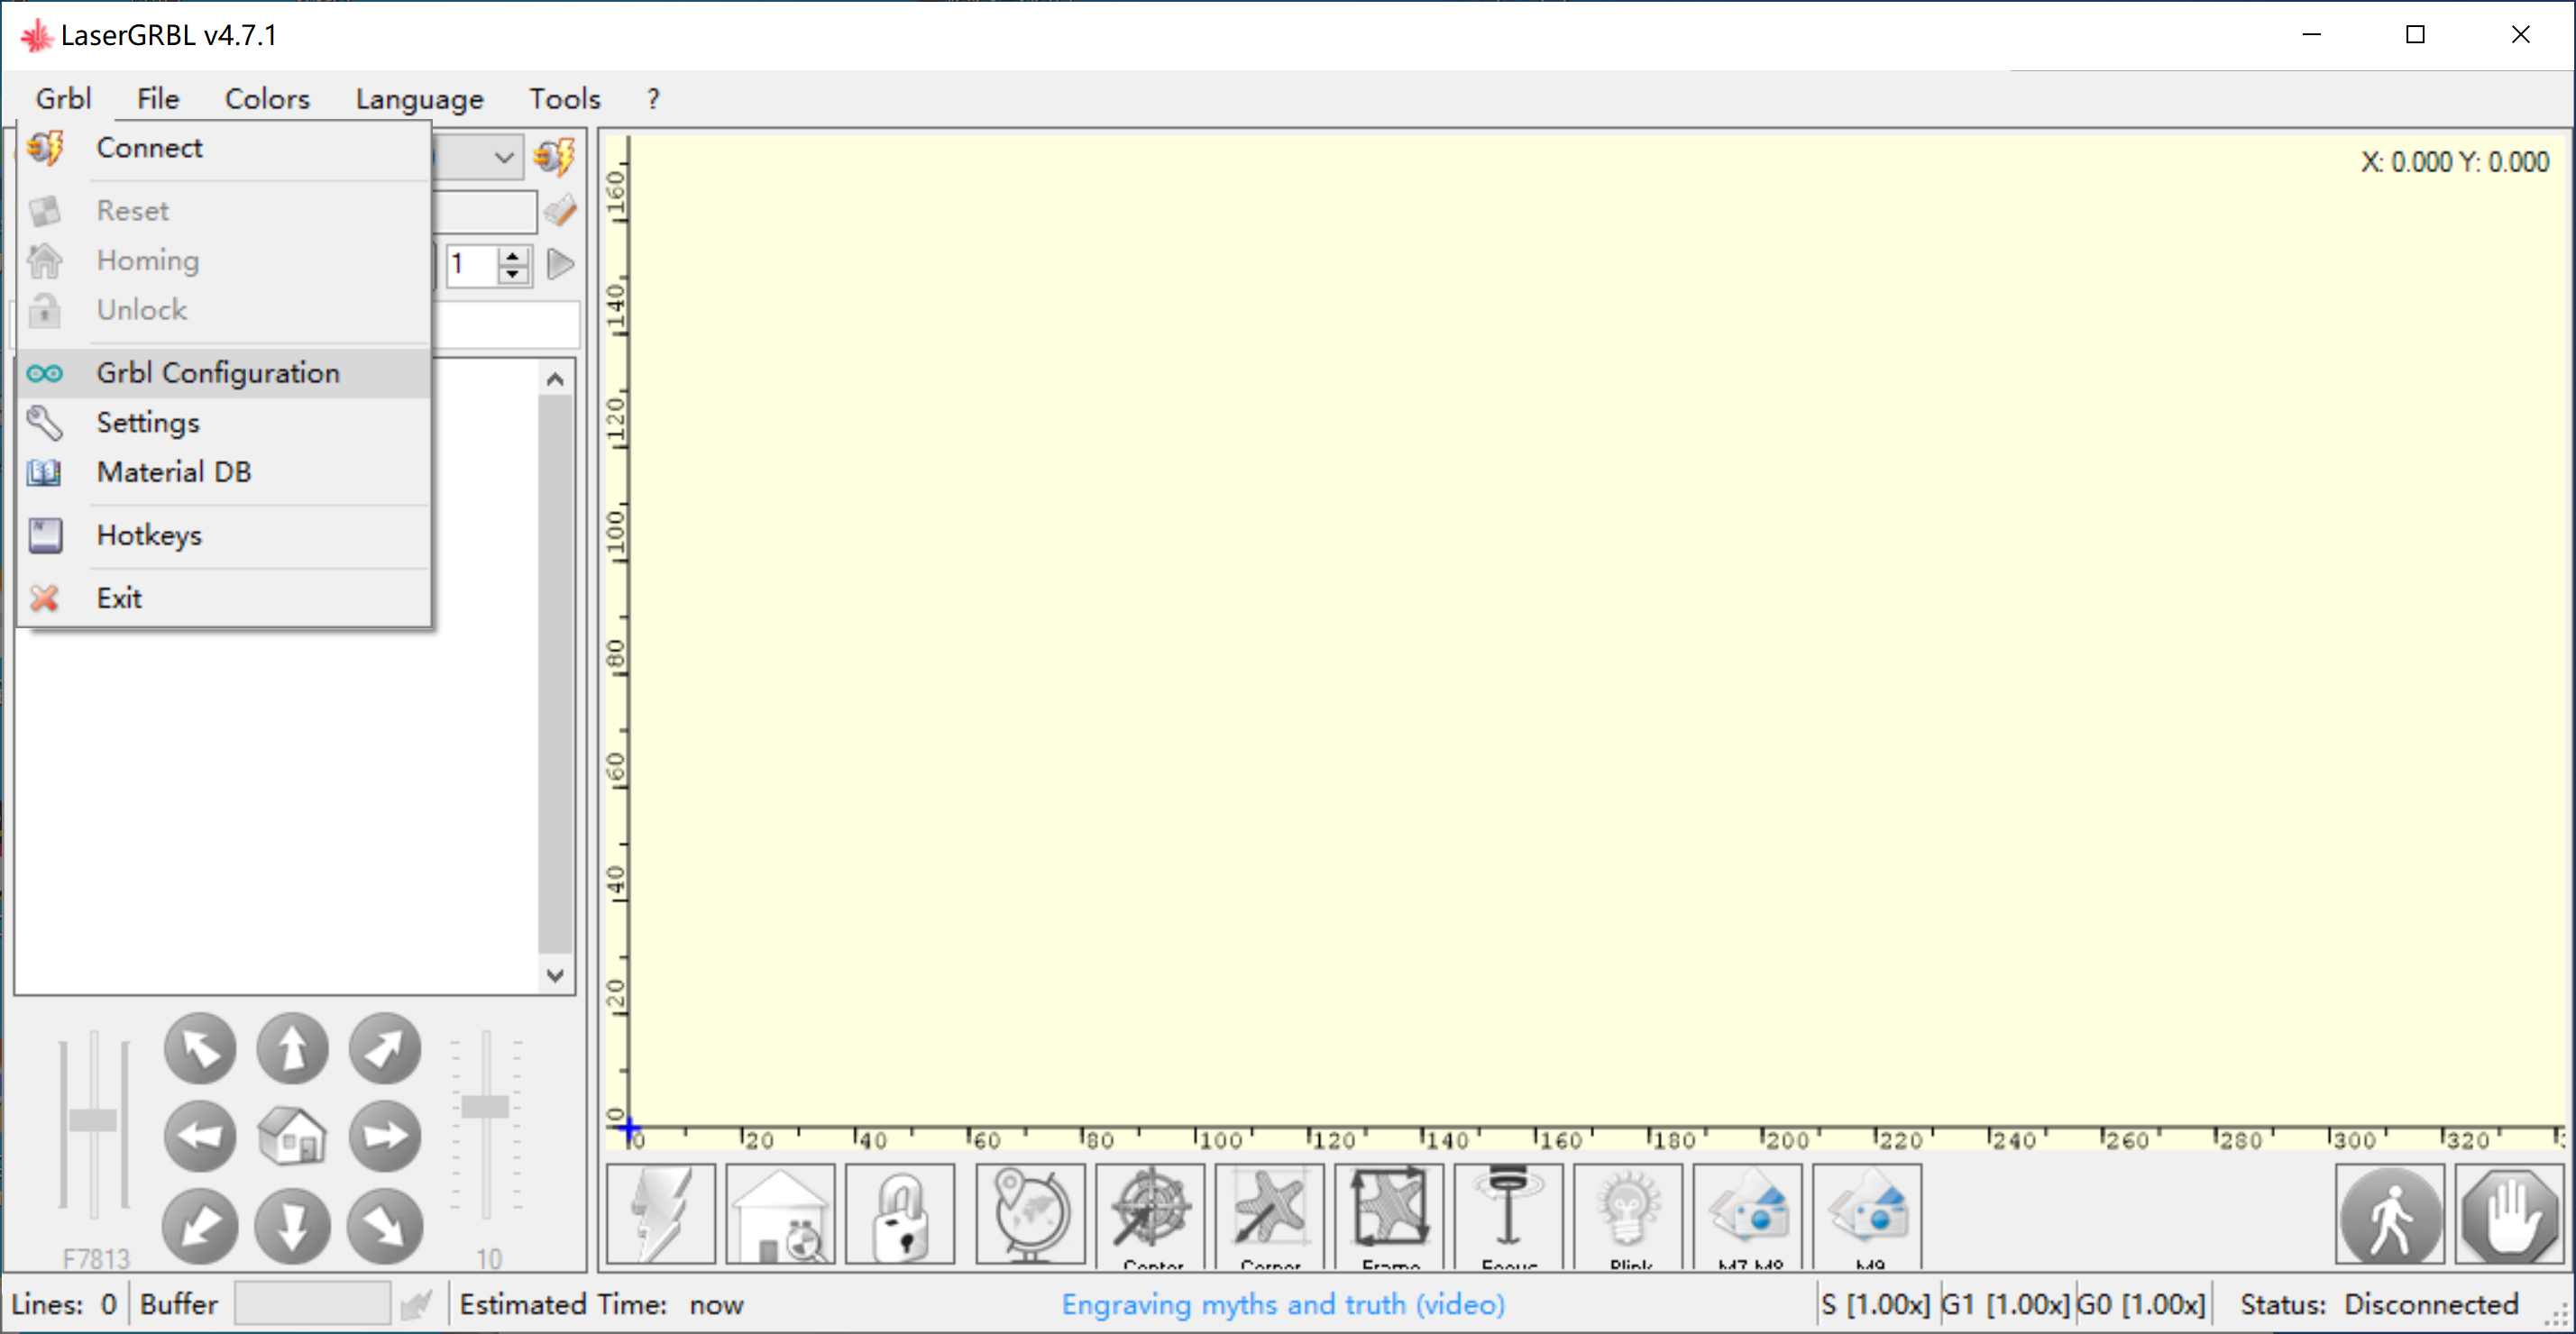
Grbl Configuration
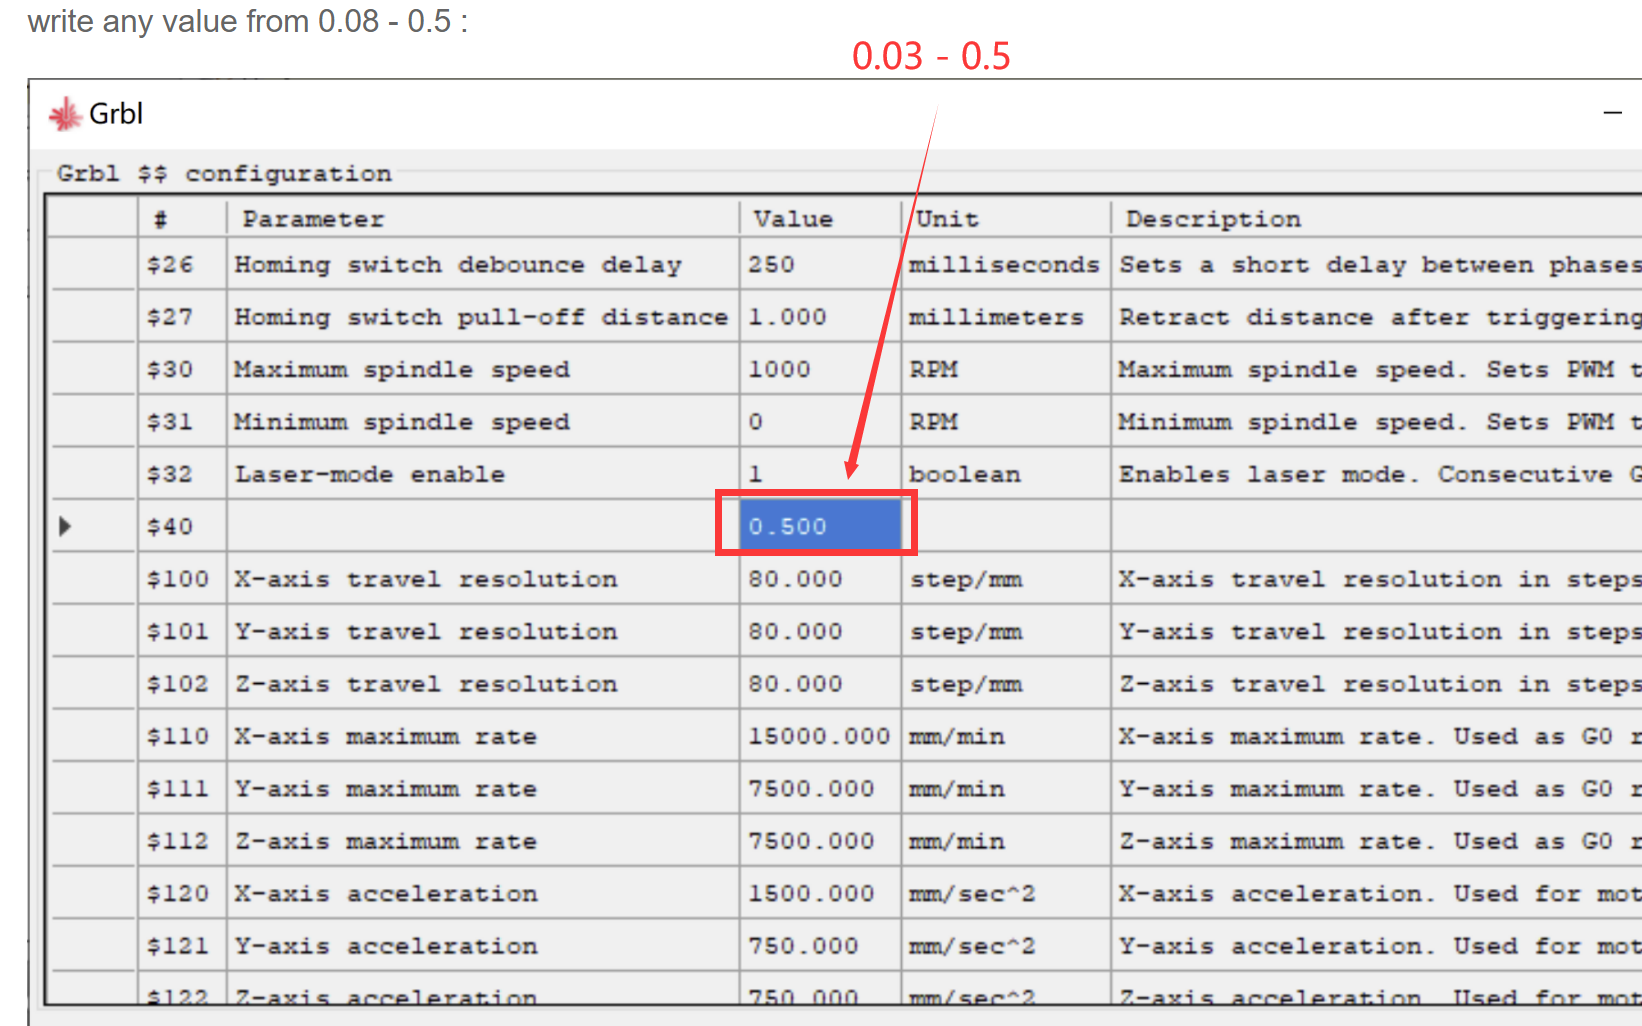
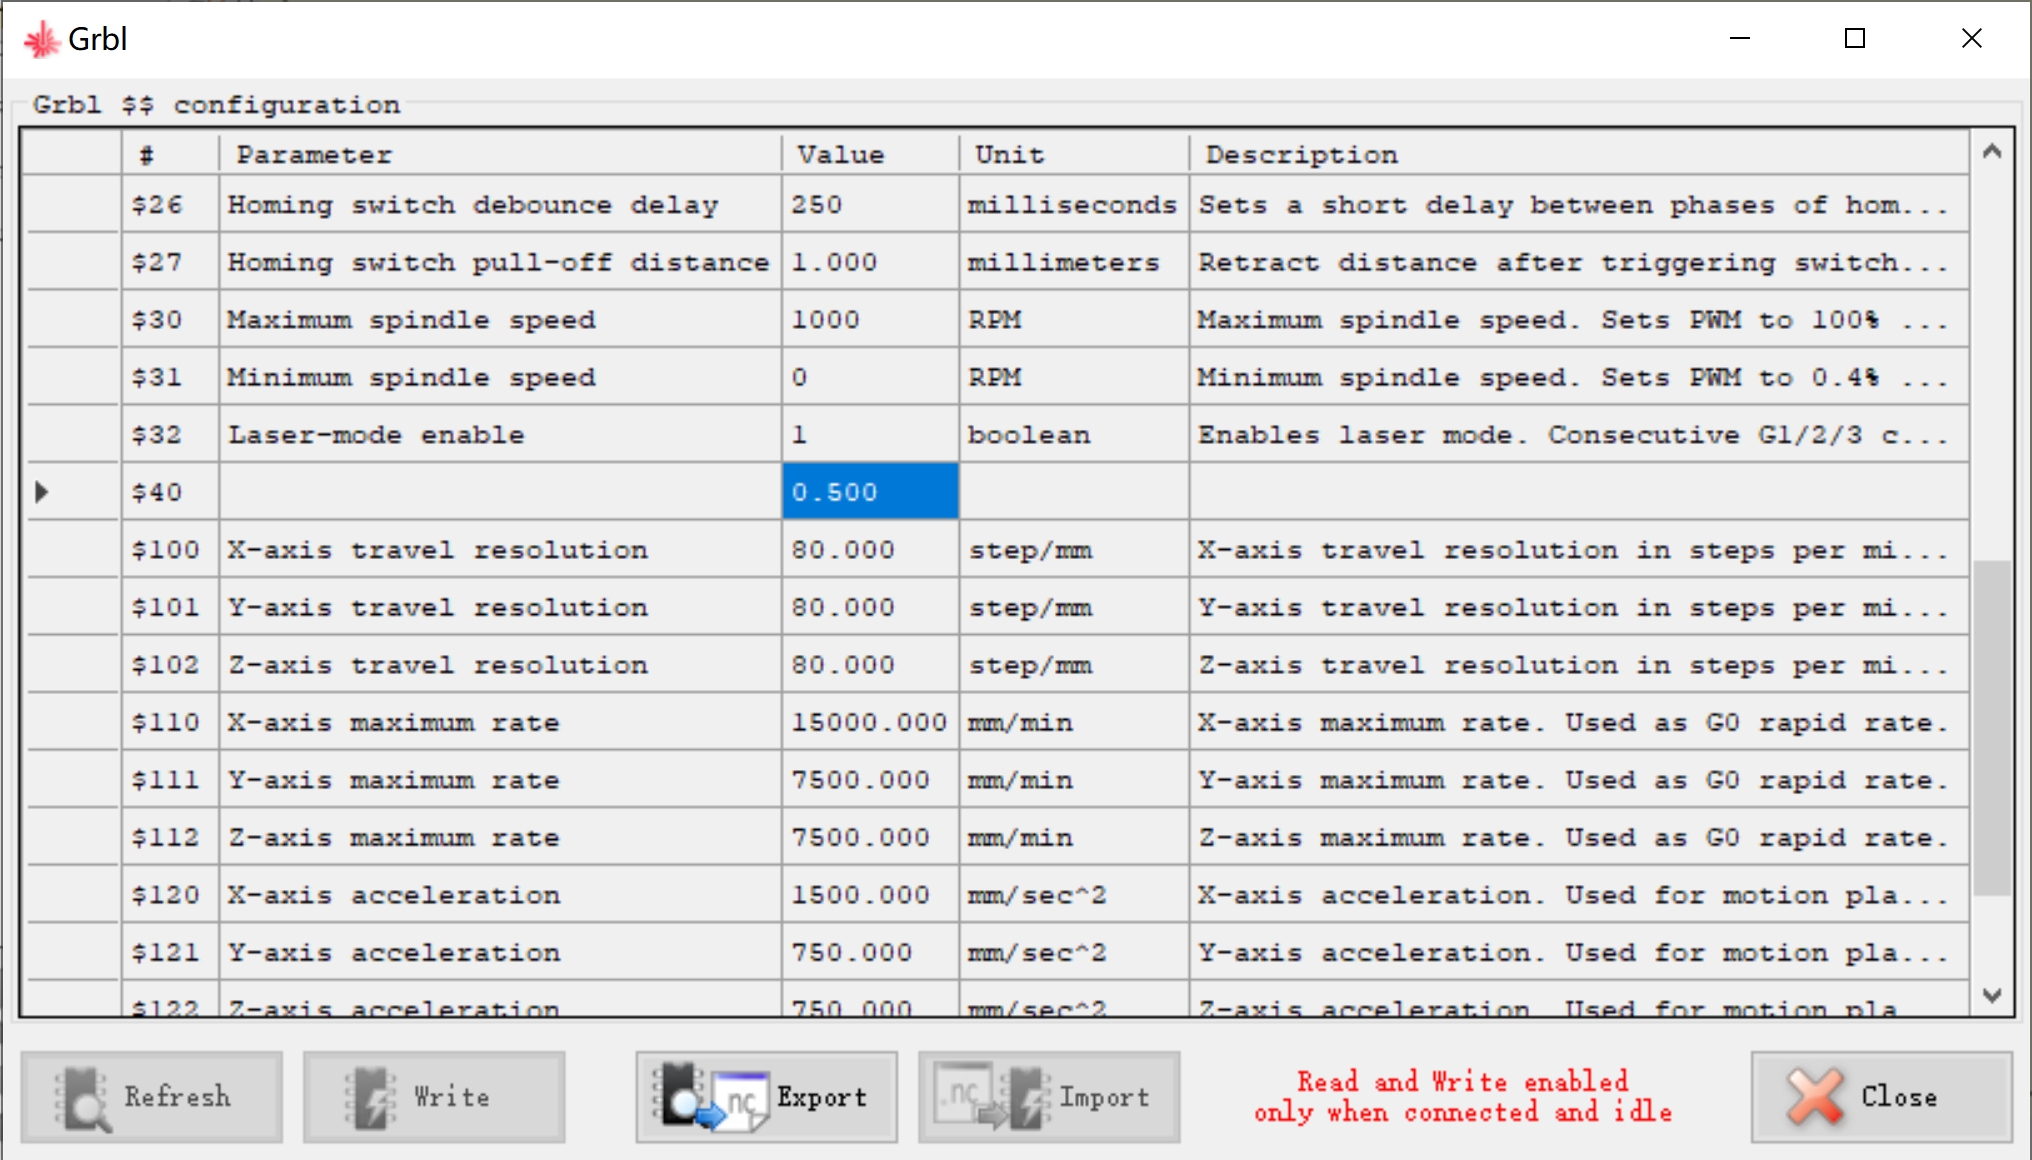
How to set low light intensity in GRBL?
Write any value from 0.08 – 0.5. The value means % laser intensity, please proceed with caution, if you modify the parameters and cannot restore the default firmware, you can re-update the firmware in NEJE Win software.
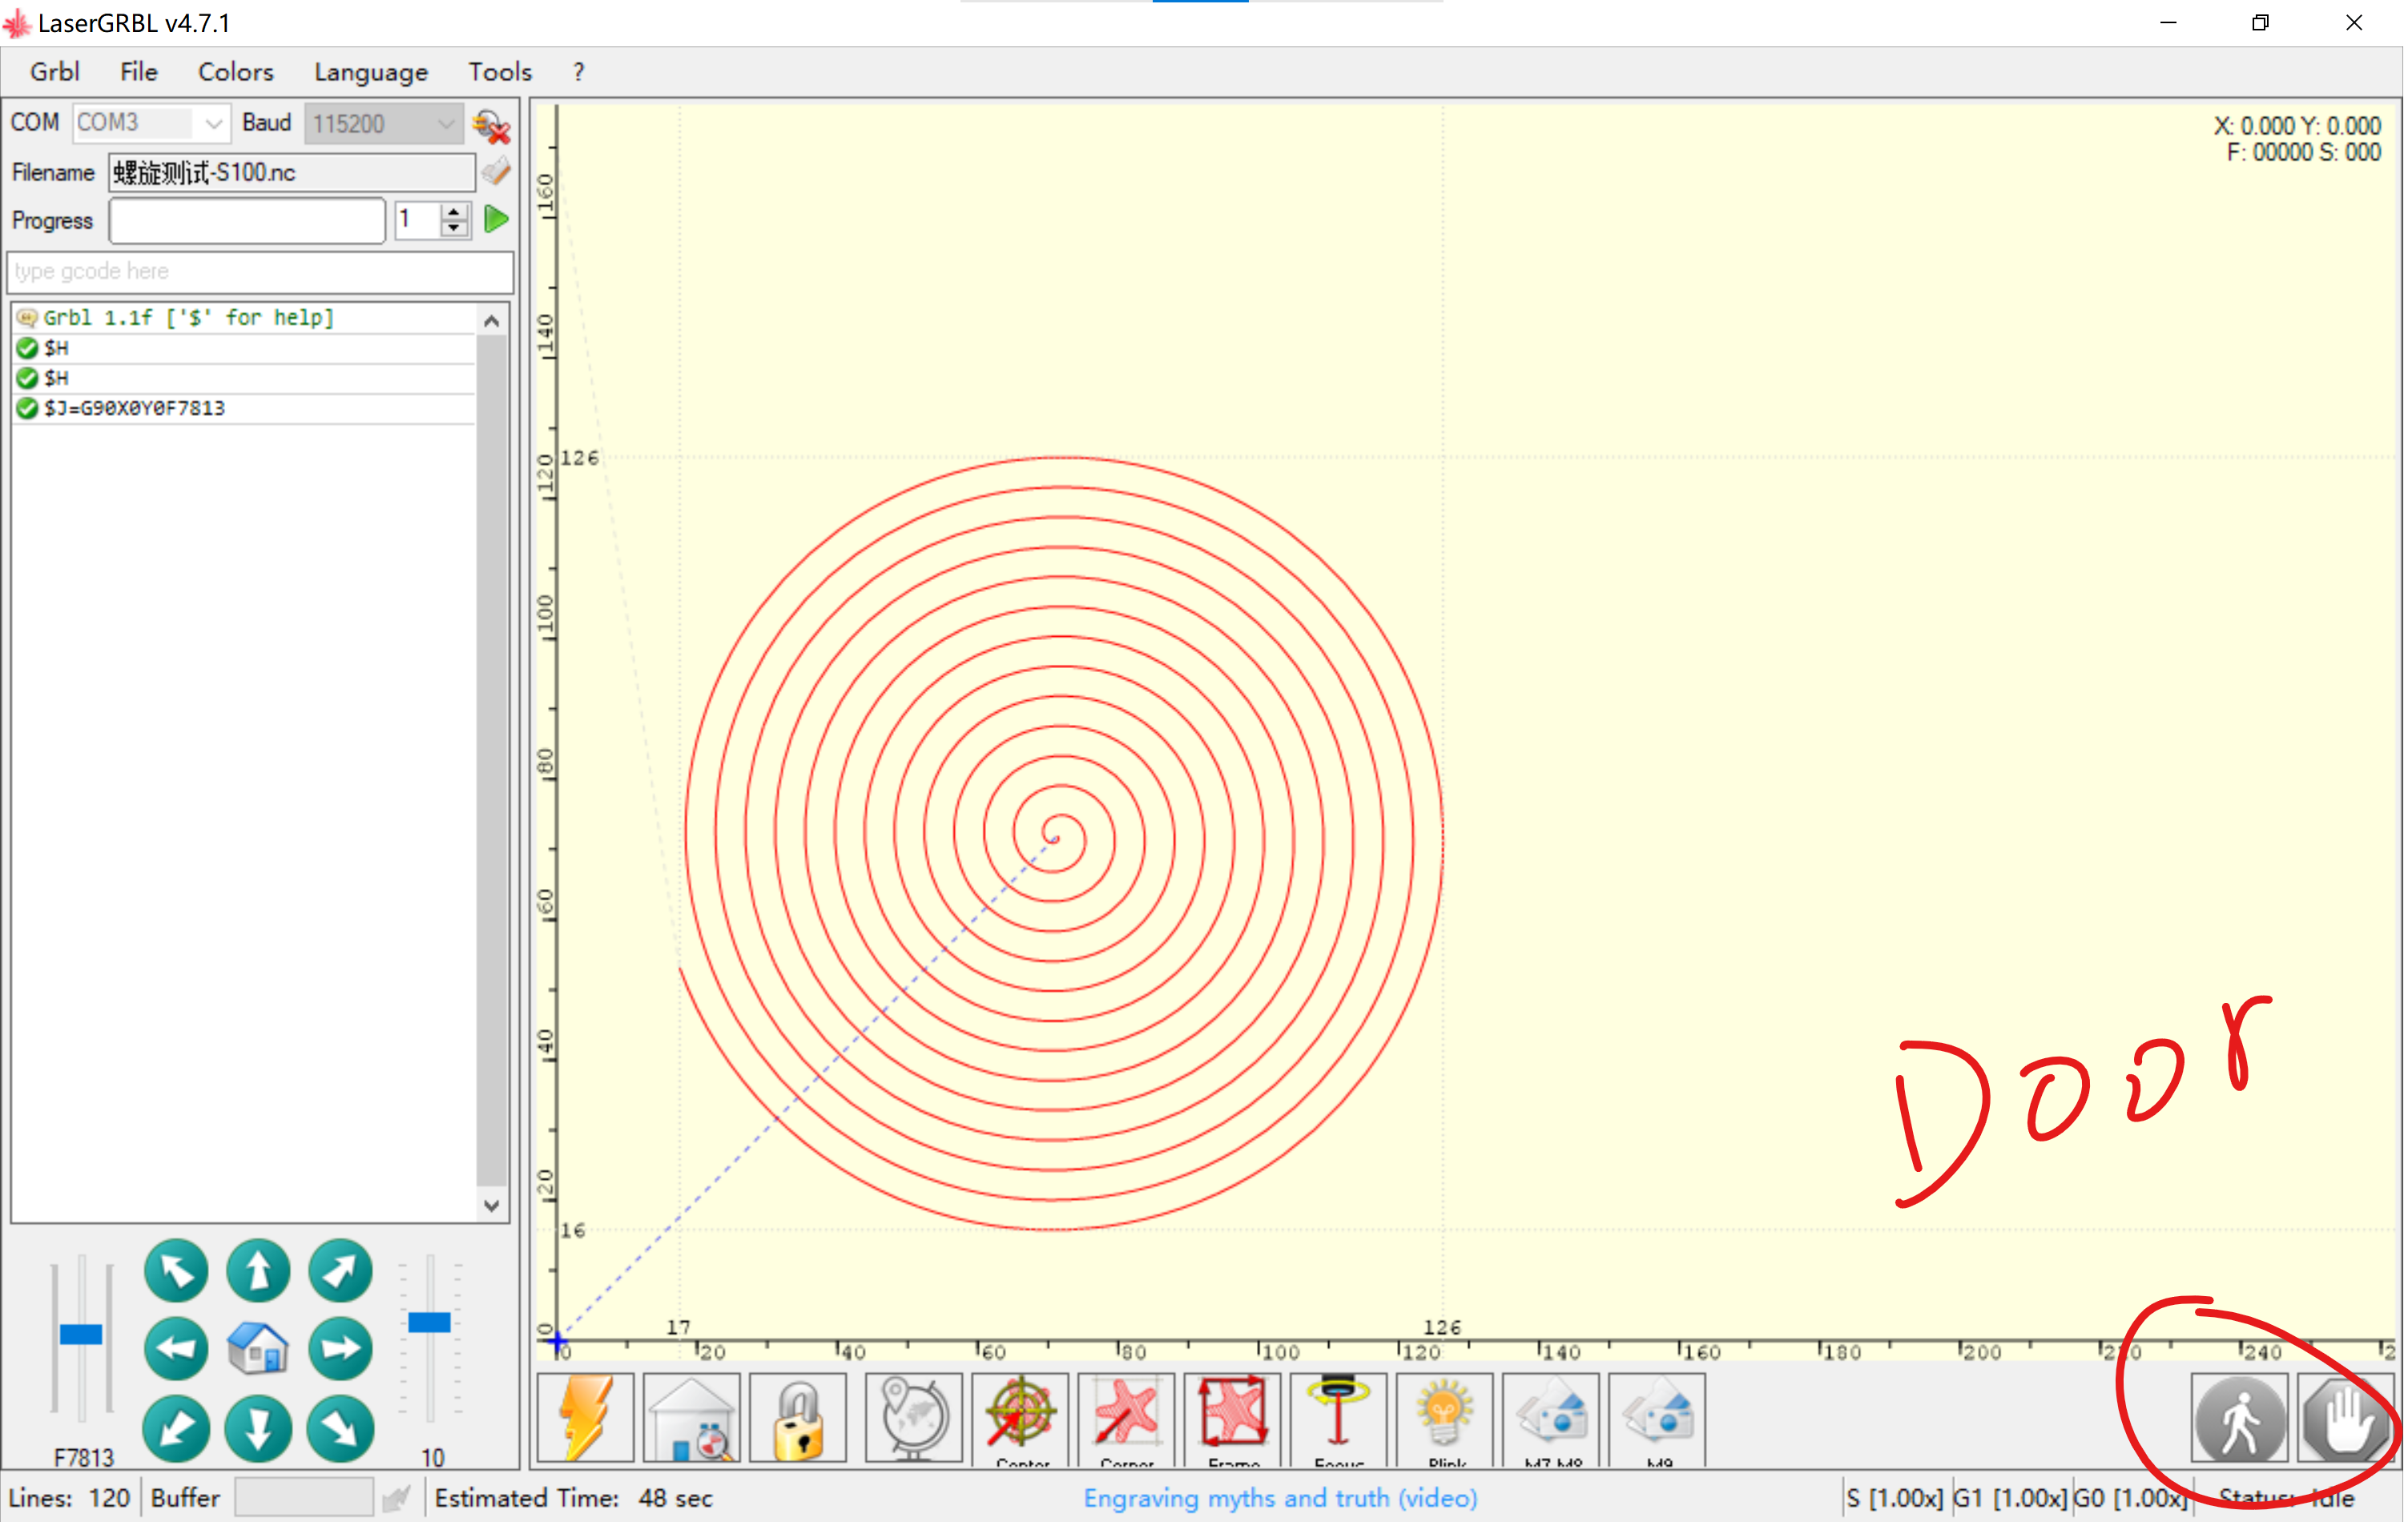
Please refer to the official instructions for laserGRBL. It should be noted that NEJE 3 Max has added M8, M7, and Door to adapt to laserGRBL. In addition to the low-light settings mentioned above, you need to add M8 to the .nc file to control the air to open, M7 controls the exhaust to open, and M9 controls them to close.
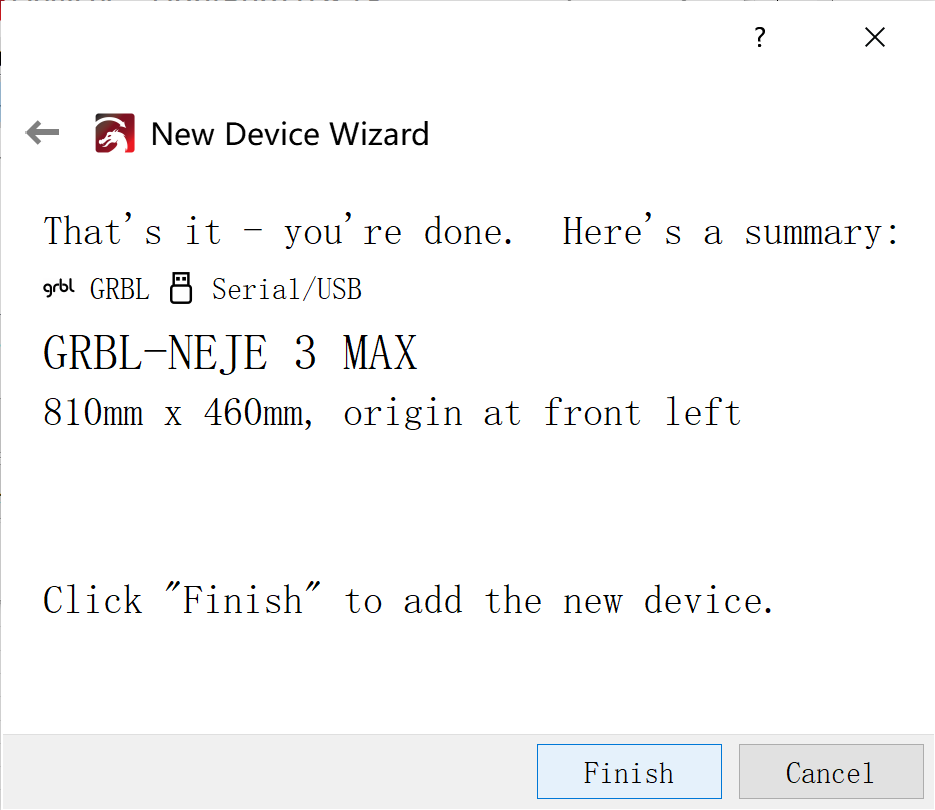
Start with Lightburn
Initialize Lightburn settings:

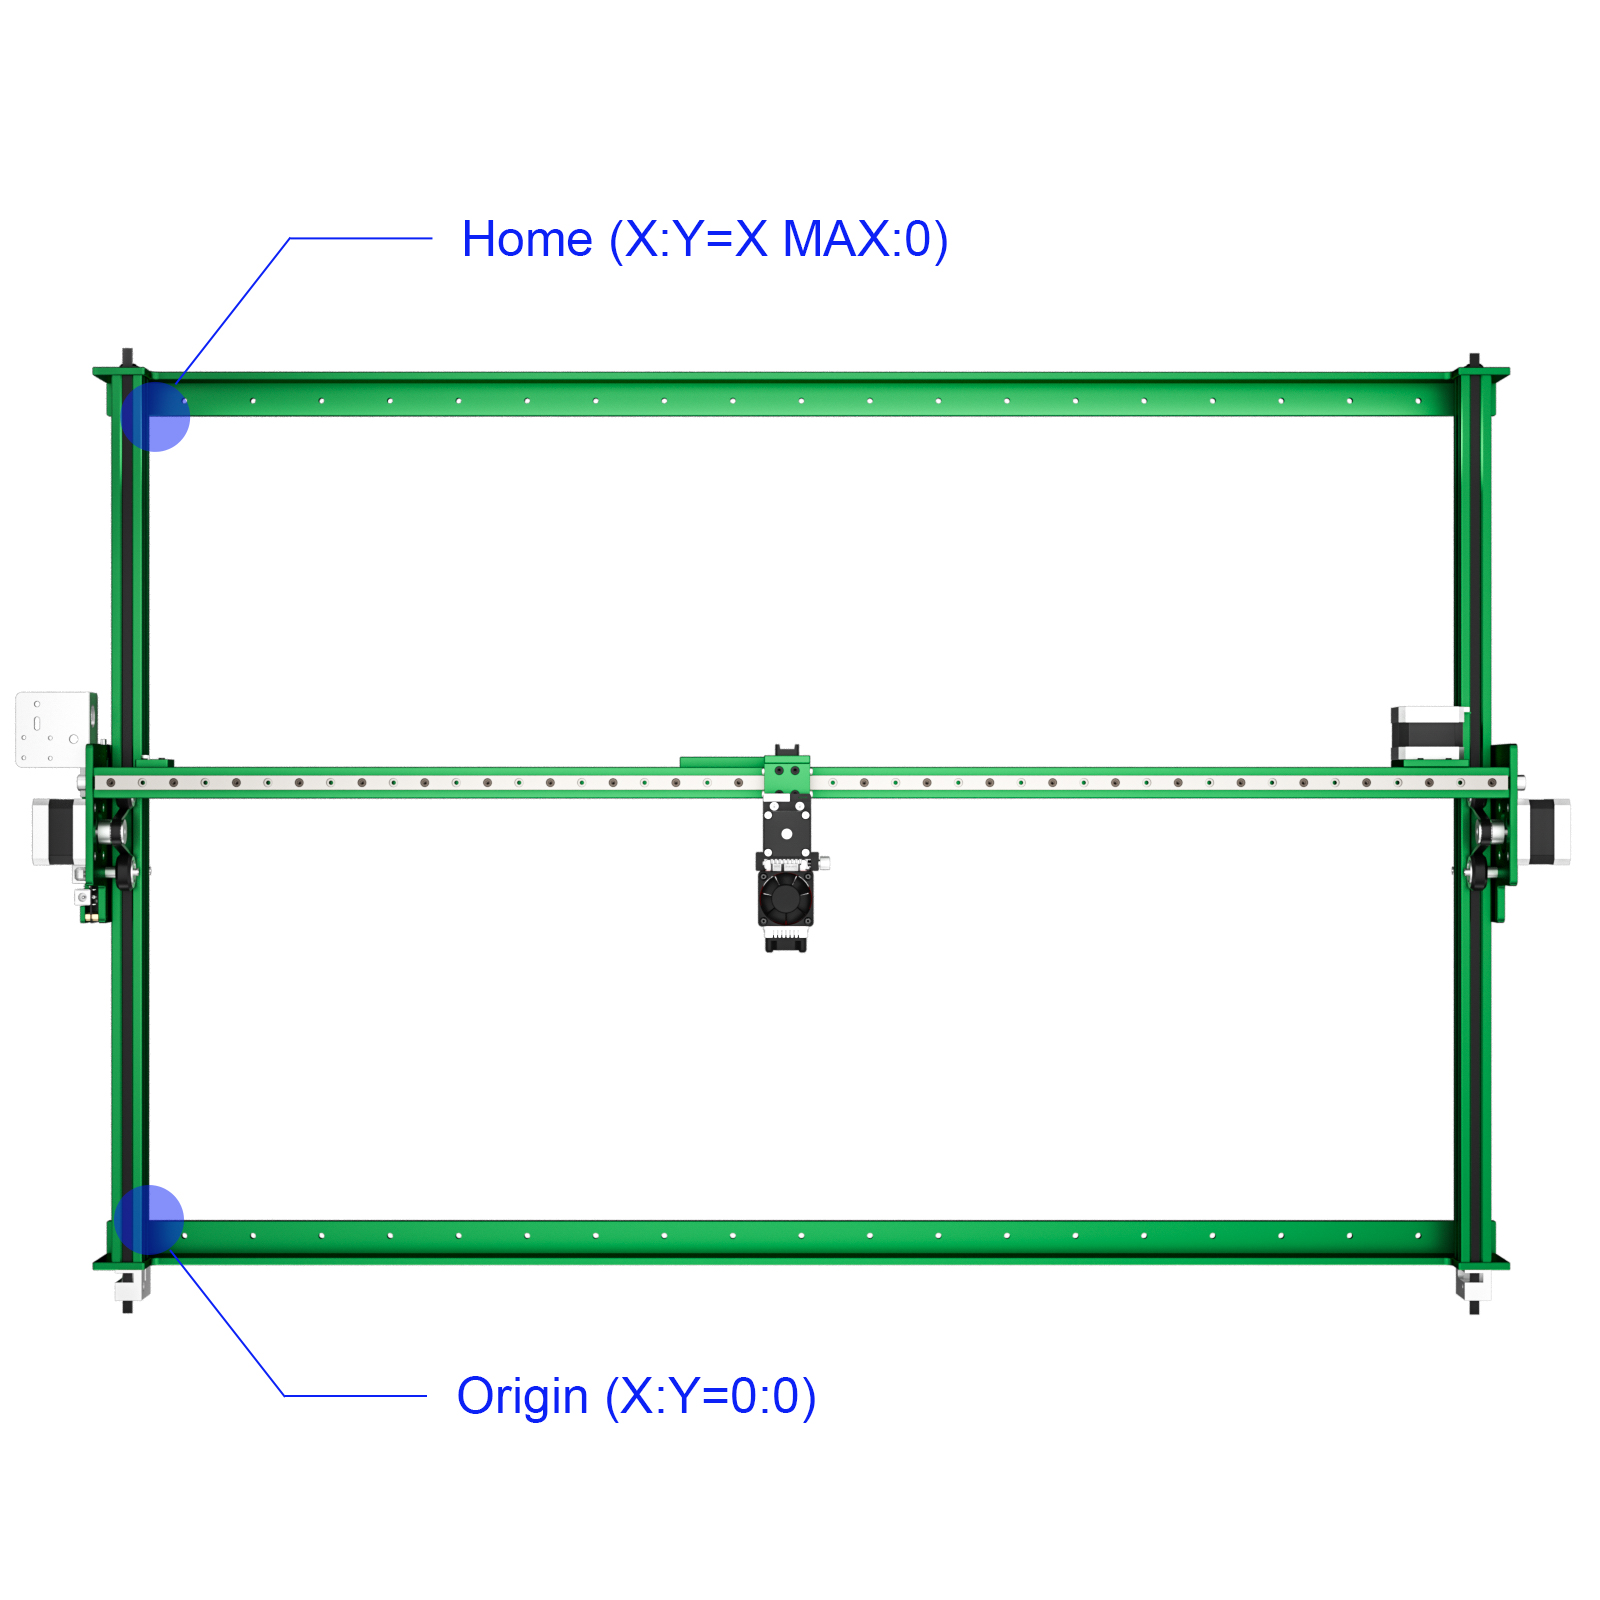
Area setting: X: 810×460 Y.
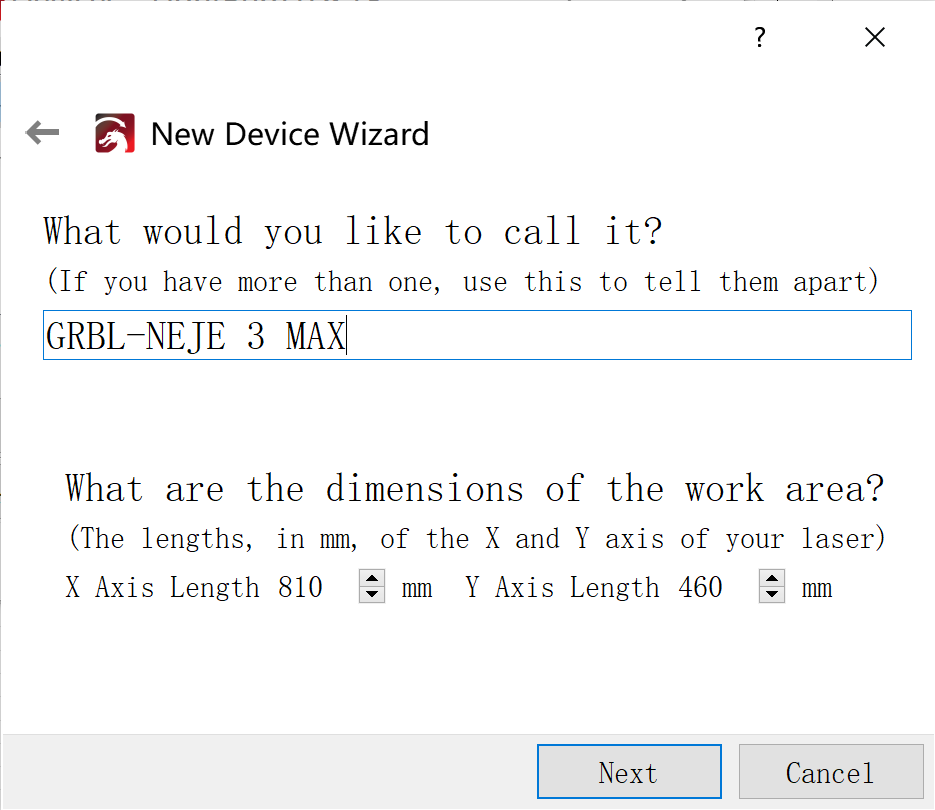
Origin X0,Y0: Front Left. Auto “Home”.

Finish:
How to start M7 in Lightburn:
Device Settings
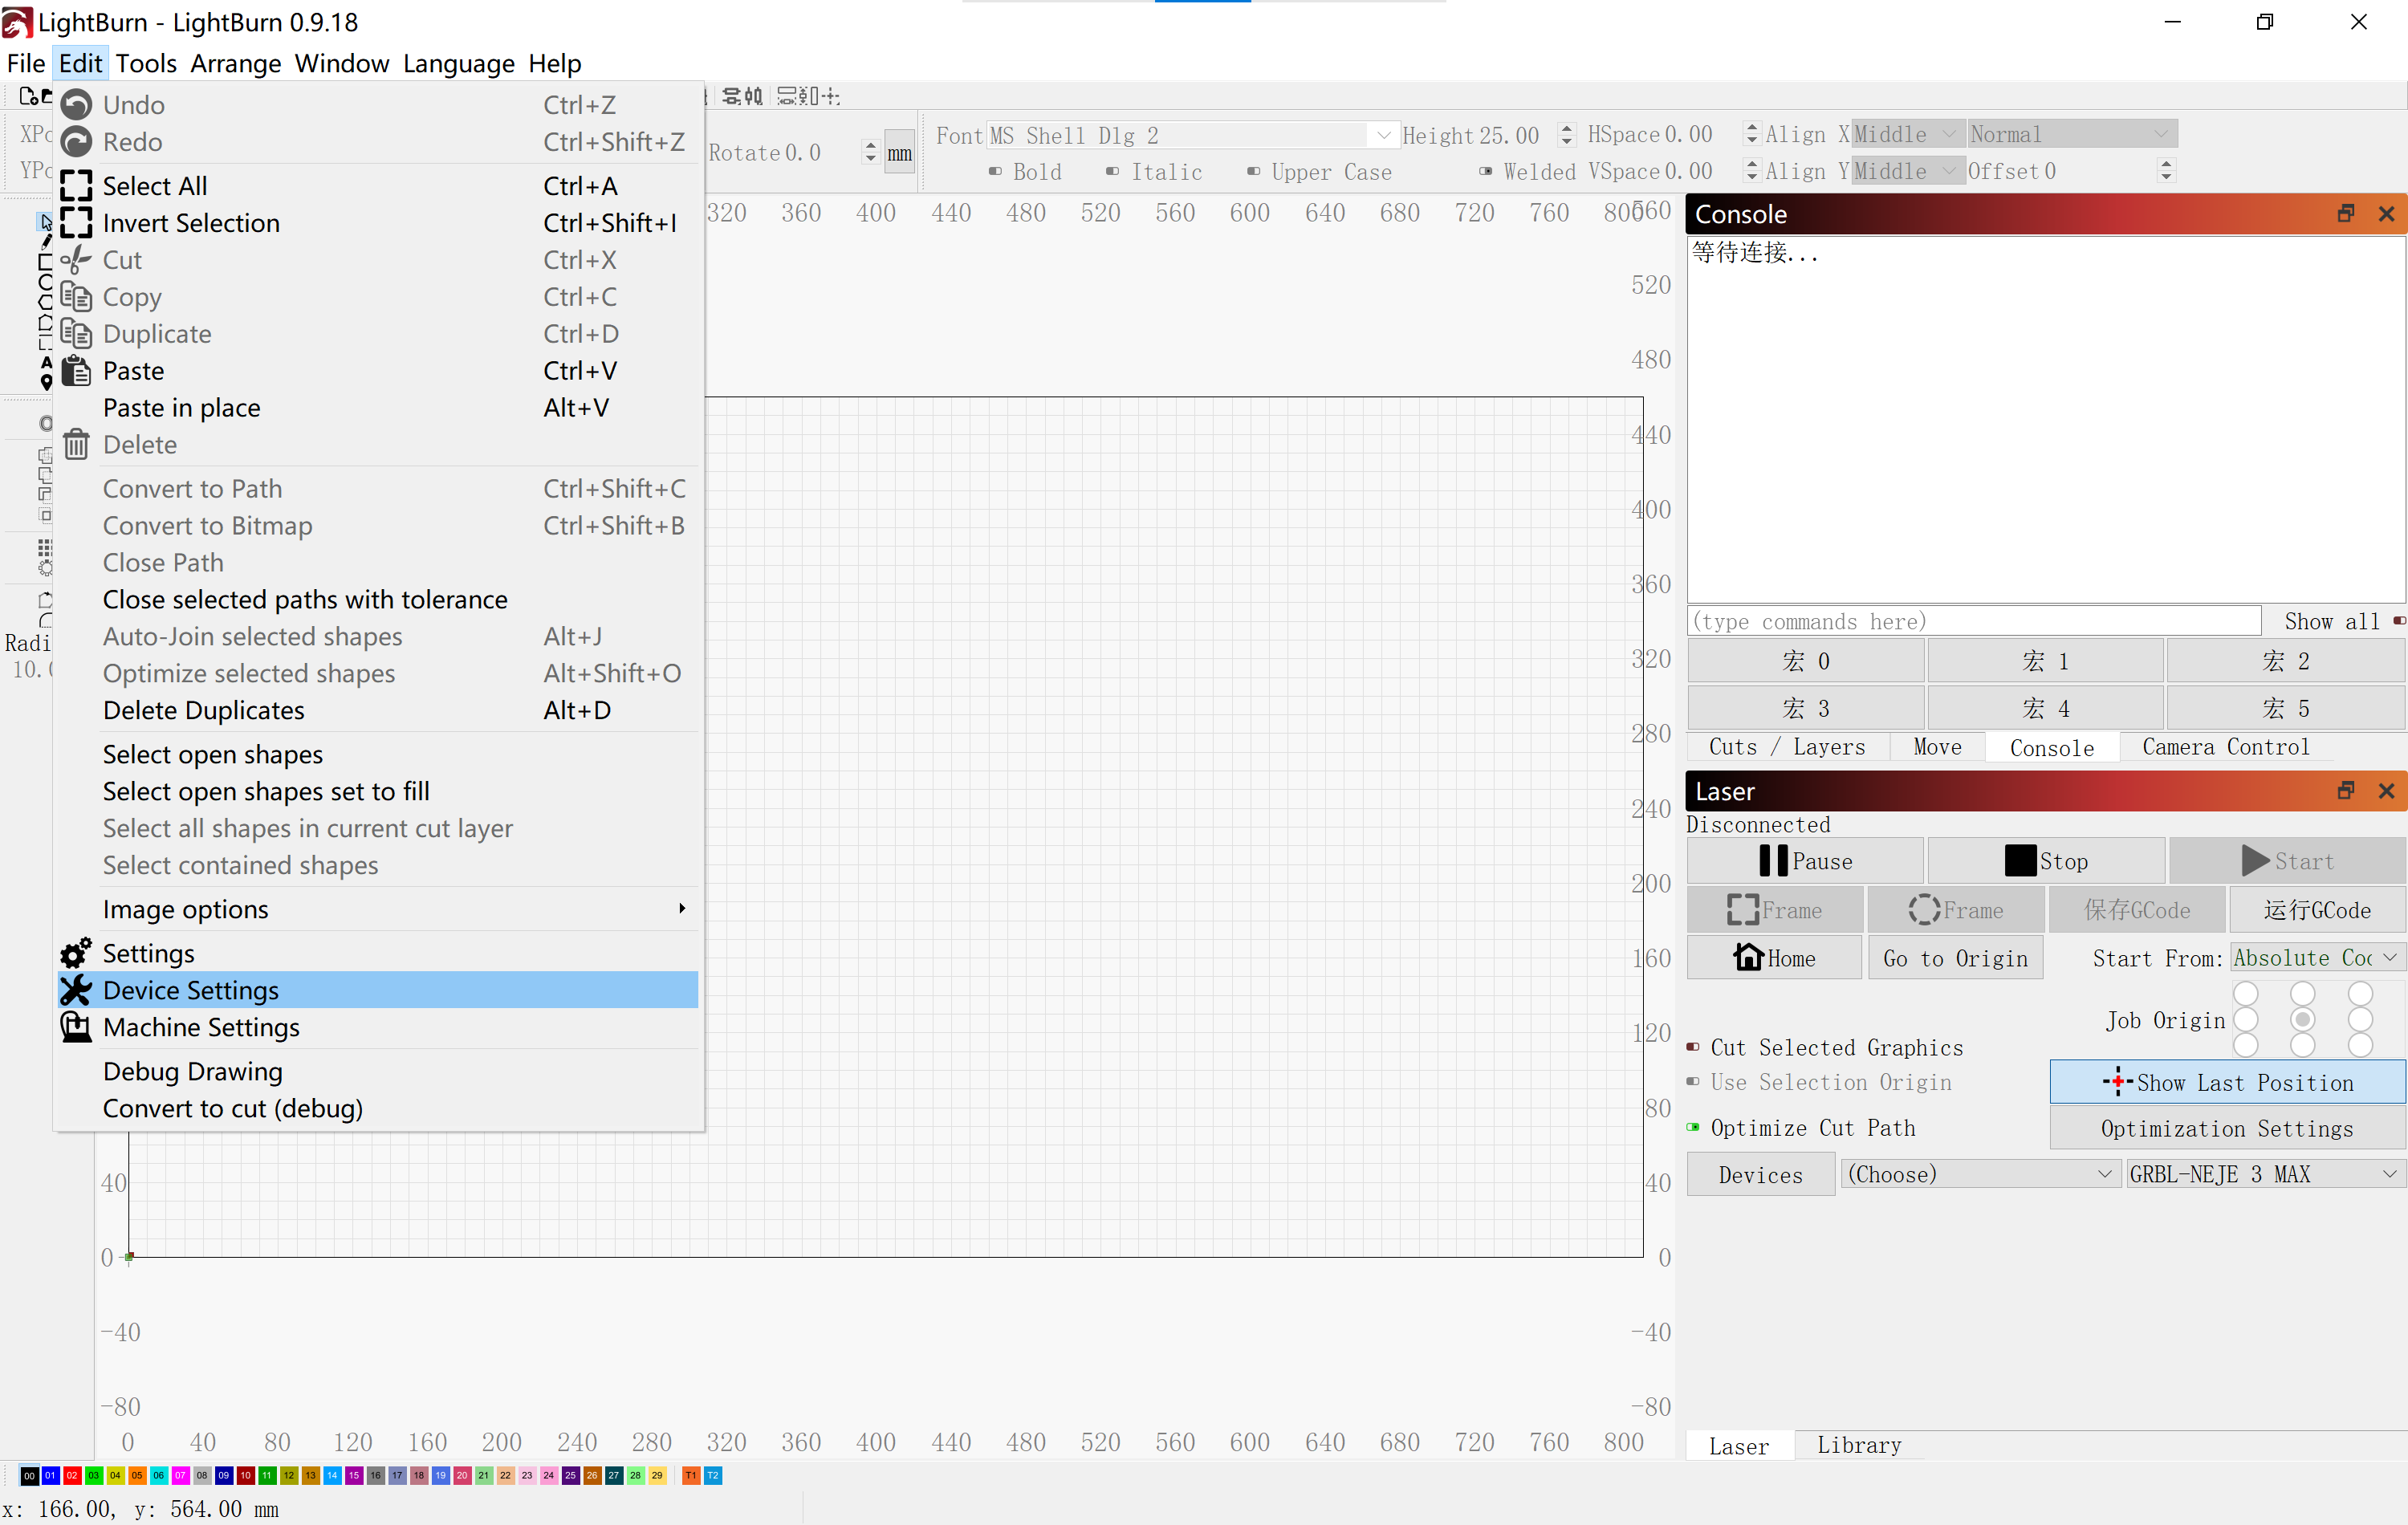
Start G-code: M7
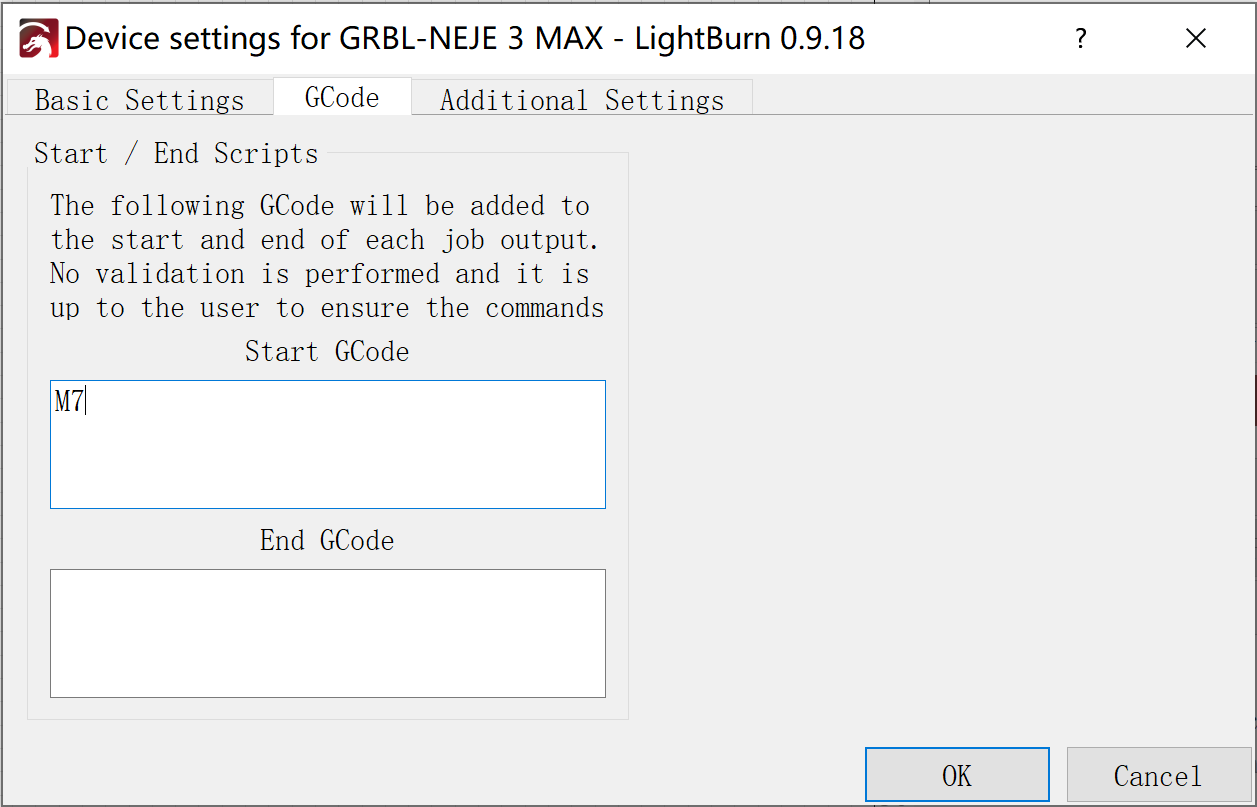
For the use of Lightburn software, please refer to the Lightburn official documentation. It should be noted that the M8 function needs to be turned on in the Lightburn layer setting, and the M7 needs to be manually turned on by referring to the previous method. Lightburn defaults to signal the M9 to turn off the engraving end, and the Door function only works in Lightburn mode. Can be stopped, but cannot resume engraving after stopping, NEJE mode and laserGRBL mode can resume engraving after the Door function is activated;
Offline Control
NEJE Max 4 built-in Neje and GRBL dual firmware. The Neje firmware can be used as a controller. It can be used as a virtual instruction controller. Through Neje software, the .gc file exported by LightBurn through the latest Neje Win software transmits files to the device through wireless ways, or can also Perform the operation directly through the Neje software control .gc file. This is currently the most advanced and portable control method.
The Neje control board has updated the NEJE traditional “One Key Start” function, which can manually switch mode, positioning, start, suspension, shut down, and other operations.
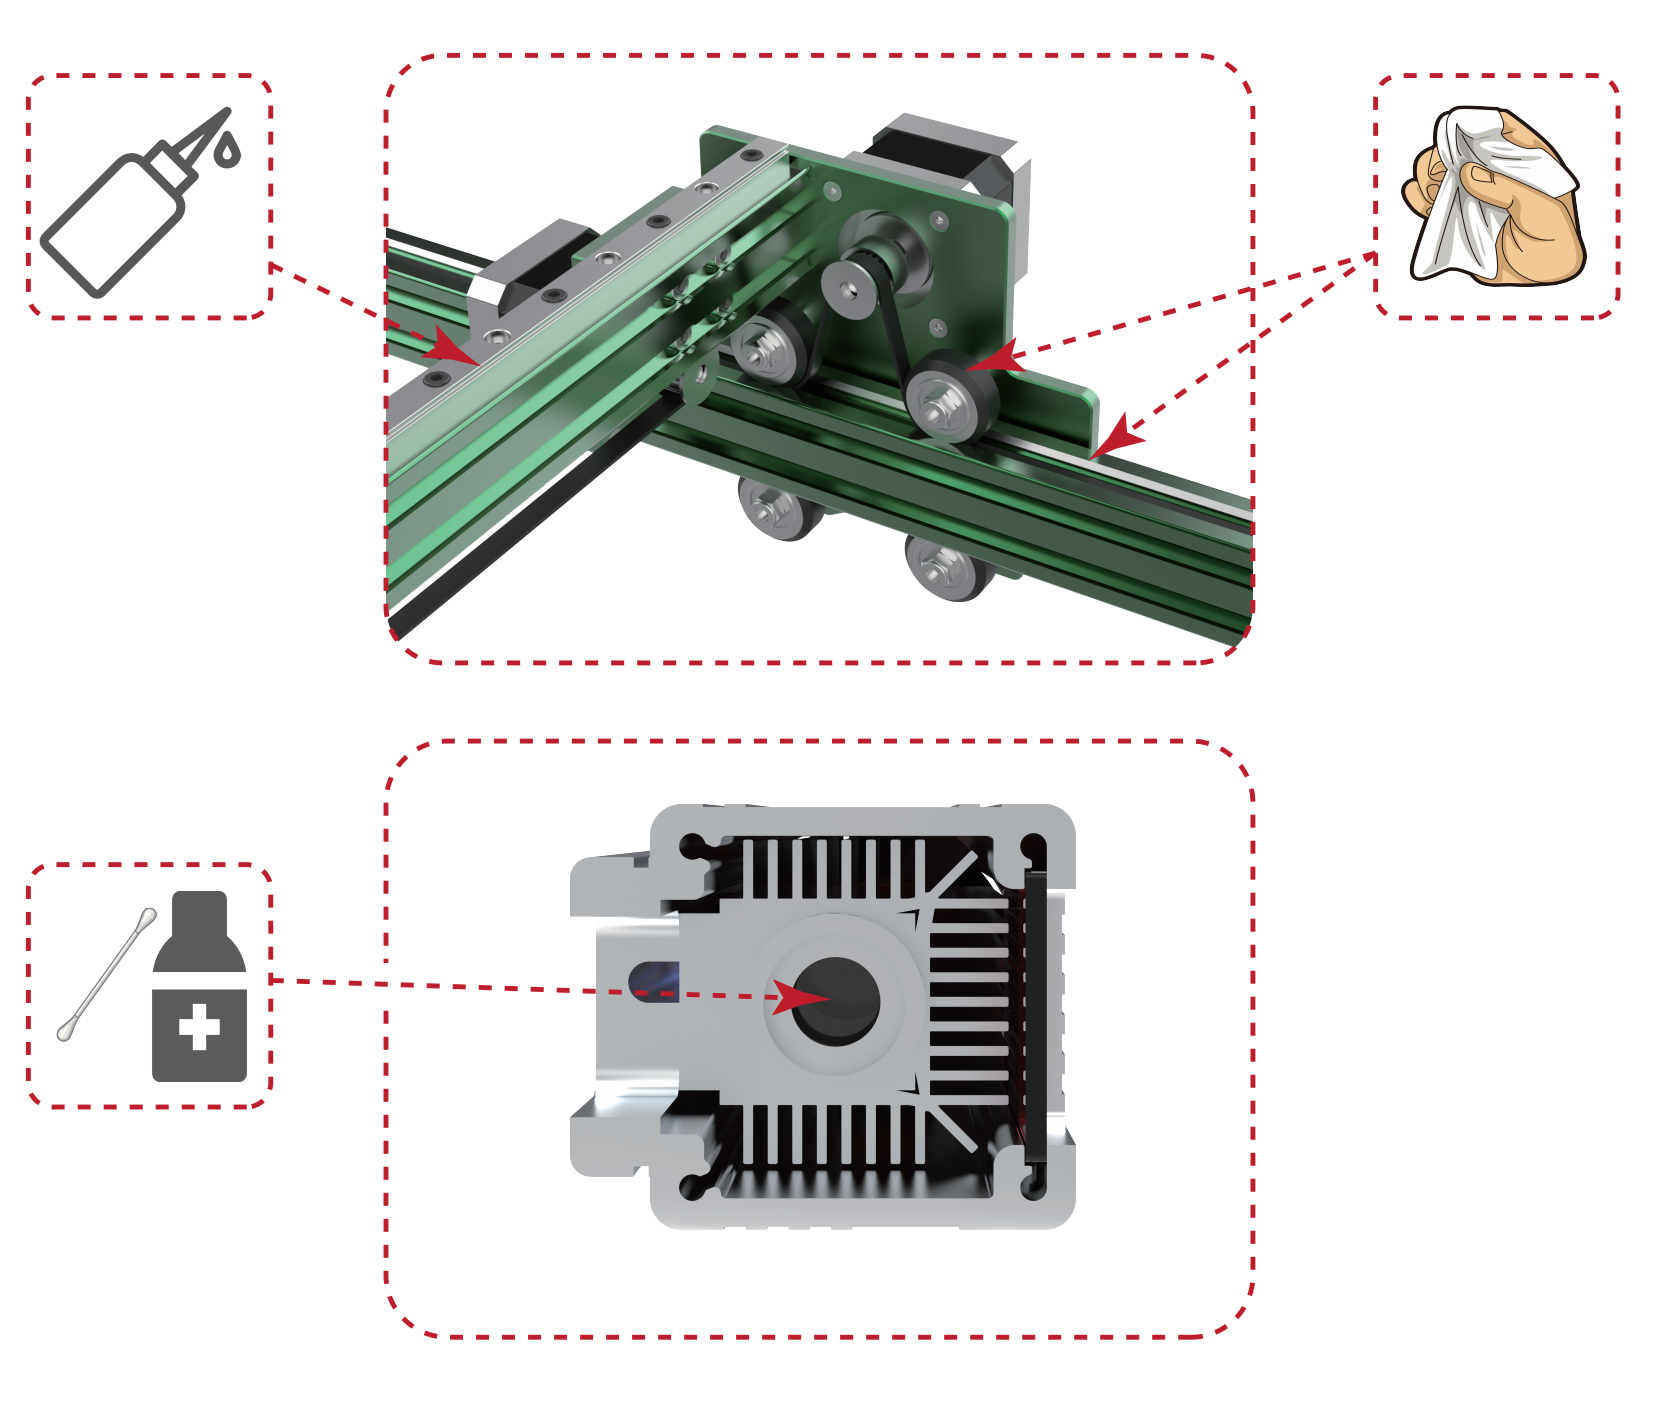
Maintenance
Dust cleaning: regularly clean the dirt and dust on the tracks and wheels, and check the tightness of the timing belt.
Lens cleaning: Smoke from engraving or cutting, or oily air sources may contaminate the lens. After contaminating the lens, the lens will be broken due to the high temperature of the laser. It is recommended to use alcohol to clean the lens surface frequently;
Moisture-proof storage: If your laser machine is not used for a long time, we suggest adding some anti-rust oil to the metal places such as the screws and bearings of the machine to avoid metal rust, and store it in a dry environment.