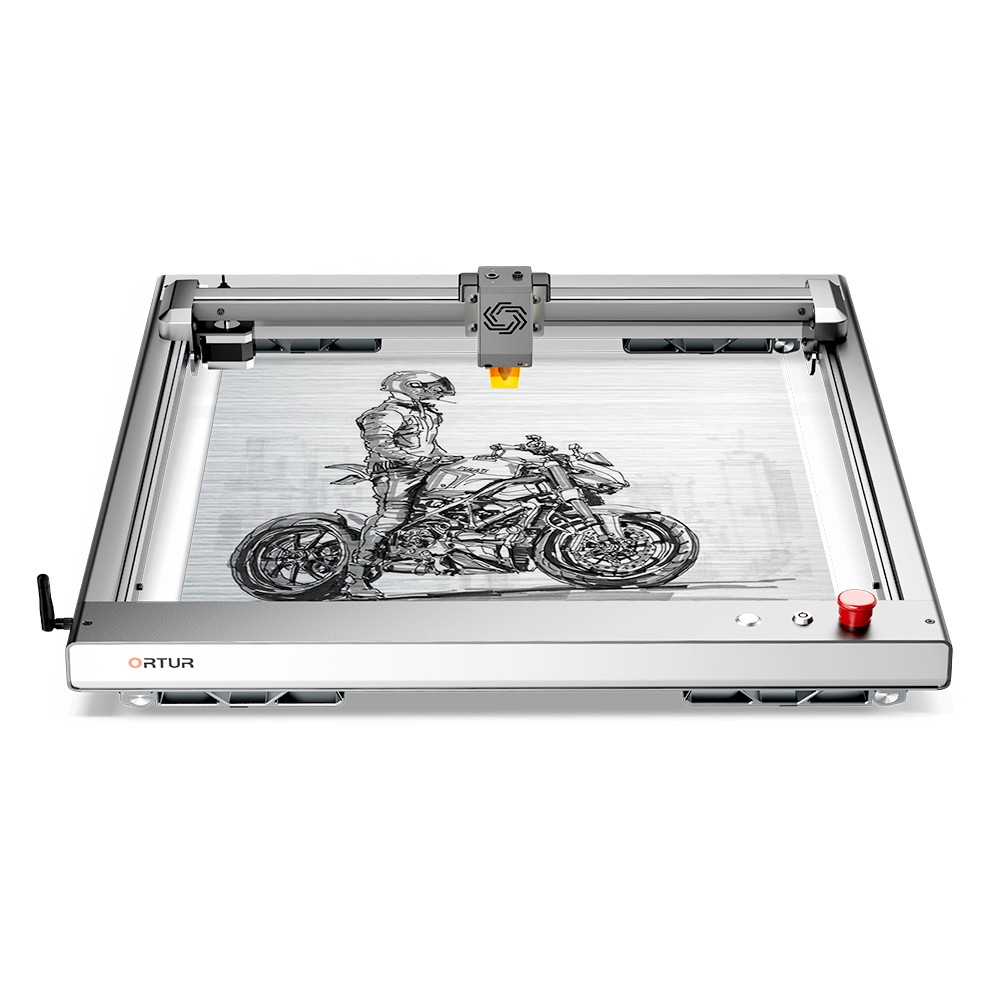
The latest Laser Master 3 is the fastest, smartest and safest laser engraver cutter from ORTUR. It is packed with proven features that significantly improve the usability of ease and quality of engraving and cutting.
But for many beginners, software installation and function details settings can still be problems. In order to help you better use Laser Master 3 and make the most of it, this article will give detailed explanations and solutions to some common situations.
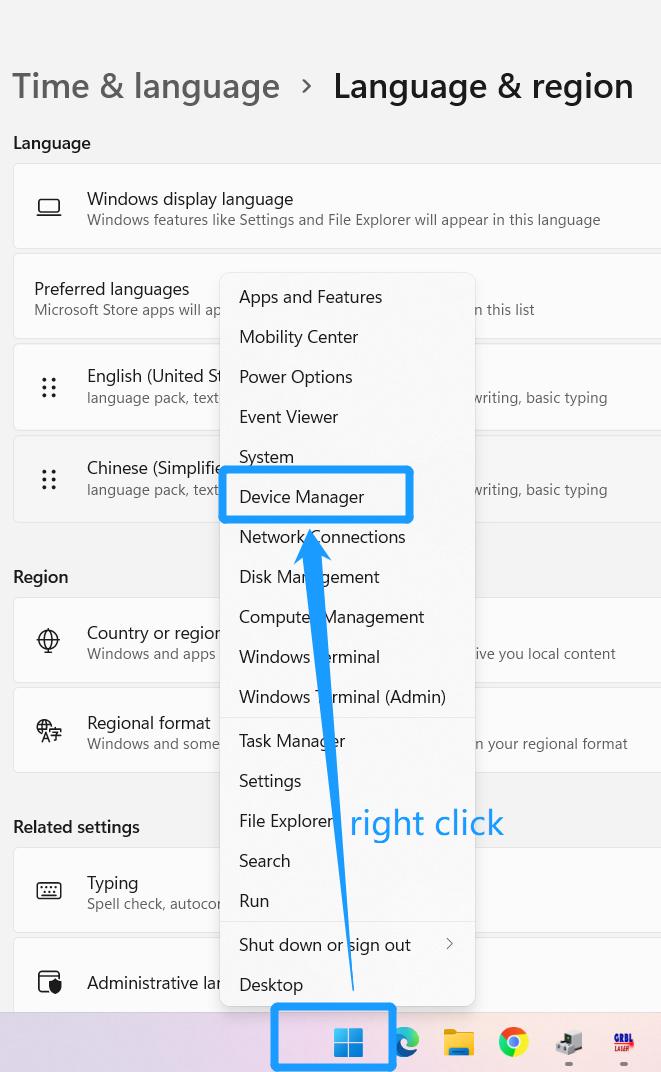
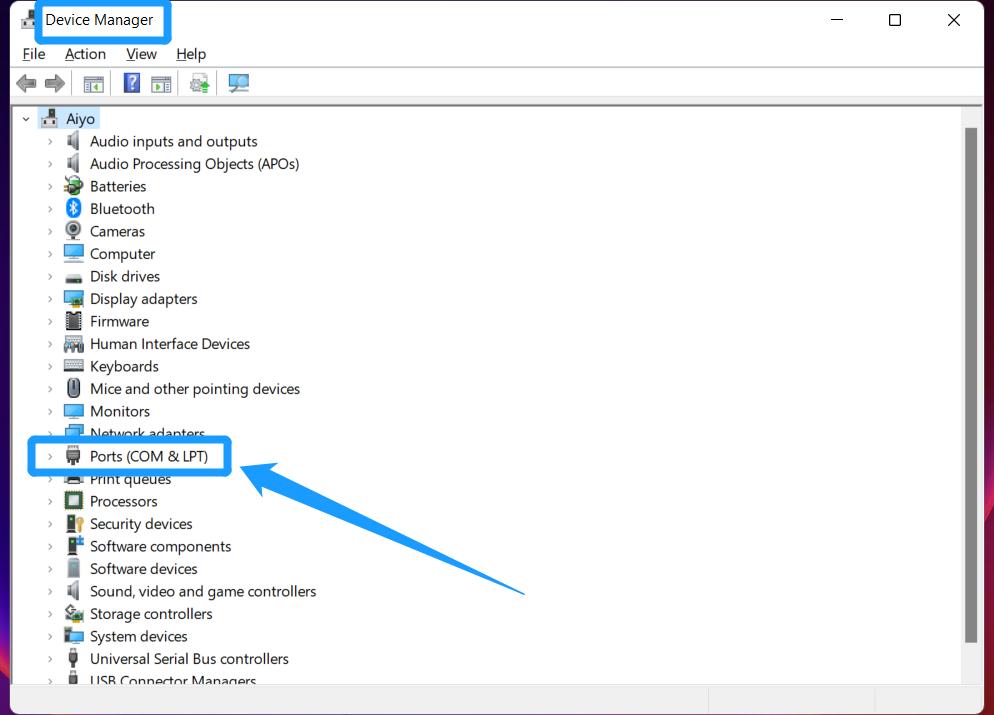
How to Install the Driver?
Before installing the computer driver, please turn on the machine and connect the USB cable to the computer, and then select the driver file to install according to your computer system.

After the installation is finished: find Device Manager->Ports on your computer. At this time, unplug the USB cable, and the new serial port will disappear on Ports, plug in the USB cable, a new serial port will be displayed. It means the driver is installed successfully.
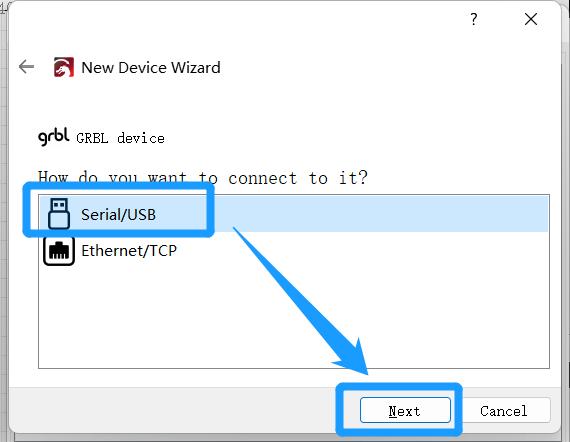
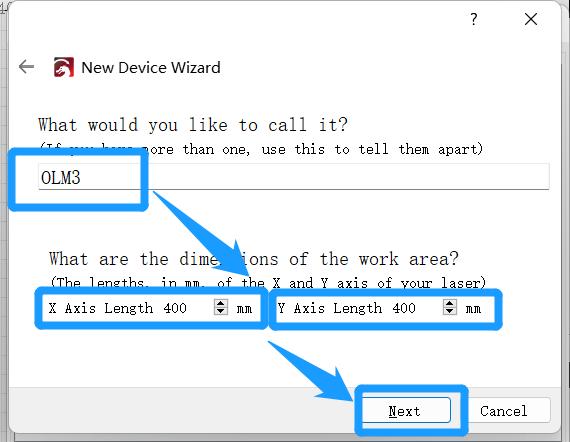
How to Connect the LightBurn to the Machine?
Please follow the steps in the screenshot below to connect. Before doing the following operations, please make sure the machine is turned on and the USB is connected to the computer.
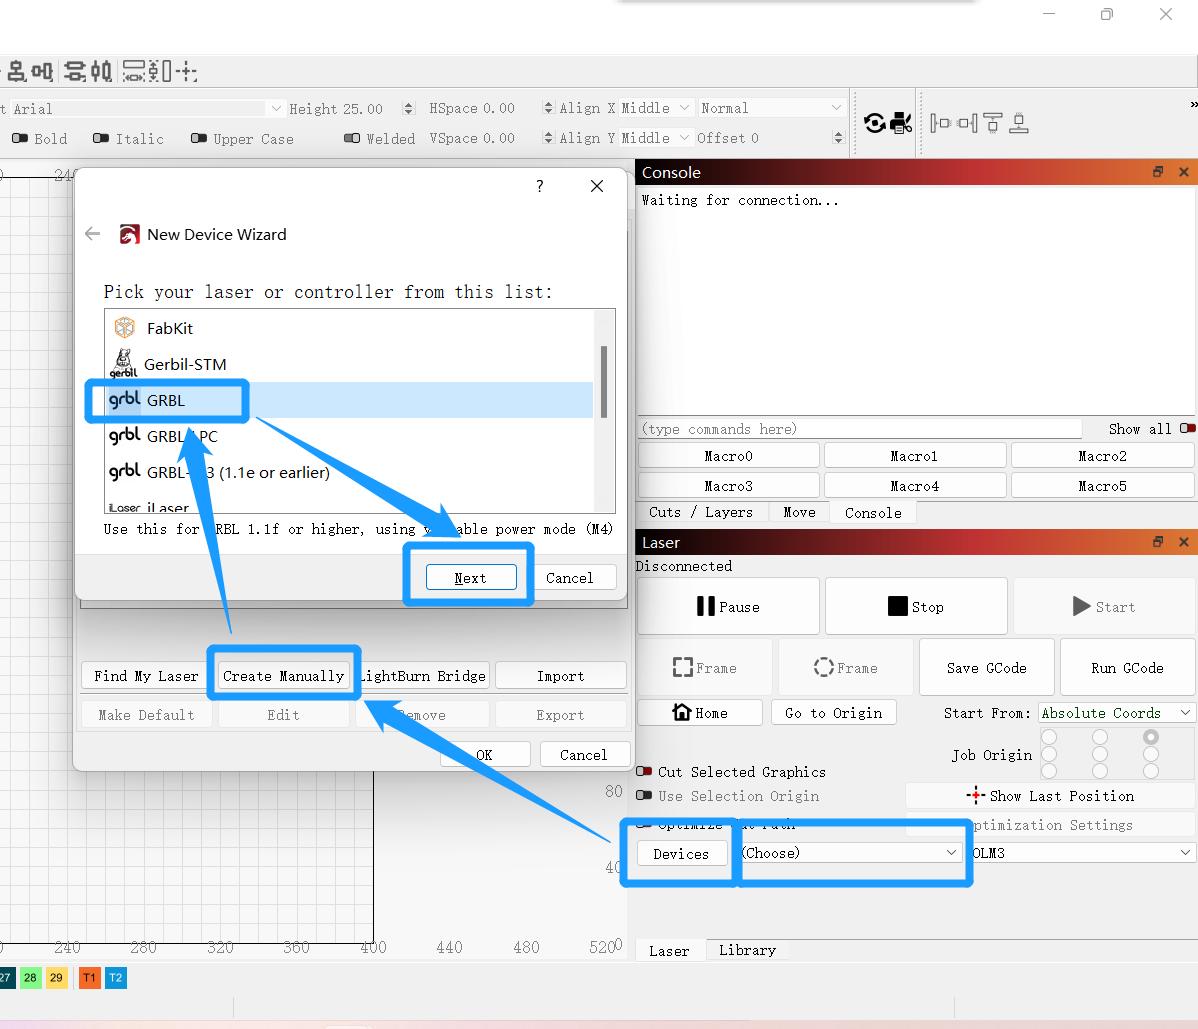
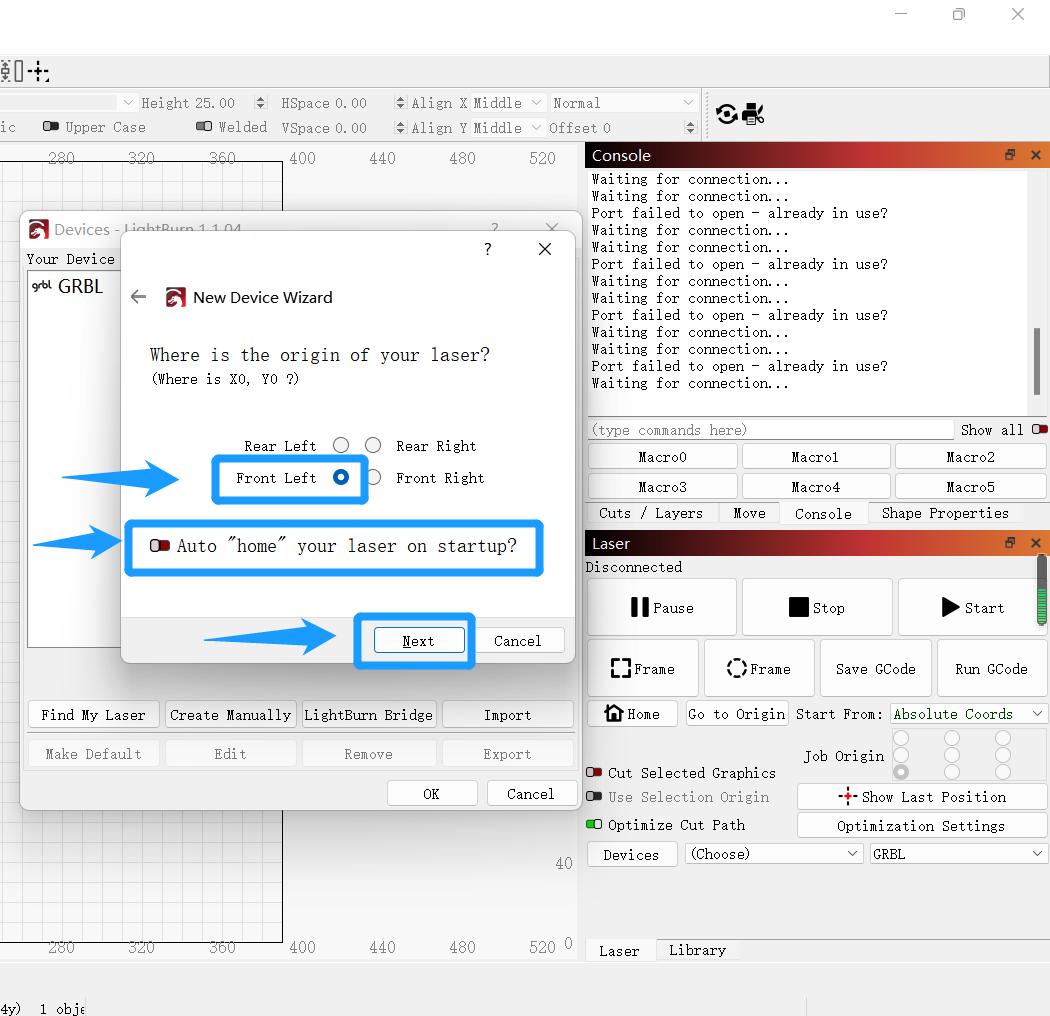
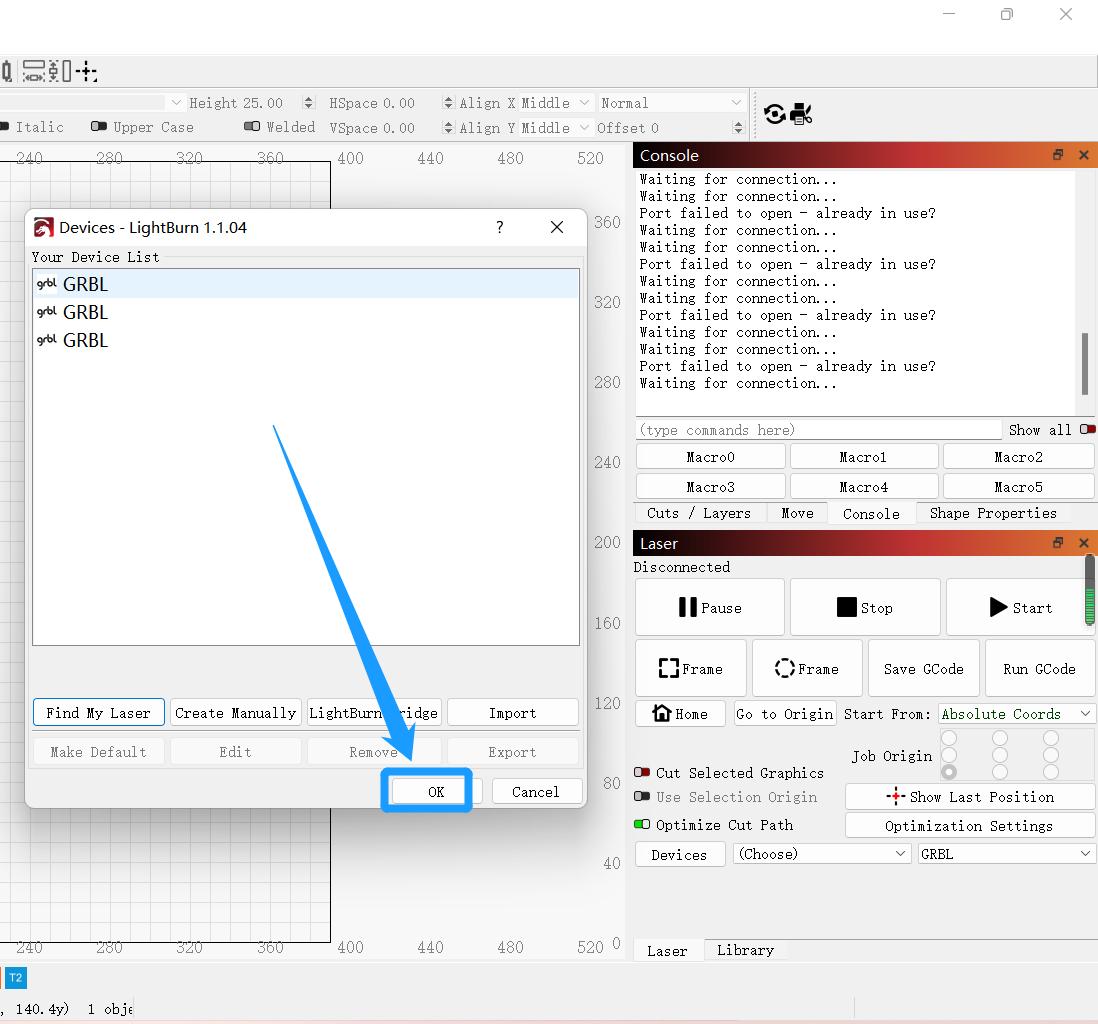

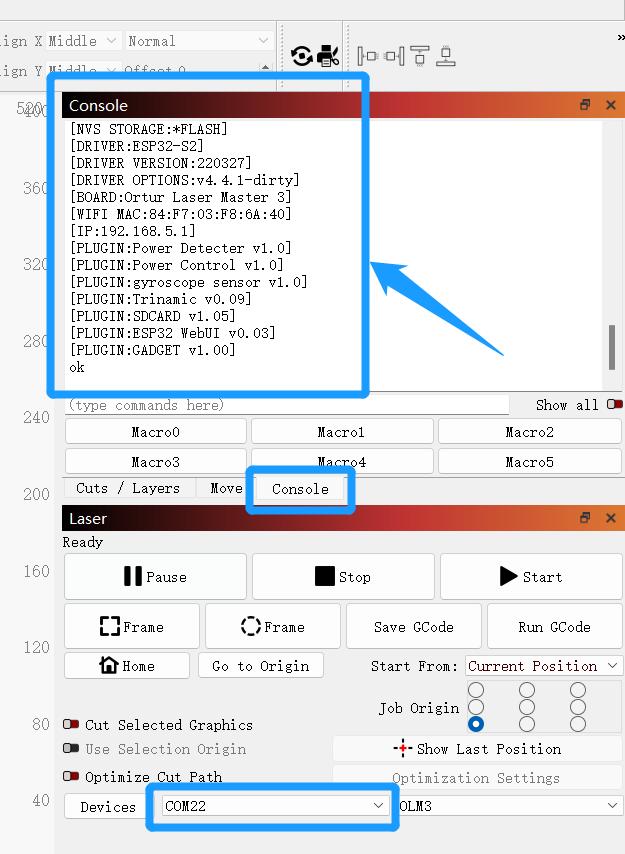
Until this page indicates a successful connection
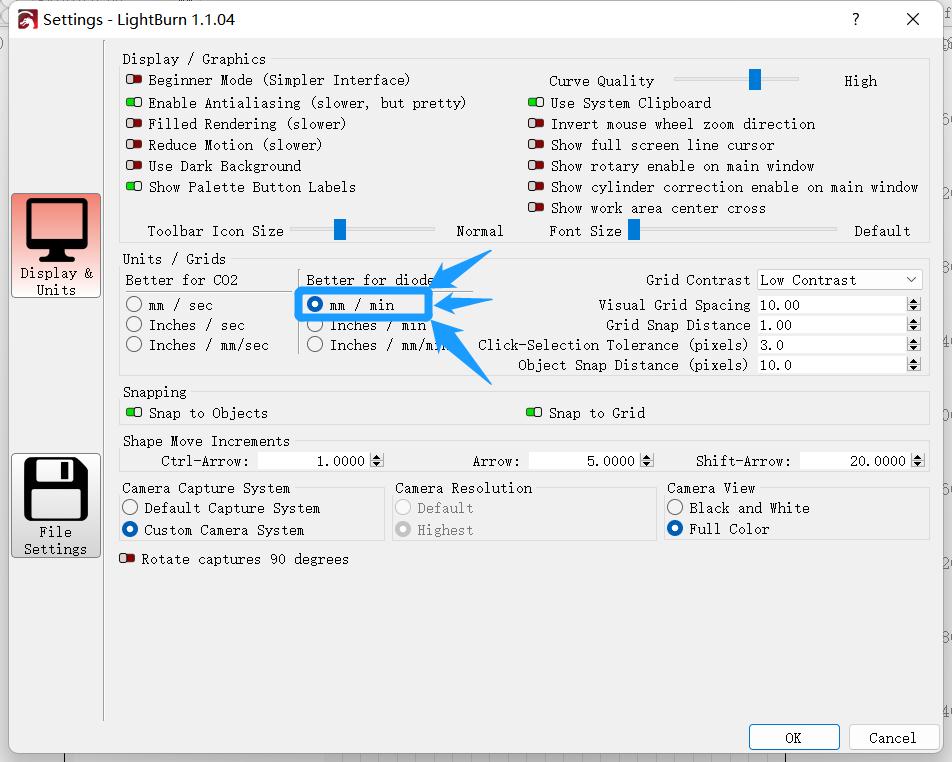
Does LightBurn Need to do Some Settings When Connecting to the Machine for the First Time?
Yes, please make sure to set it up in order to avoid unnecessary troubles.
- Edit -> Settings
- Edit -> Device Settings
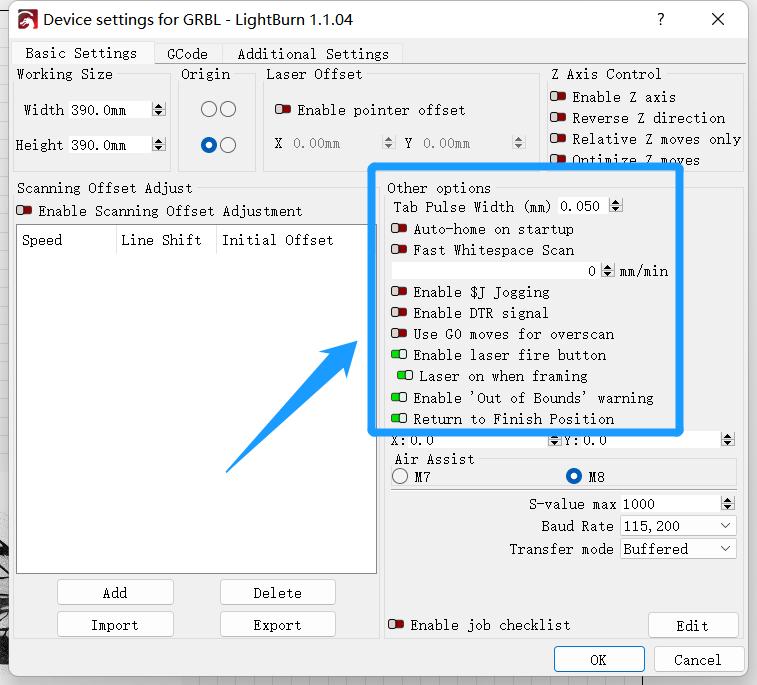
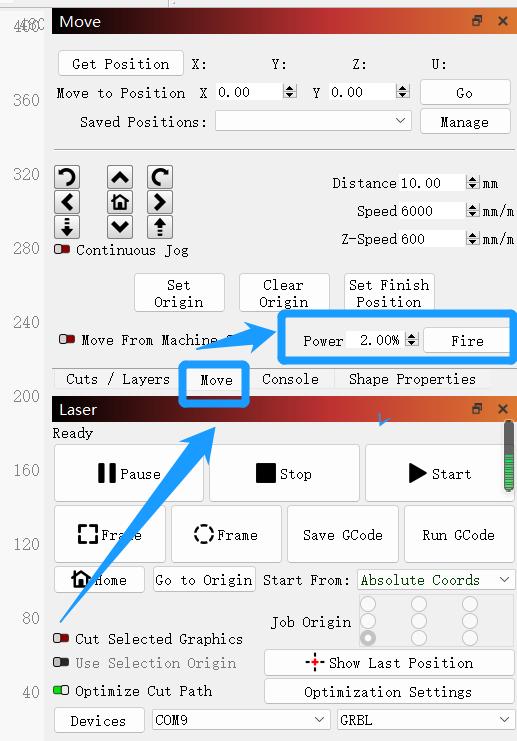
- Change power to 2%
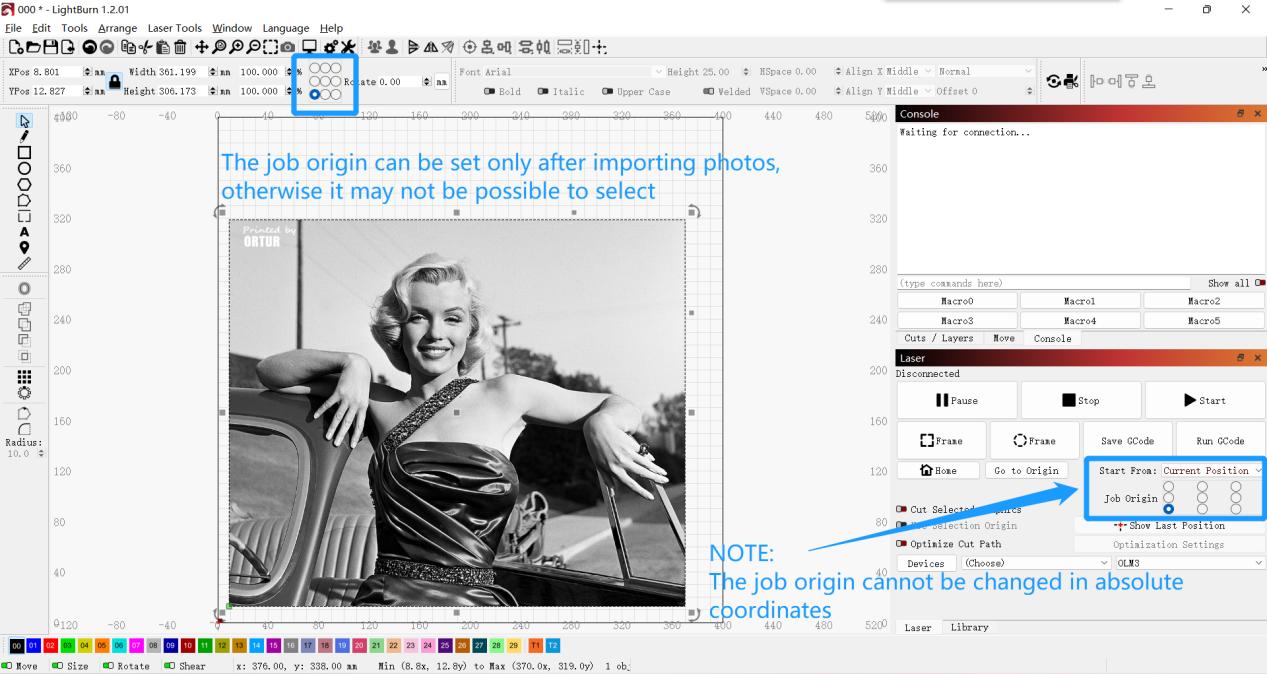
- Set all job origins to the lower left corner (because the origin of ORTUR’s machine is in the lower left corner)
How to Use LightBurn with the Machine for Engraving?
- Turn on the machine, connect the USB to the computer, and select the corresponding serial port to connect the machine, when the prompt message appears in the Console window, it means that the LightBurn software is successfully connected to the OLM3 machine.
- Import the image to be engraved
- Set fixed parameters first
- Then set the parameters that will change due to different materials
Speed / Max power / Min power / Line Interval (0.1mm = 1mm/10line –>Engrave 10 lines at 1mm intervals)

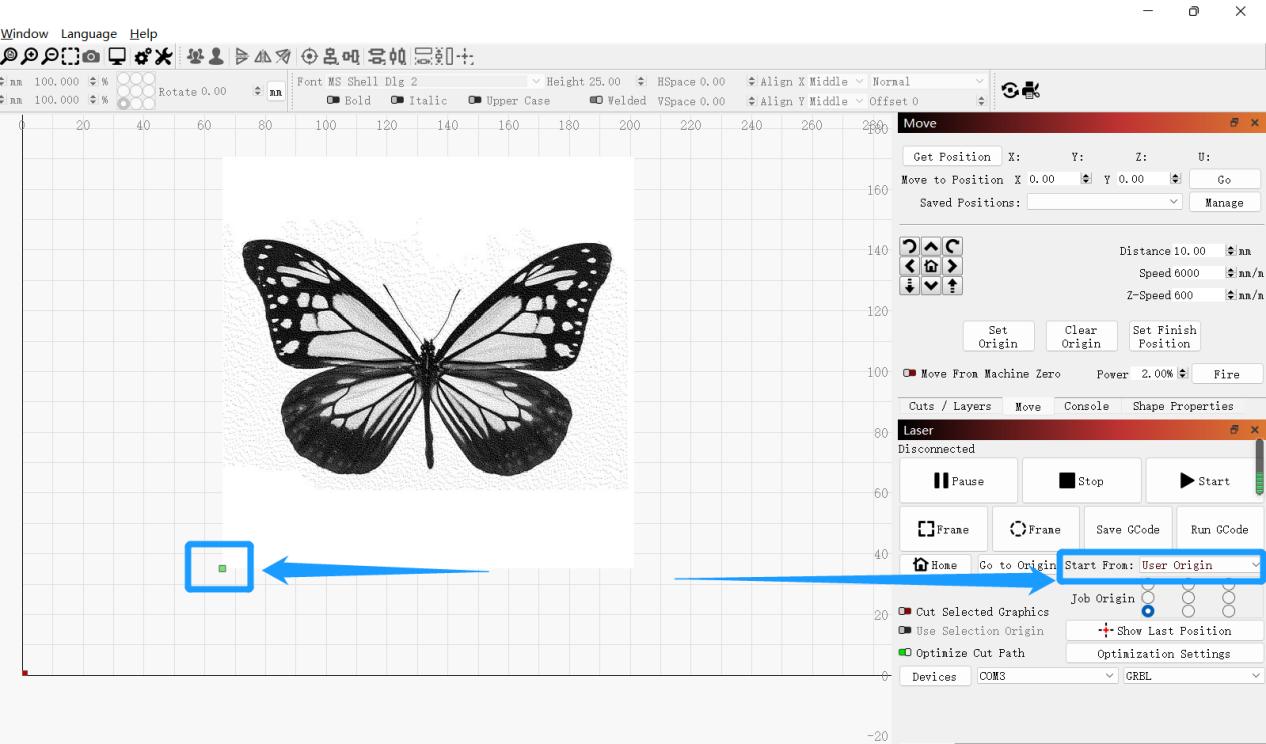
- Move the laser module to the starting point where you want to engrave, click the Frame button to confirm that there are no errors in the engraving range, and then click the Start button to start engraving.
Some Basic Common FAQs When LightBurn Connects to the Machine
1. Q: Why does the machine have no response when the power button is pressed, and the light of the pressed button turns red?
A: That is because the Safety Lock is not open, please insert the key and rotate it to the right to open the Safety Lock.
2. Q: After turning on the machine, why does the indicator light flash alternately in red and yellow?
A: The indicator light flashes alternately in red and yellow, which means the emergency stop button is pressed, please rotate it to the right to release the emergency stop button.
3. Q: After turning on the machine, why can the machine be normal homing, but the indicator light is red?
A: That is because there is no TF card inserted, please insert the TF card (Note: The TF card must be inserted into the machine before use. Generally, if there are no special circumstances, please do not take out this card, so as not to cause abnormal light display of the machine and some engraving abnormalities)
4. Q: When the machine’s indicator light is green, why does the indicator light of the machine flash other colors at intervals?
A: Please ignore the other colors of the light display, as long as the overall display is green. Because the lights of other colors are status lights, the customer does not need to pay attention.
5. Q: The indicator light flashes alternately in red, green, and blue, and there is no response when the machine is running.
A: This triggers the machine’s firmware upgrade mode, please turn off the machine, and then restart the machine. If you can not shut down the machine by holding down the switch button. Then, please click the RESET button to shut down the machine.
6. Q: Why does the machine return abnormally and keep making a crashing sound?
A: Please check whether the belt of the X-axis or Y-axis is inserted into the belt buckle. If inserted, please check whether the belt of the X-axis or Y-axis has been adjusted and tightened. If you are not sure or the machine is not properly adjusted, please check out the video on how to adjust the belt of OLM3’s X-axis or Y-axis.
7. Q: Why is the engraved image crooked?
A: Please check whether the belt of the X-axis or Y-axis is inserted into the belt buckle. If inserted, please check whether the belt of the X-axis or Y-axis has been adjusted and tightened. If you are not sure or the machine is not properly adjusted, please check out the video on how to adjust the belt of OLM3’s X-axis or Y-axis.
8. Q: Why does it always prompt that the machine is busy, or beyond the engraving range of the machine, or the machine stops in the middle of engraving.
A: The following points need to be noted when engraving images
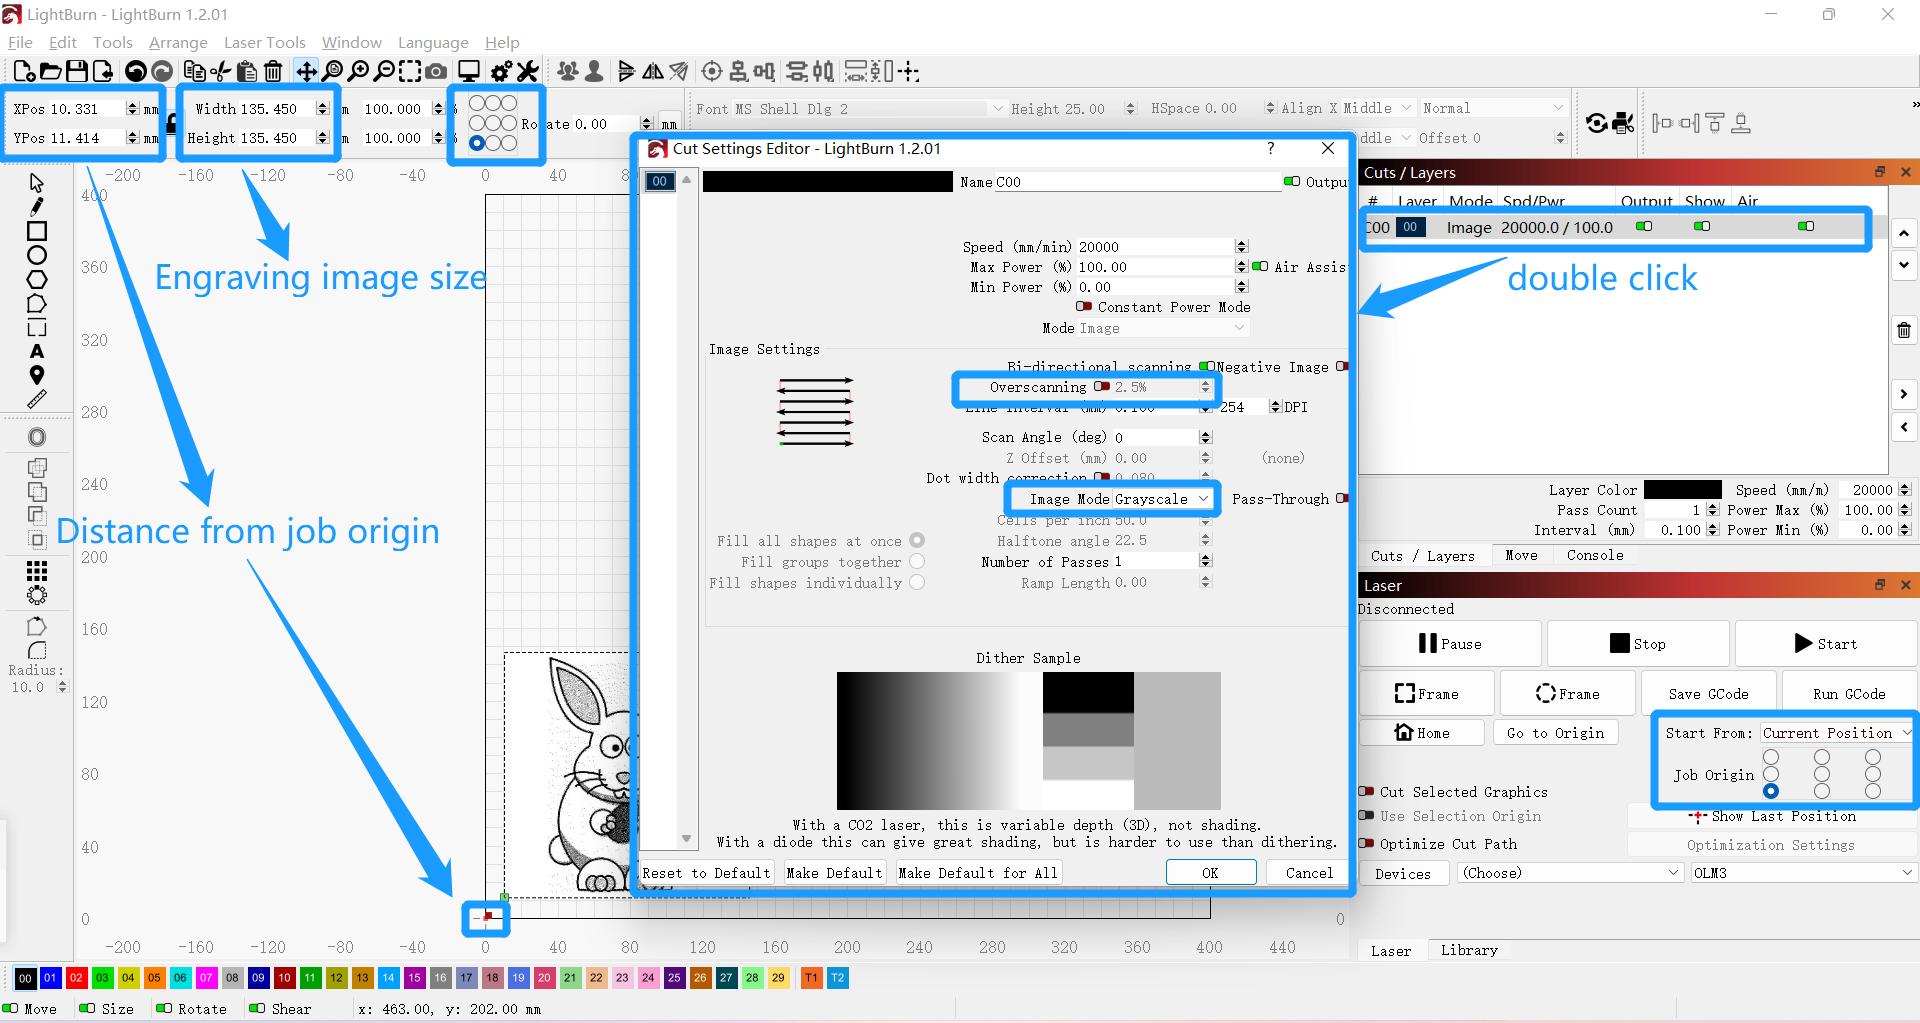
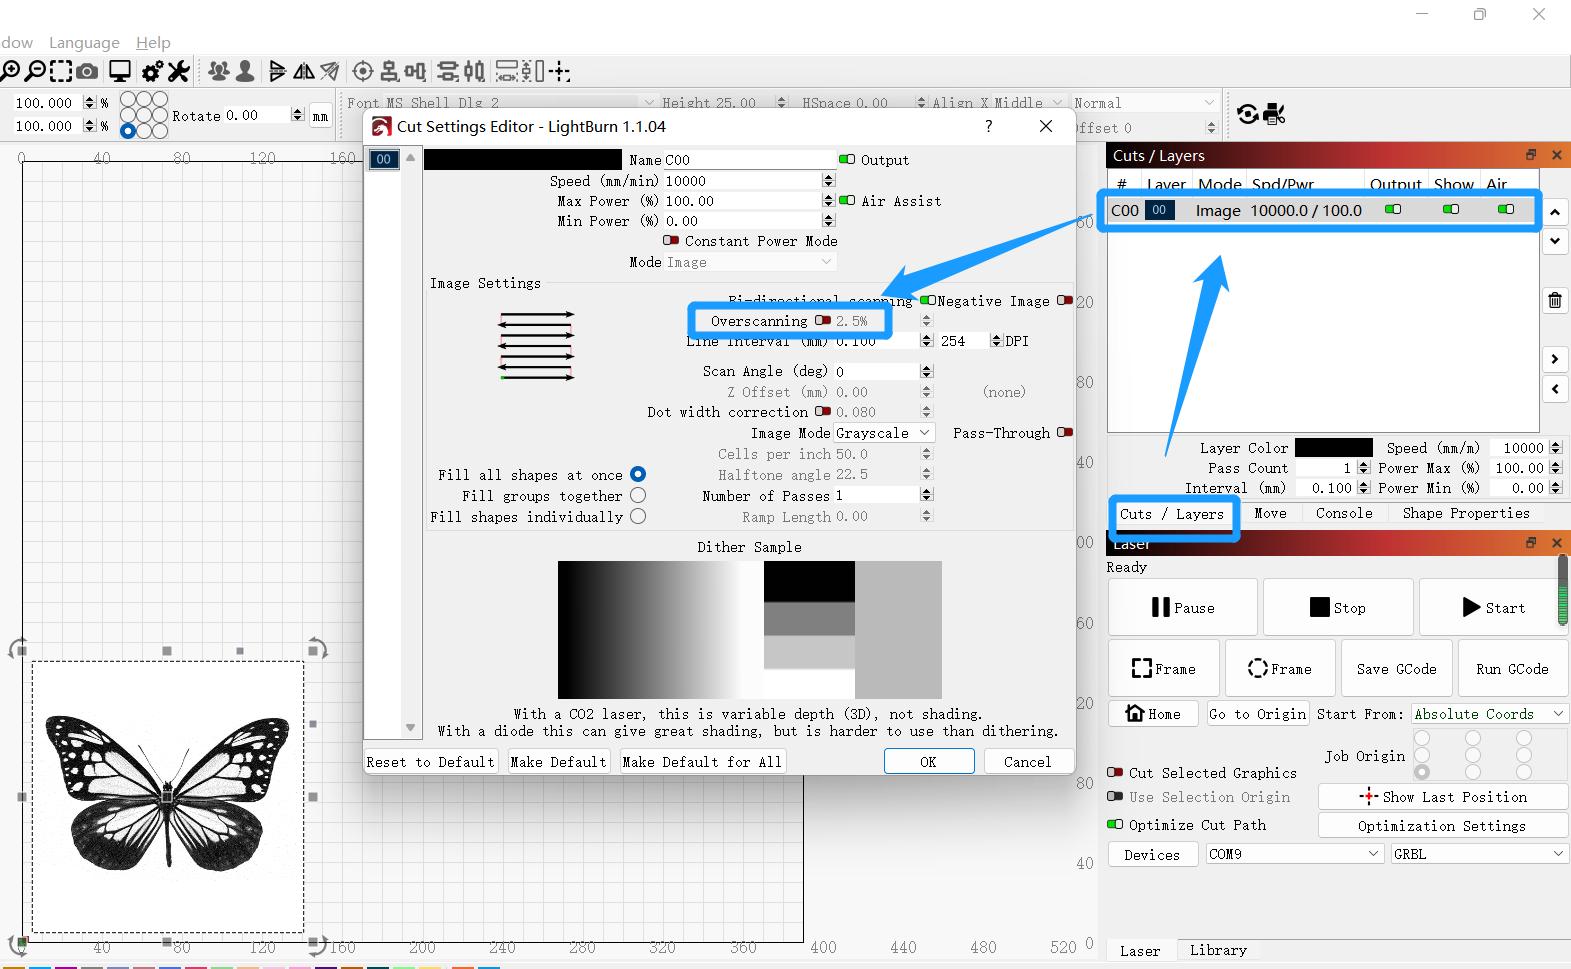
When engraving an image, the image should be at least 5MM away from the edge of the rated area (as to why it is 5MM, it is related to the default value of lightBurn’s Overscanning). But it is not absolute, only when this situation occurs, it is necessary to do that.
Also, you need to turn off Overscanning in the Image Settings of the Settings Editor after selecting the engraved image every time.
(Note: In Line mode, this option is not available)
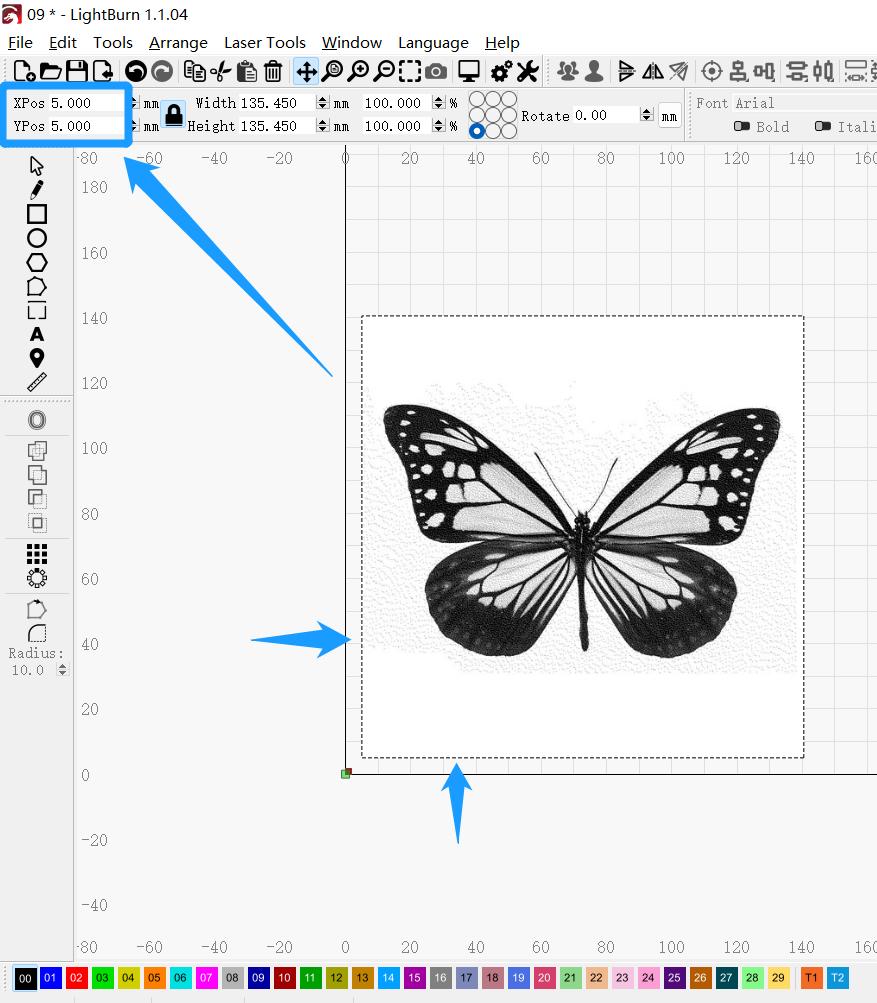
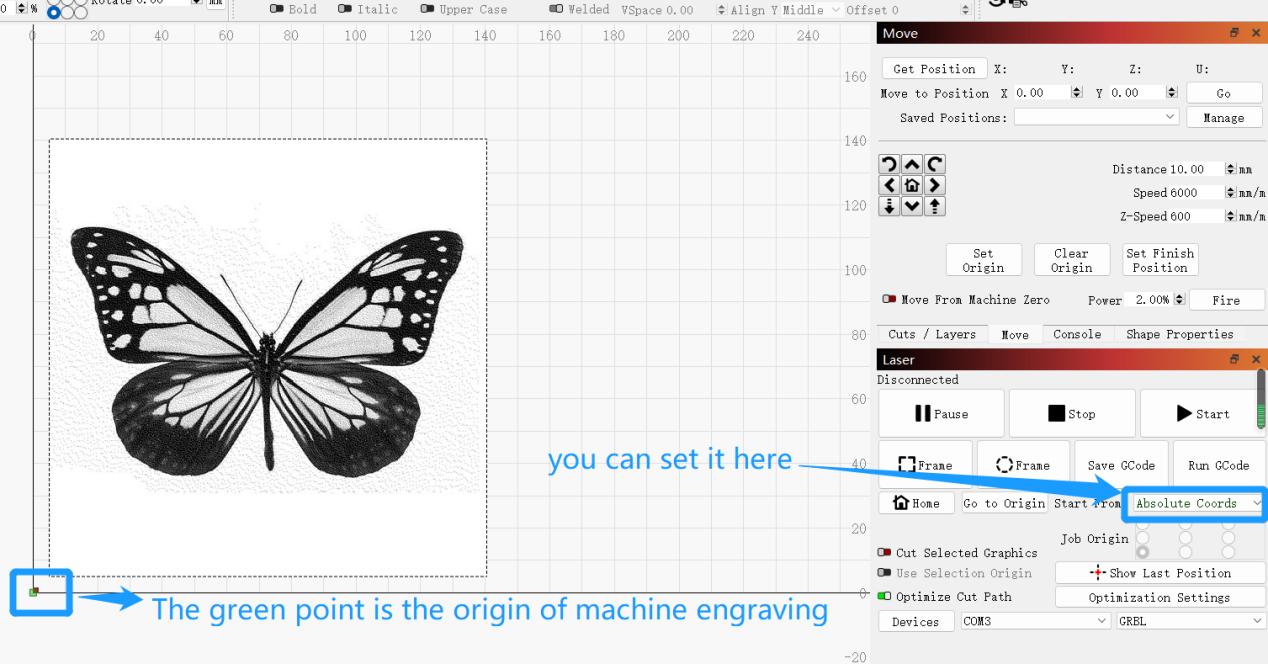
9. Q: The image is in the middle of the engraving area of the software, but when I click the Flame button to follow the track, why does the laser module hit the frame?
A: Because the range you set is too far from the origin of the machine engraving, and considering the size of the image itself, if you add up the two distances, it will exceed the engraving track of the machine.
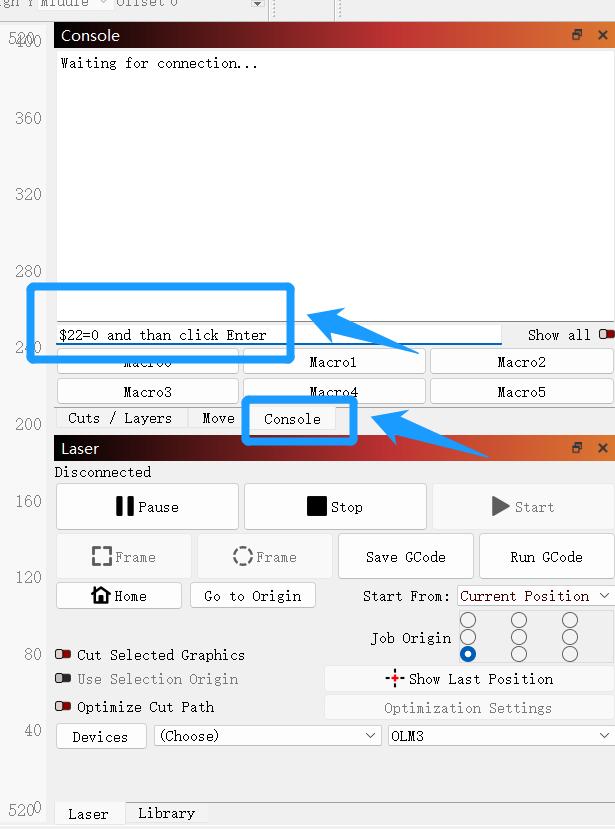
10. Q: How to use OLM3 with YRR?
- Turn off the homing, that is, change the parameter $22=1 to $22=0, which means that turning off the homing has been completed.
Enter $22=0 on the console page of LightBurn, and then click the Enter key, and if OK is displayed, the setting is successful.
- When using YRR, turn the machine’s switch to the direction marked as YRR.
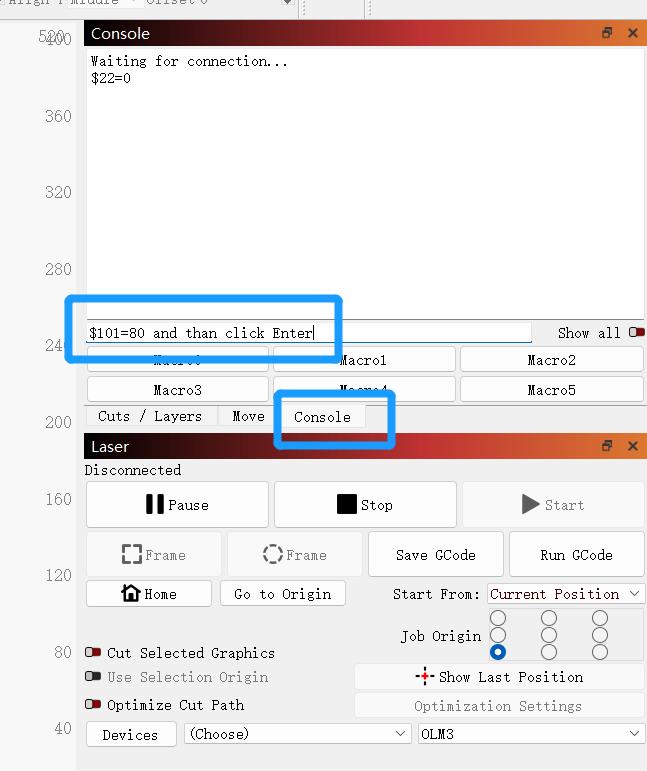
- Change the parameter $101=100 to $101=80, then change the step rate of the YRR motor to match the OLM3 machine.
Enter $101=80 on the console page of LightBurn and click the Enter key, and if OK is displayed, the setting is successful.
- When YRR is not used, the above parameters need to be modified back to their original values.
11. Q: Is there a detailed function introduction of LightBurn software?
A: Please refer to LightBurn’s online documentation
https://lightburnsoftware.github.io/NewDocs/


