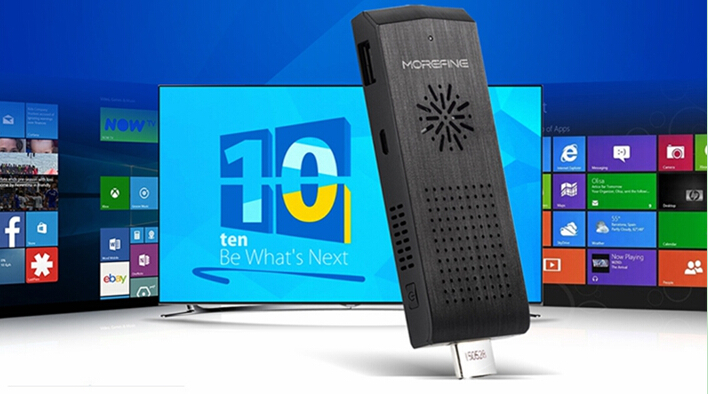
Download here: MOREFINE M1 Windows 10 & Android 4.4 Dual System Firmware
Introduction of installing T01 dual system
1. Preparation
1. Two USB discs with ROM more than 8GB each
2. A 4 in 1 USB hub
3. A USB keyboard and a USB mouse
2. Installation
Install Android system before windows
1 piece of USB discs for Android, another for windows
3. Installation for Android system
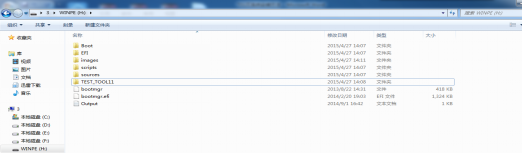
1.Formatting USB disc into FAT32 format and name it “WINPE”. Copy all the files and upgrade file packets into this USB disc that we sent you (as showed in image 1).
Image 1

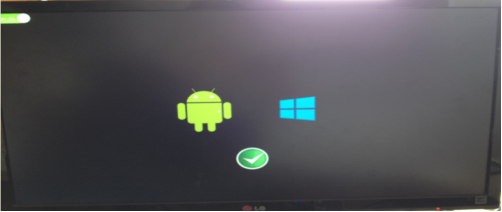
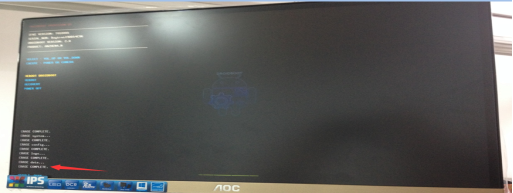
2. Connect “WINPE”, USB mouse and USB keyboard to USB hub, then connect USB hub to the T01 machine (as showed in image 2), choose to enter Android system (as showed in image 3), then go to “Save&Exit” column and choose “launch EFI Shell from filesystem device”. At last, choose “Enter” until automatic upgrade finish.
Image 2
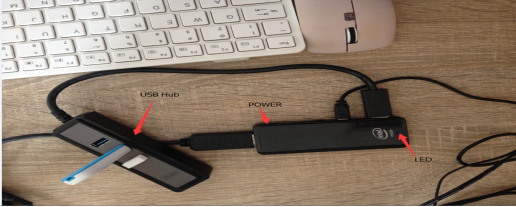
Image 3
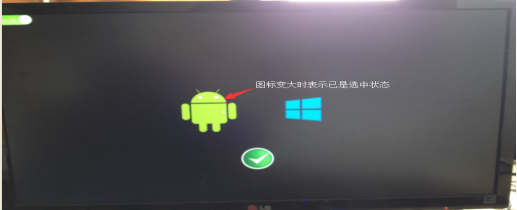
Image 4
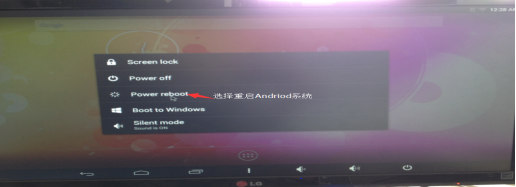
Image 5
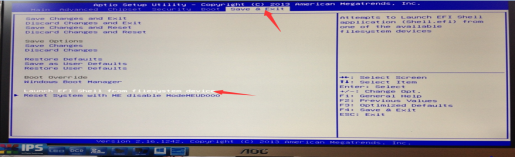
Image 6
4. Installation for Windows system
1. Formatting the second USB disc into “NTFS” format and name it “WINPE”
2. Copy all the files and upgrade file packets that we sent you into this USB disc (as showed in image 7).
Image 7
3. Connect the formatted USB disc (“WINPE”), USB mouse and USB keyboard to USB hub, then connect USB hub to the T01 machine. Press the power button to turn on the machine, wait till the blue LED lights(as showed in image 8), choose windows icon and press enter key to get into windows system (as showed in image 9). Then restart windows, press F7 on keyboard once the logo shows, the Start menu will appear. Choose to start from USB disc (as showed in image 10). Wait for the automatic installation finish (as showed in image 11). After OS finishes installation, choose to close the window and restart system (as showed in image 12). If interface as showed in image 13 is appearing, then dual system is successfully installed.
Image 8
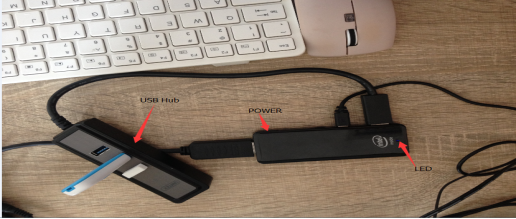
Image 9
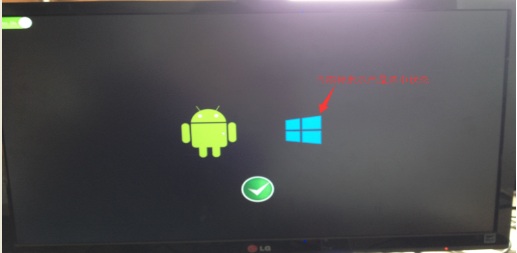
Image 10
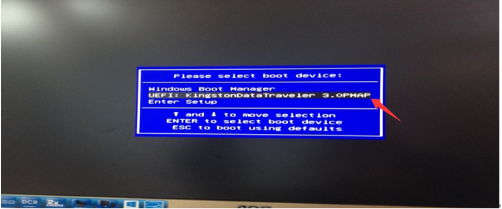
Image 11
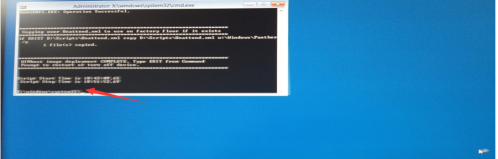
Image 12

Image 13