Before the Start
Raspberry Pi is a miniature development board computer created by the Raspberry Pi Foundation in the United Kingdom, with the purpose to promote basic computer science education in schools with relatively low-cost hardware and free software. These micro computers are powerful enough to run a desktop operating system when equipped with other accessories. However, how to set up a Raspberry Pi?
Please prepare the following items before get started|: power supply, microSD card, HDMI cable, monitor, keyboard, and mouse.
Depending on the Raspberry Pi model you use, the devices you need may differ. Make sure what you need with the Raspberry Pi.
Preparations:
Firstly, added PC with Internet access. This refers to as “your usual computer” to differentiate it from the Raspberry Pi development board that you are configuring. You’ll need an SD card adapter to connect your card to your computer if it doesn’t already have a dedicated microSD card port; these are inexpensive and simple to access. Additionally, you can also prepare pre-load micro SD card in advance.
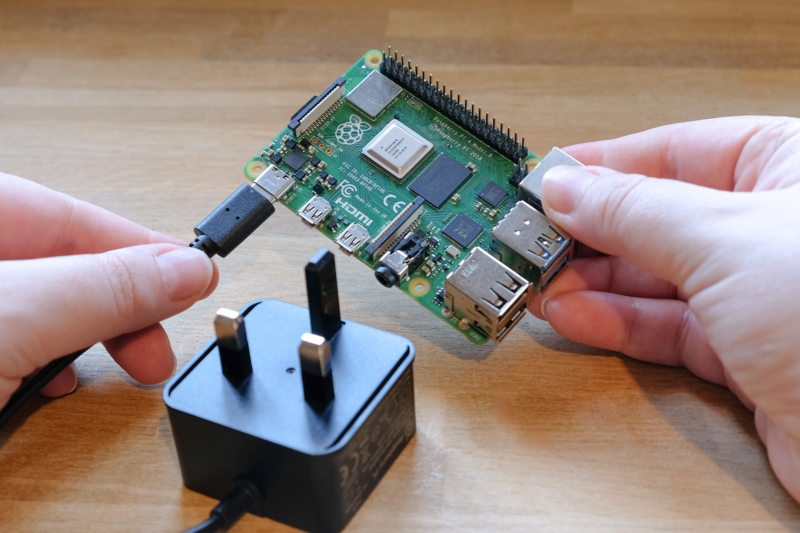
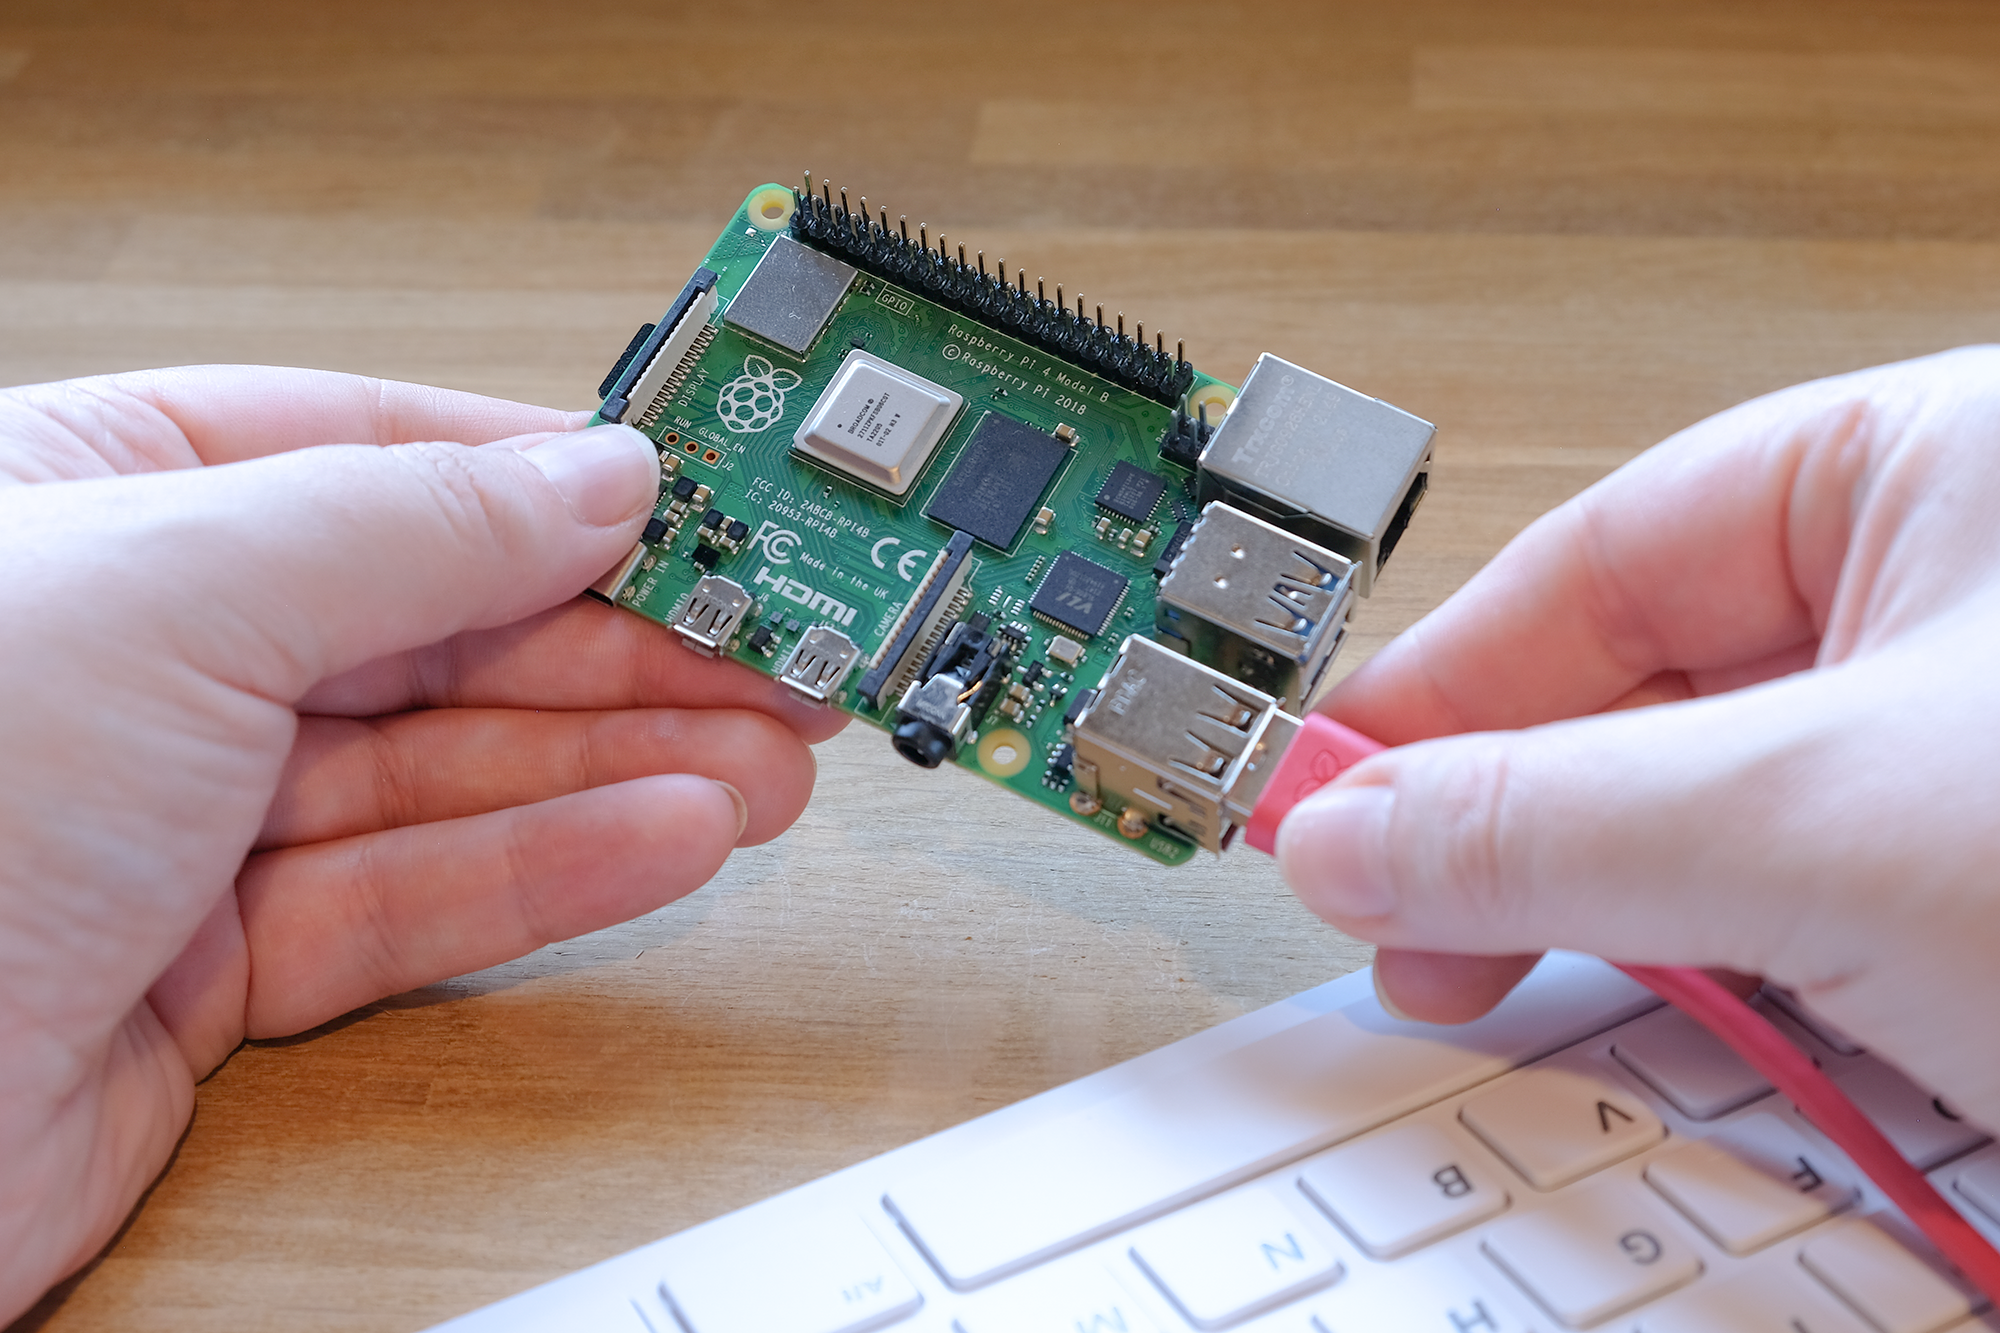
Choosing the right power source
Get a USB-C power supply for Raspberry Pi 4. If you are setting up Raspberry Pi Zero models, or the older ones, a micro USB power supply will help. It’s not suggested to use USB-C and micro USB adapters for mobile phones and hand-held games consoles, since they may not have ample or stable power.
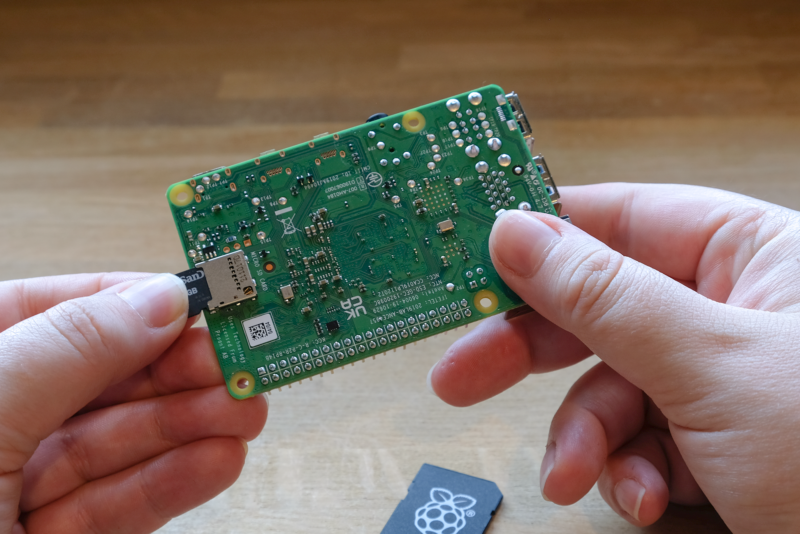
Choosing the right SD card
A micro SD card works as the memory of Raspberry Pi, like that a hard drive works for the desktop. The micro SD card contains the operating system for your Raspberry Pi, and it also stores all your files.
It’s acknowledged that the larger the capacity of your micro SD card, the more data you can store. Although setting up your micro SD card is simple, the pre-load micro SD cards can save you a lot of time.
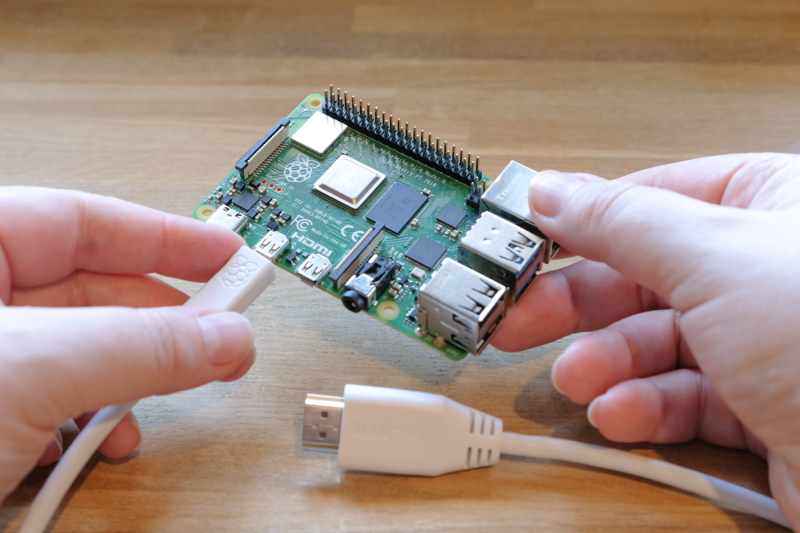
Choosing an HDMI monitor or television and cable
A Raspberry Pi can connects to any HDMI monitor or TV as a host computer does. What you need is a micro HDMI to HDMI lead, then you can connect up to two monitors to your Raspberry Pi 4. A standard HDMI to HDMI cable works for the previous models and mini HDMI to HDMI cable works for Raspberry Pi Zero.
Choosing a USB or Bluetooth mouse and keyboard
A Raspberry Pi comes with several USB ports to get access to variety of devices, such as keyboard and mouse. You can use any USB mouse and keyboard with a Raspberry Pi. The Bluetooth mouse and keyboard with a USB Bluetooth adapter can also get connected with a Raspberry Pi.

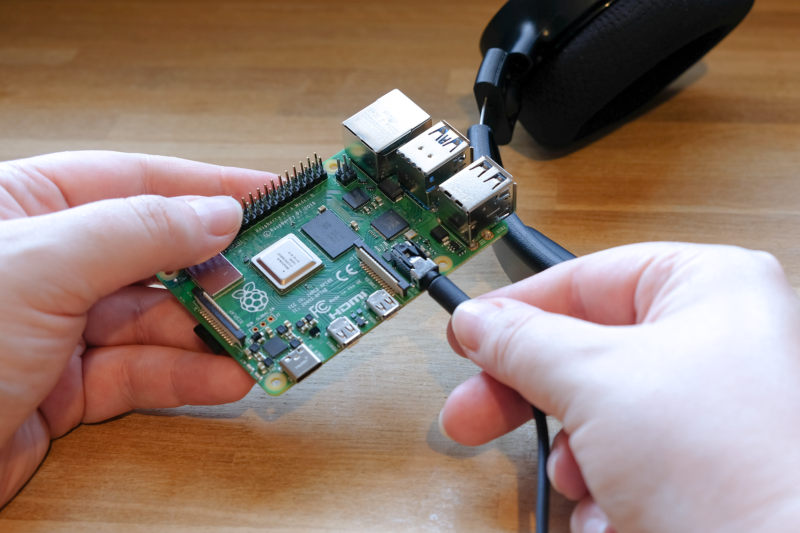
Additional audio output
The majority of Raspberry Pi models have an audio port that is designed for connecting a set of headphones. If your monitor doesn’t have a speaker of its own, you can also utilize a USB or Bluetooth speaker.
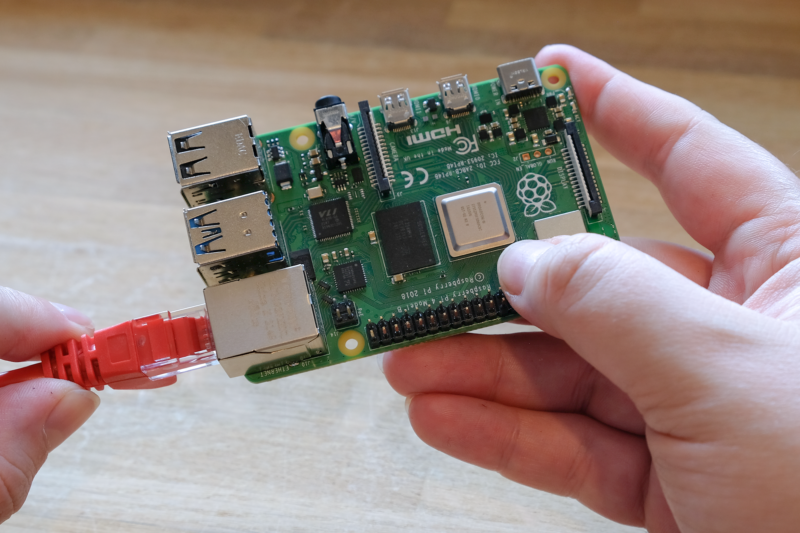
Options for connecting to the Internet
The Raspberry Pi 4, 3B+, 3, Zero W, Zero 2 W, and Zero W all include Bluetooth and Wi-Fi connectivity. You can initially set up your Raspberry Pi by connecting it to your local wifi network if you’re using one of these models. You can connect your Raspberry Pi with an Ethernet cable if you’re using an older model or if you’d want a faster and more secure connection. Models of the Raspberry Pi Zero will need an Ethernet to micro USB converter.
Installing an Operating System
It’s recommended to install the official operating system, Raspberry Pi OS, which is available for free. With the dedicated free software, Raspberry Pi Imager, you can download and install Raspberry Pi OS to your micro SD card in a matter of minutes.
Raspberry Pi Imager is available for Windows, Mac OS, Ubuntu for x86, and Raspberry Pi OS. After downloading Imager, open it and connect your micro SD card to your usual computer, using an SD card adapter if required.
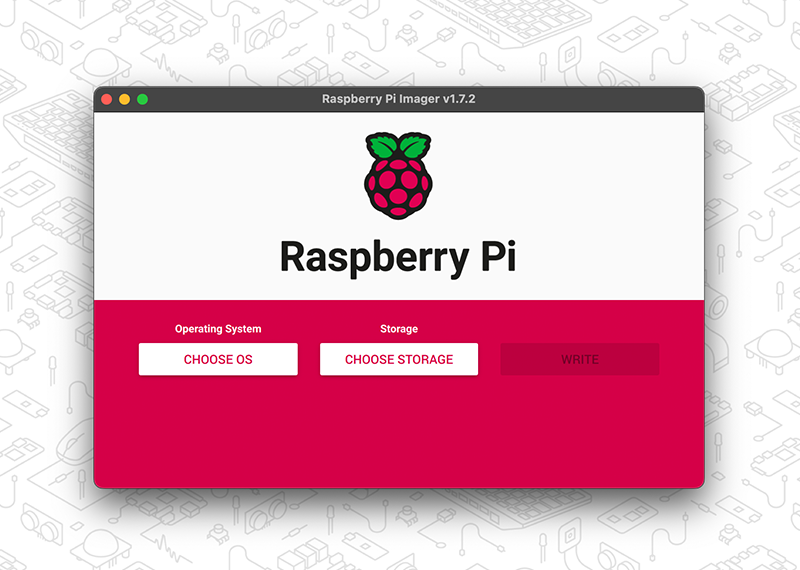
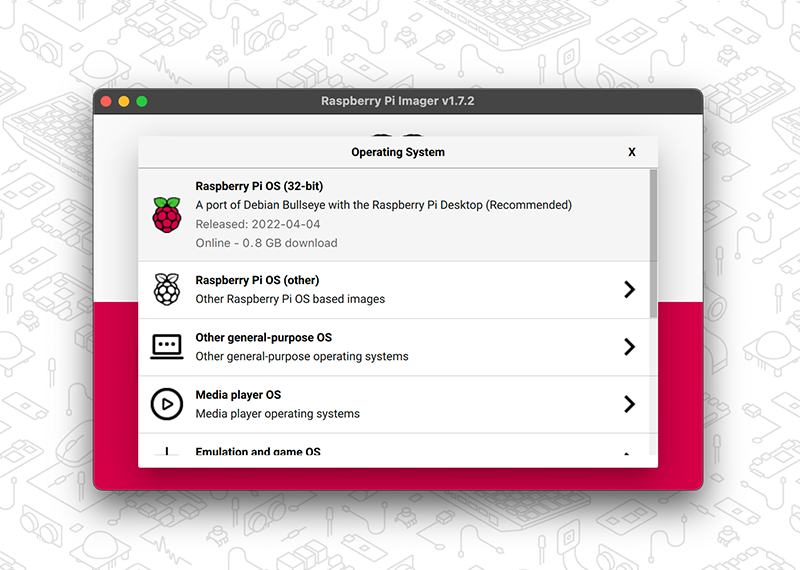
Operating System: the latest recommended version of Raspberry Pi OS will be at the top of the list. Select it.
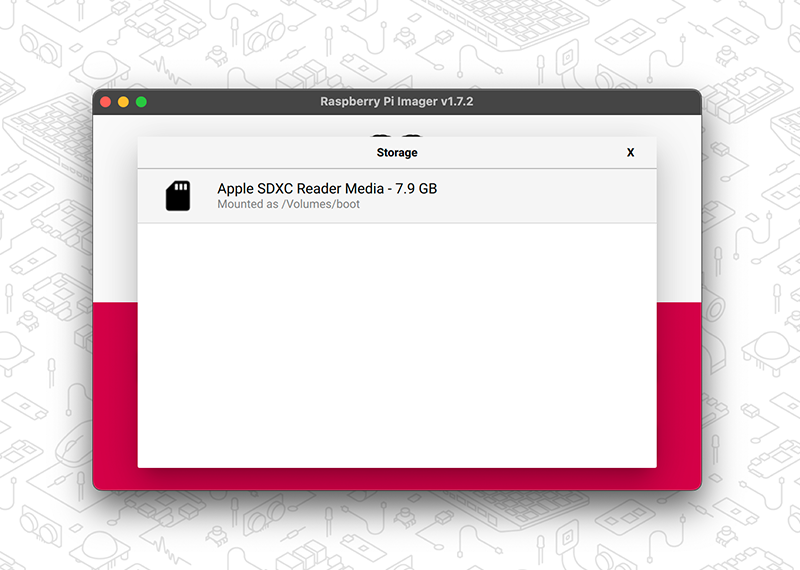
Storage: Find a micro SD card. Make sure to select the correct mountable storage option if you have more than one attached to your computer; otherwise, data loss will occur.
If you’re not sure which one is correct, unplug any other SD cards, USB storage drives, and so on before proceeding. Assuming you’ve disconnected everything else, you could be sure that the only option left is your micro SD card.
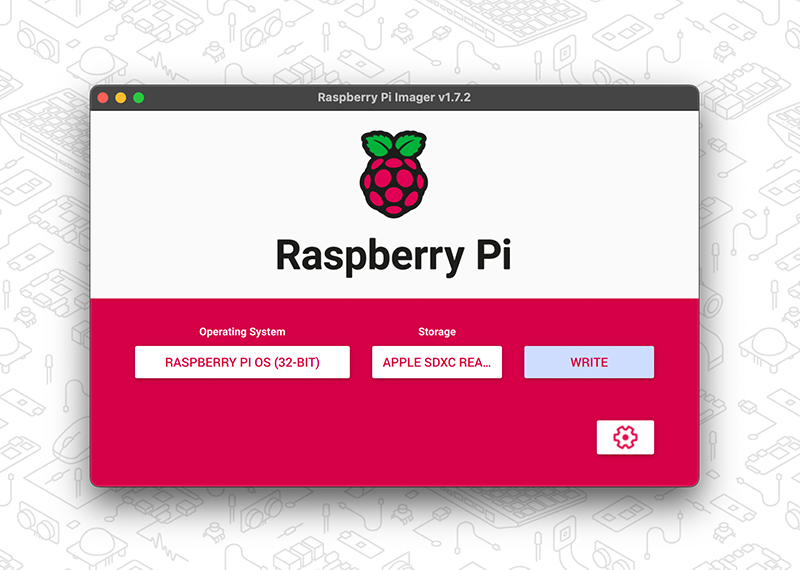
Write: select WRITE to install Raspberry Pi OS to your micro SD card. You may be asked to confirm admin credentials by your computer. Don’t worry, this is expected, so it’s OK to do this as prompted.
Insert your micro SD card into your Raspberry Pi once your Raspberry Pi OS installation is complete. Connect your monitor, mouse, and keyboard next. Make sure the power supply is the final thing you connect to your Raspberry Pi.
Start your Raspberry Pi and Complete Setup
Now, you have complete the setting up. Try to start it. The Raspberry Pi will naturally get turn on when connected to power. When you initially turn it on, the Raspberry Pi OS Setup Wizard will appear. This assists you with completing the setup of your Raspberry Pi, such as connecting it to your WiFi network, selecting the relevant region and language settings, and so on (all of these settings can be changed afterwards).
Software installing
Raspberry Pi OS features many basic applications pre-installed, so you can start using them straight away. It also allow you to install other applications. Click the Raspberry icon in the top left corner of the screen and select Preferences then Recommended Software from the drop-down menu to install them for free. For examples, the LibreOffice can assist you to write and edit documents and spreadsheets. The Universal Access makes it easy to use accessibility apps such as a screen magnifier and Orca screen reader.

Explore more with Raspberry Pi
Your Raspberry Pi is powering up, and you can use it as a desktop PC freely. While there’re countless features are waiting for you to study, and explore. Learning to code, controlling external devices, and building fun and exciting projects, these are all possible with Raspberry Pi!
